I love Dad

You will find the original tutorial here :

This tutorial is a personal creation.
Any resemblance with another one would be only pure coincidence.
It is stricly forbidden to modify tubes, to change their name or take off the matermarks,
To present them on your sites or blog,
To share them in groups,
to make a bank of images, or to use them on lucrative purposes.

Thank you to respect Animabelle’s work and the tubers work.
Don’t hesitate to warn her (or me) if you have any trouble with this tutorial.


Material
Animabelle uses her own tubes, not provided with the material to prevent the theft of her work
2 decoration tubes - 1 brush tip
1 alpha layer - 1 color palette - 1 preset

Animabelle’s important note
Tubers have been warned that disrespectful and dishonest bloggers come steeling our tubes
they grab them into the folders of material we use to provide for our tutorials.
These people rename and convert the tubes to png type,
and then they offer them for download in their blogs, pretending they have done the work.

To protect my work, I am therefore forced to no longer provide my tubes with the material.
Honest people will understand my way of doing, I hope.
I thank them for their understanding.
Very important Tip:
never download your tubes on these blogs, because most of the time all of these tubes are stolen tubes.
Always make sure that the tubes you use have been signed by their authors.
Thank you.
|
Filters used
user defined filter - Unlimited 2 - - Mehdi - AP 01 [Innovations] - Penta.com - Mura’s Meister -
Filter Factory Gallery J - Simple - Alien Skin-Eye Candy 5
“Renée Graphisme” filters, with her kind permission


translator’s note : I use PSP17, but this tutorial can be realized with another version.
Important
Open all images in PSP, and the alpha layer, duplicate them and close the originals.
Never work with original images.
Double click on the presets
and they will settle down automatically in the right plugin
import the brush tip : file/import/custom brush

Colors used
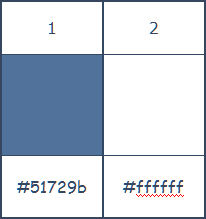
Don't hesitate to change the colors and the blend mode of the layers, and the shadows,
according to your tubes and images.

use the pencil to follow the stepss
left click to grab it


Realization
Step 1
activate the copy of the alpha layer (selections)
color 1 as foreground color (left click) and color 2 as background (right click)
Step 2
effects/plugins/Mehdi/Wavy Lab 1.1
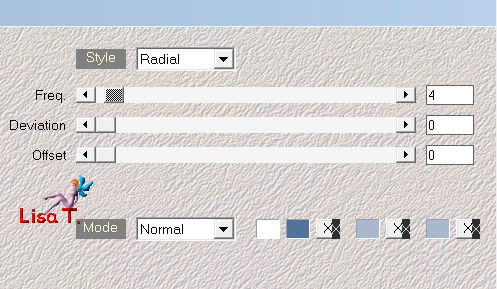
Step 3
adjust/blur/gaussian blur/50
Step 4
adjust/add-remove noise/add noise
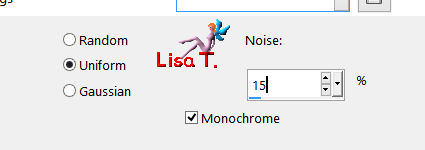
Step 5
effects/image effects/seamless tiling
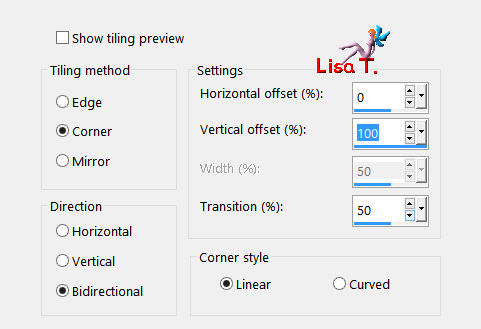
Step 6
layers/duplicate
Step 7
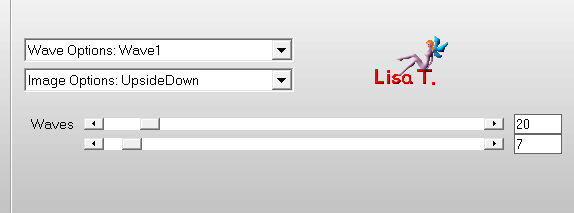
effects/plugins/AP[Distort]/Distort-WavyCity
Step 8
adjust/sharpness/sharpen
Step 9
layers/duplicate
Step 10
image/mirror/horizontal mirror
Step 11
in the layers palette, set the opacity on 50% (layers properties)
Step 12
layers/merge/merge visible
Step 13
adjust/sharpness/sharpen
Step 14
layers/new raster layer
Step 15
fill with color 1
Step 16
effects/plugins/Penta.com/VTR2

Step 17
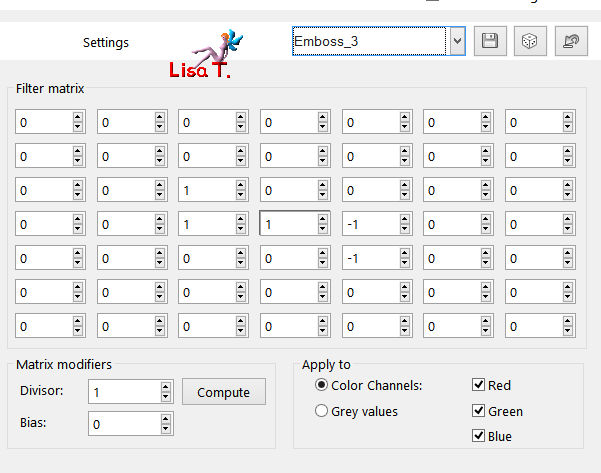
effects/user defined filter/emboss 3
Step 18
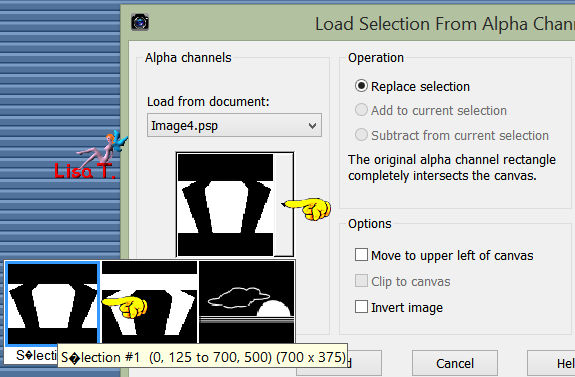
selections/load-save selections/from alpha channel/selection #1
Step 19
press the delete key of your keyboard
Step 20
selections/select none
Step 21
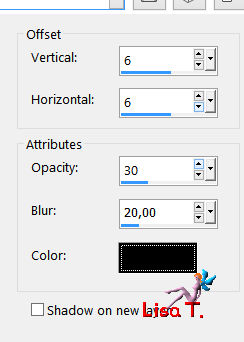
effects/3D effects/drop shadow
Step 22
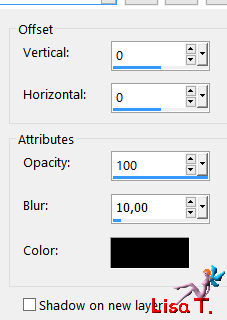
drop shadow again with the following settings -> -6 / -6 -/ 30 / 20 / black
Step 23
in the layers palette, activate the bottom layer (the background - merged)
Step 24
layers/duplicate
Step 25
activate Raster Deform tool (D) with the following settings to move the background in the right place
350 /309,50 / 0,00 / 119,00 / 100 / 76,20 / 0,00 / -0,00 / 0,000

press the M key of your keyboard to disable the pick tool
keep this layer active in the layers palette
Step 26
layers/new raster layer
Step 27
selections/select all
Step 28
activate the background image “fond_papounaime_animabelle”
edit/copy - back to your work - edit/paste into selection
Step 29
selections/select none
Step 30
effects/image effects/seamless tiling as before

Step 31
layers/properties
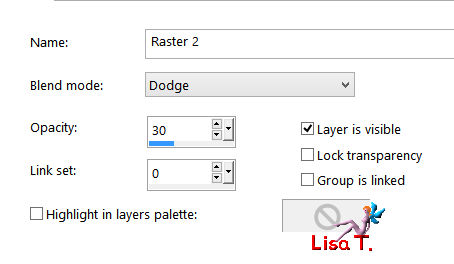
set the blend mode on “dodge” and the opacity on 30% (according to your colors)
Step 32
effects/user defined filter/emboss 3
Step 33
in the layers palette, activate the top layer (raster 1)
Step 34
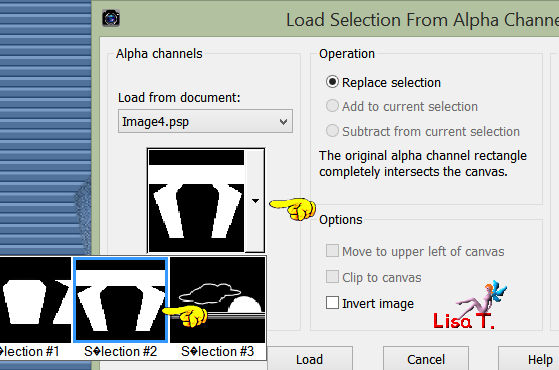
selections/load-save selections/from alpha channel
Step 35
choose selection #2
Step 36
selections/modify/contract/10 pixels
Step 37
effects/3D effects/drop shadow
Step 38
selections/modify/contract/10 pixels
Step 39
effects/3D effects/drop shadow

Step 40
selections/modify/contract/20 pixels
Step 41
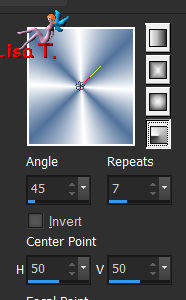
fill the selection with the following radial gradient (colors 1 & 2)
Step 42
adjust/blur/gaussian blur/20
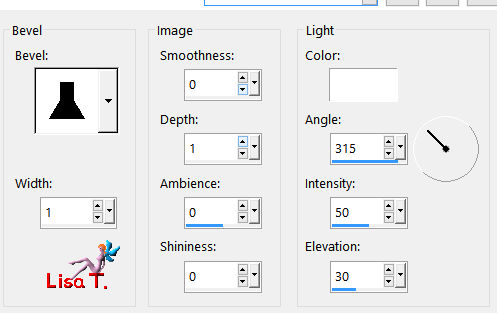
Step 43
effects/3D effects/inner bevel
Step 44
layers/new raster layer
Step 45
selections/load-save selections/from alpha channel/selection #3
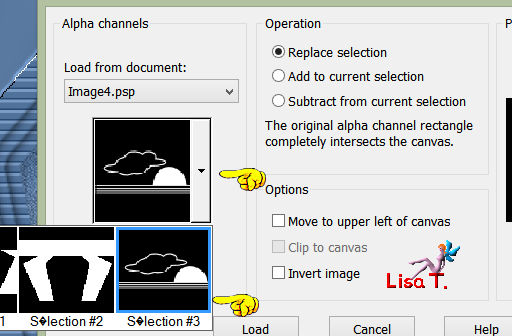
in the materials palette, set white as background
Step 46
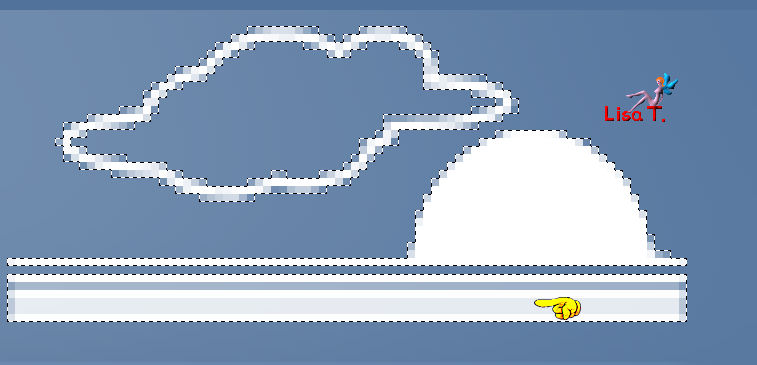
right click 2 times to fill the selection with white
don’t hesitate to enlarge your work to click in the right place
Step 47
selections/select none
Step 48
effects/plugins/Mura’s Meister/Copies
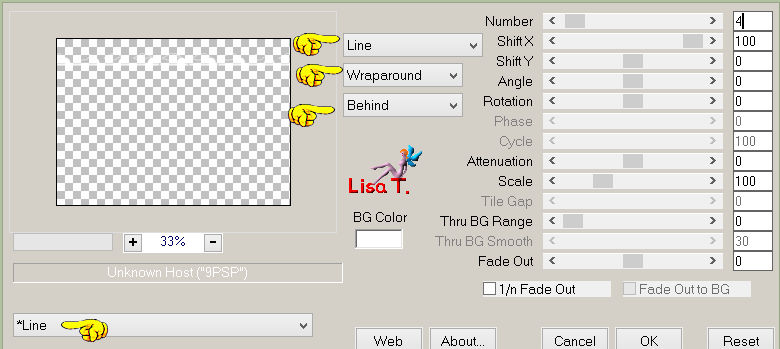
Step 49
effects/3D effects/drop shadow
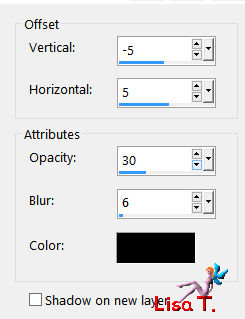
Step 50
activate the tube “deco1_papounaime_animabelle”
edit/copy - back to your work - edit/paste as new layer
you must colorize it if you changed the colors
- - - - - - - - - - - - - - - - - - - - - - - - -
to colorize, you must proceed this way :
note these informations concerning the color you want to use
for example, H (Hue) 255 and (Saturation) 139
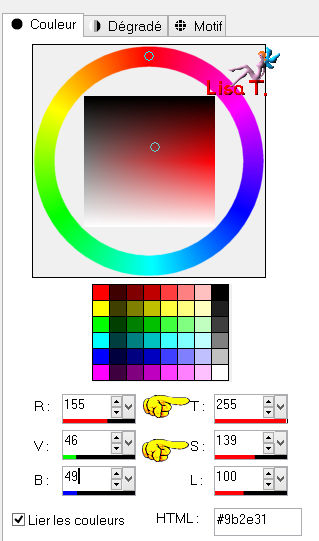
activate the decoration tube you want to colorize
adjust/hue and saturation
write the settings you noted

- - - - - - - - - - - - - - - - - - - - - - - - -
Step 51
effects/image effects/offset
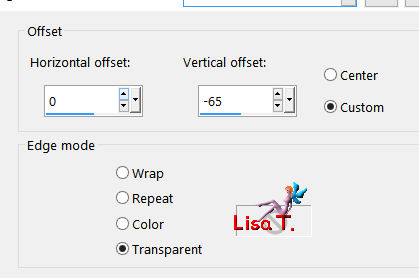
Step 52
layers/new raster layer
Step 53
activate the paint brush tool with the following settings

in the materials palette, set white as background
Step 54
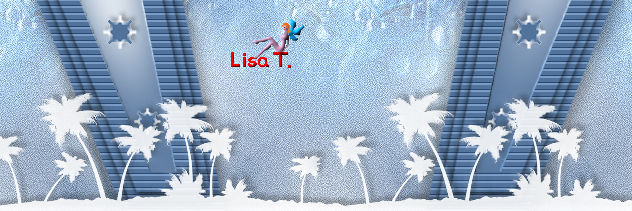
place the brush tip as shown
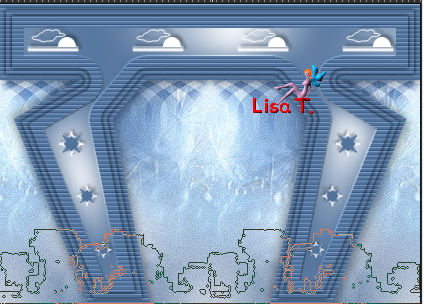
Step 55
right click 2 or 3 times (don’t move the mouse) to apply the brush tip
you must not see blue color at the bottom of the decoration
if you see some blue, move the decoration down with the Move Tool
Step 56
effects/3D effects/drop shadow

Step 57
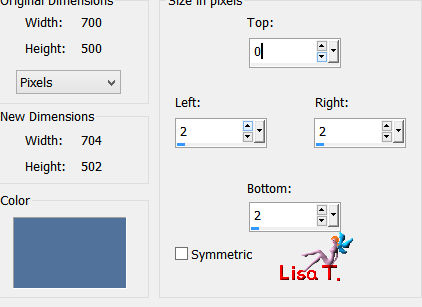
image/add borders/uncheck “symmetric”/color 1
Step 58
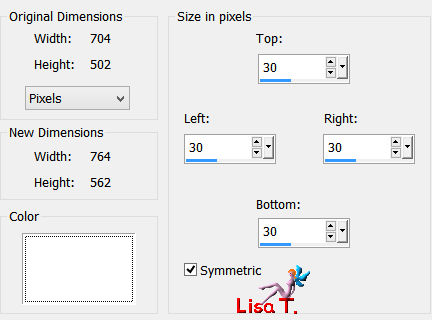
image/add borders/check “symmetric”/30 pixels/white
Step 59
activate the magic wand tool, default settings (inside checked)
and select the white border
Step 60
in the materials palette, prepare a linear gradient with colors 1 & 2
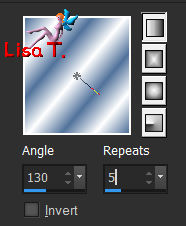
fill the selection with this gradient
Step 61
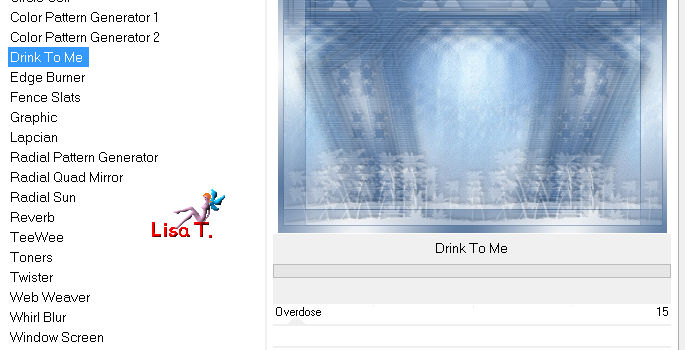
effects/plugins/Filter Factory Gallery J/Drink To Me
Step 62
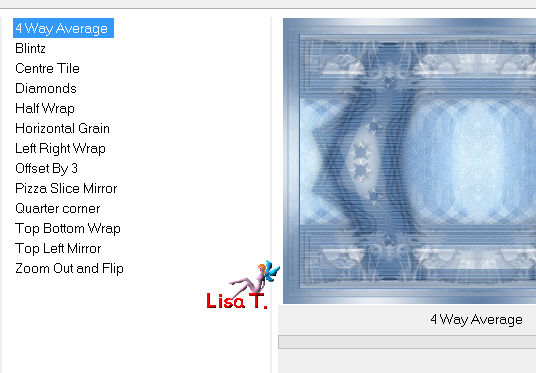
effects/plugins/Simple/4 Way Average
Step 63
selections/promote selection to layer
Step 64
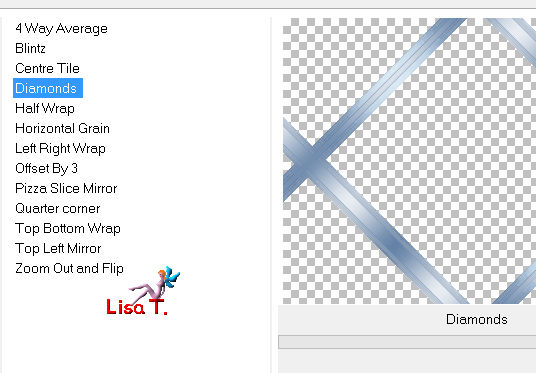
effects/plugins/Simple/Diamonds
Step 65
layers/merge/merge down
Step 66
adjust/sharpness/sharpen more
Step 67
selections/select none
Step 68
activate the tube “deco2_papounaime_animabelle”
colorize it if necessary
edit/copy - back to your work - edit/paste as new layer
Step 69
activate the character tube
edit/copy - back to your work - edit/paste as new layer
Step 70
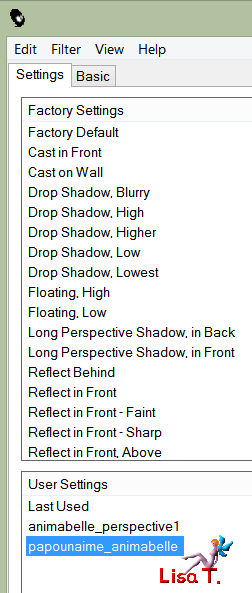
effects/plugins/Alien Skin/Eye Candy 5-Impact/Perspective Shadow
Step 71
apply the preset “papounaime_animabelle” provided
if you have chosen dark colors, Animabelle recommends not to do this step
and not to drop any shadow
Step 72
image/add borders/check “symmetric”/1 pixel color 1
apply your signature
save as.. type jpeg, and resize eventually.

Don't hesitate to write to Animabelle if you have any trouble with her tutorial

To be informed about her new tutorials, join her NewsLetter

If you created a tag with her tutorial and wish it to be shown,
send it to Animabelle !
It will be her pleasure to add it to the gallery at the end of the tutorial


Back to the Board of Animabelle's tutorials


|