Love and fresh water
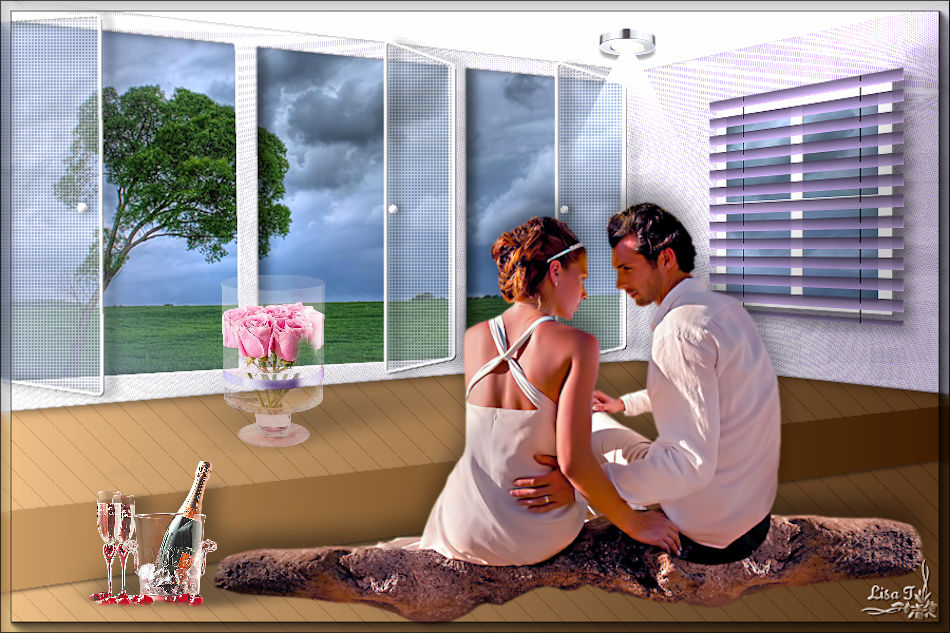
You will find the original tutorial here :


This tutorial is a personal creation.
Any resemblance with another one would be only pure coincidence.
It is stricly forbidden to modify images, to change their name or take off the matermarks,
To present them on your sites or blog,
To share them in groups,
to make a bank of images, or to use them on lucrative purposes.

Thank you to respect Animabelle’s work and the tubers work.
Don’t hesitate to warn her if you have any trouble with this tutorial.


Material

Animabelle’s important note
Tubers have been warned that disrespectful and dishonest bloggers come steeling our tubes
they grab them into the folders of material we provide with our tutorials.
These people rename and convert the tubes to png type,
and then they offer them for download in their blogs, pretending they have done the work.

To protect my work, I am therefore forced to no longer provide my tubes with the material.
Honest people will understand my way of doing, I hope.
I thank them for their understanding.
Very important Tip:
never take your tubes on these blogs, because most of the time they are stolen tubes.
Always make sure that the tubes you take have been signed by their authors !
it is the only way to be sure you are not using stolen tubes
Thank you.
|
Filters used
<I.C.NET Software> Filters Unlimited 2.0
DCspecial
Déformation
L en K's
Mura's Seamless
VanDerLee
AlphaWorks (import in Unlimited 2)
AAA Frame

“Renée Graphisme” filters, with her kind permission


translator’s note : Animabelle and I use PSP18, but this tutorial can be realized with another version.
I translate exactly the indications of Animabelle

Colors used

Don't hesitate to change the colors and the blend mode of the layers, and the shadows,
according to your tubes and images.
if you change these colors, choose 2 main colors matching with your tubes
color 1 > FG color > light color
color 2 > BG color > dark color
color 3 will be used for the final frame
in the materials palette, prepare colors 1 and 2
duplicate all tubes and layers, always work with the copies

Important
Open all images in PSP, duplicate them and close the originals.
work with the copies

use the pencil to follow the steps
left click to grab it


Execution
Step 1
open the alpha layer > window > duplicate
work with the copy, close the original
Step 2
selections > load / save selection > from alpha channel > selection #1
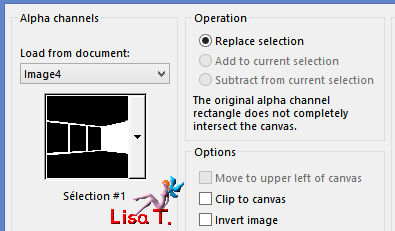
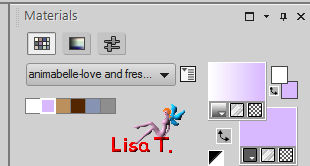
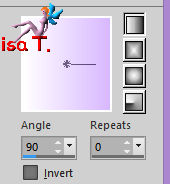
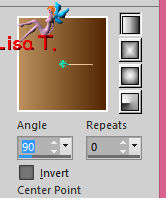
flood fill the selection with a linear gradient (I show you my colors to help you)
Step 3
layers > duplicate
effects > plugins > Unlimited 2 > DCSpecial > Psych
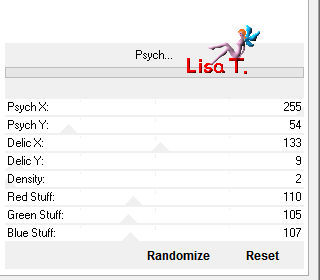
layers > properties > blend mode of the layer > Luminance (Legacy)
Step 4
layers > duplicate
effects > plugins > Unlimited 2 > Déformation > Alias blur
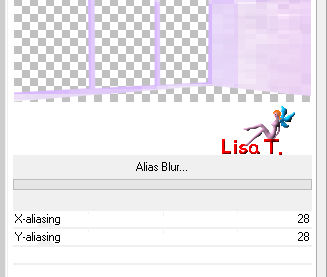
adjust > sharpness > Sharpen
layers > opacity of the layer : 35% > blend mode : Luminance (Legacy)
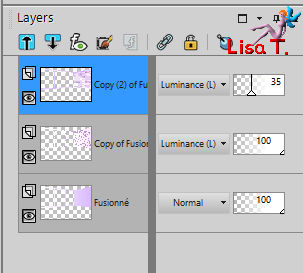
Step 5
selections > select none
layers > merge > merge visible
effects > 3D effects > inner bevel
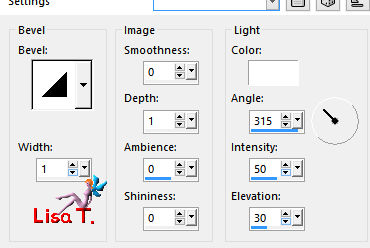
Step 6
in the materials palette, set color 3 as FG color, and color 4 as BG color
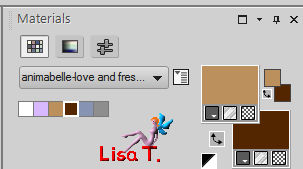
activate the magic wand tool > feather and tolerance : 0
select the empty part at the bottom
selections > modify > expand > 2 pixels
layers > new raster layer
flood fill with a linear gradient
Step 7
selections > select none
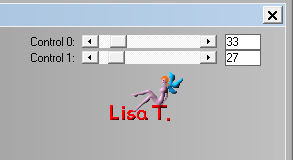
effects plugins > L en K’s > Frederiek
Step 8
selections > load / save selection > from alpha channel > selection #2
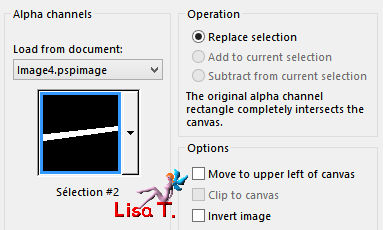
flood fill with the gradient

Step 9
effects > 3D effects > drop shadow > 2 / 0 / 50 / 5 / black
selections > select none
layers > arrange > move down
Step 10
activate the layer « Merged »
select the empty part ot the top with the magic wand tool (same settings as before)
selections > modify > expand > 1 pixel
layer > new raster layer
flood fill white
selections > select none
Step 11
efects > plugins > Texture > Texturizer
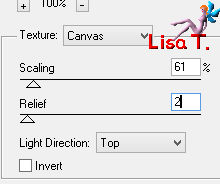
effects > 3D effects > drop shadow > 1 / 0 / 30 / 3 / black
Step 12
activate the layer « Merged »
effects > 3D effects > drop shadow > 1 / 9 / 50 / 15 / black
Step 13
layers > new raster laeyr
layers > arrange > send to bottom
flood fill with a color matching your misted tube
Animabelle chose #8693b2 (color 5)
Step 14
copy / paste as new layer the misted landscape
activate the Pick Tool (K)
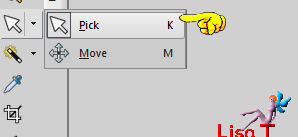
move this landscape in the middle of the left three Bay windows
layers > duplicate
layers > merge > merge visible
Step 15
selections > load / save selection > from alpha channel > selection #3
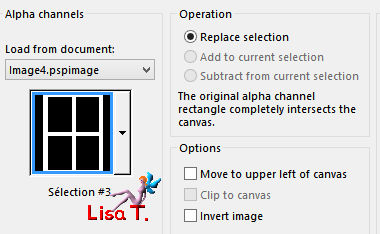
layers > new raster layer
flood fill white
selections > select none
Step 16
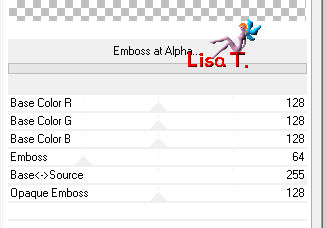
effects > plugins > Unlimited 2 > Mura’s Seamless > Emboss at Alpha > default settings
Step 17
select the empty part around the window with the magic wand tool
selections > invert
selections > modify > contract > 5 pixels
activte the layer « Merged »
Step 18
layers > new raster layer
flood fill with the color you chose in step 13
once more, copy / paste as new layer the misted landscape
move it properly with the Pick Tool (K)
selections > invert
edit > cut
Step 19
selections > invert
layers > new raster layer
effects > 3D effects > cutout
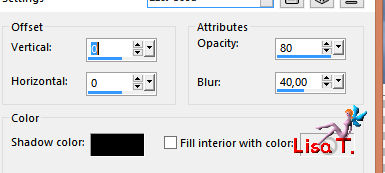
selections > select none
Step 20
close the eye of the bottom layer, and activate any other one
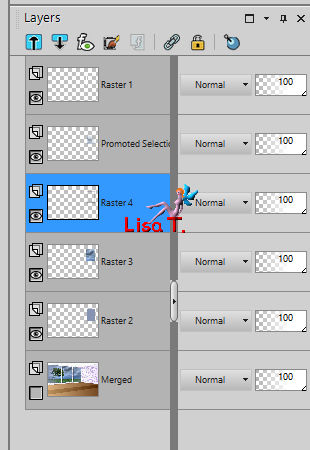
layers > merge > merge visible
open the eye of the bottom layer but keep the top layer active
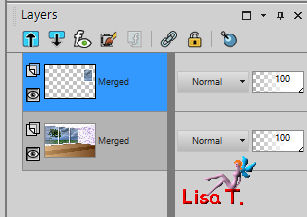
Step 21
activate the selection tool > custom selection

with the following settings
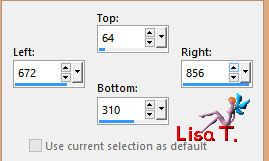
Step 22
effects > plugins > VanDerLee > Unplugged-X > Jalusi
set color 2 into « custom » (or other)
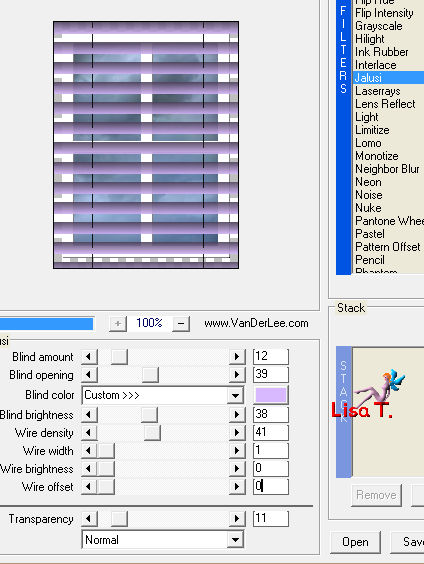
Step 23
selections > select none
activate the Pick Tool

select the « perspective » mode
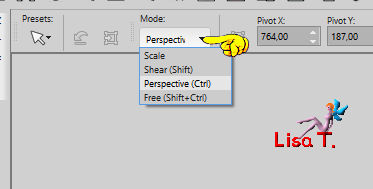
push up the left corner (the upper left corner will move as well)
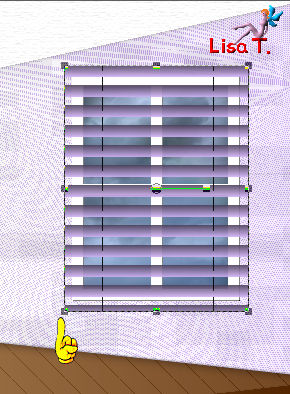
you must obtain this result
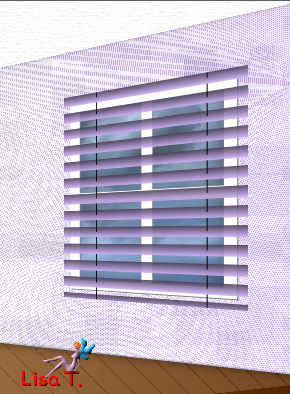
Step 24
adjust > sharpness > sharpen
effects > 3 D effects > drop shadow > 6 / 9 / 50 / 15 / black
Step 25
selections > load / save selection > from alpha channel > selection #4
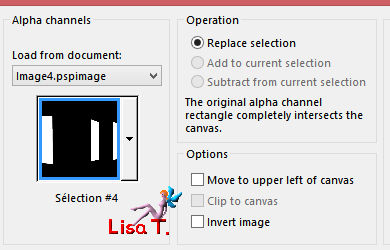
layers > new raster layer
flood fill the selection white
Step 26
effects > plugins > Unlimited 2 > AlphaWorks > v-Photo Whiteout... > default settings (128 / 0 )
if you have difficulties (translator's note :Like me !!) with this plugin, set the opacity of the layer on 45% (more or less, according to your colors)
Step 27
effectss > Texture > Weave > color 5
for her second version, Animabelle chose color #cbeaeb
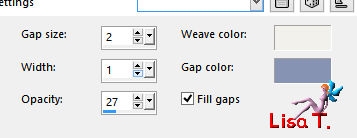
Step 28
selections > select selection borders
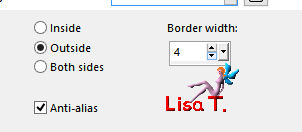
selections > promote selection to layer
flood fill the selection white
selections > select none
Step 29
effects > plugins > Unlimited 2 > Mura’s Seamless > Emboss at Alpha > default settings
effects > 3De ffects > drop shadow > 0 / 9 8 50 / 15 / black
Step 30
layers > new raster layer
selections > load / save selection > from alpha channel > selection #5
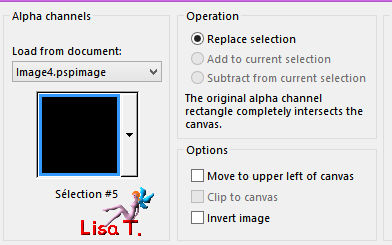
Step 31
flood fill white
effects > 3D effects > inner bevel
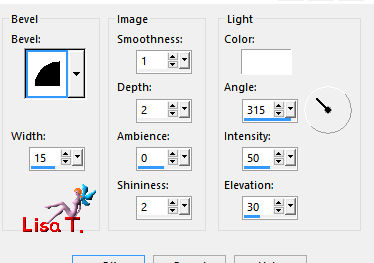
selections > select none
effects > 3D effects > drop shadow > 0 / 4 / 40 / 9 / black
Step 32
copy / paste as ne wlayer the spot light provided in the material
image > resize > 10% > uncheck « all layers »
adjust > sharpness > sharpen
effects > image effects > offset
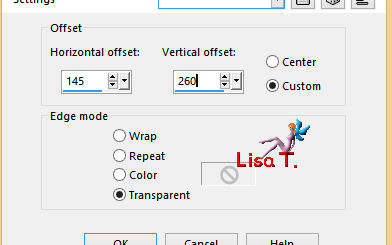
effects > 3D effects > drop shadow > 5 / 0 / 40 / 5 / black
Step 33
layers > merge > merge visible
effects > illumination effects > lights
if necessary, change the number « horizontal » so the halo of light is centered under the spot

if it doesn’t work, uncheck the settings box « on », and check it again
Tine has applied this effects this way : se HERE
if you don’t obtain the same result as Animabelle, do like that =>
layers > new raster layer
activate the Free Hand Selection Tool > point to point > feather 50
draw a triangle
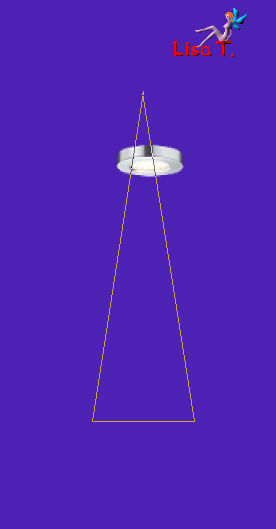 and your selection will look like this and your selection will look like this 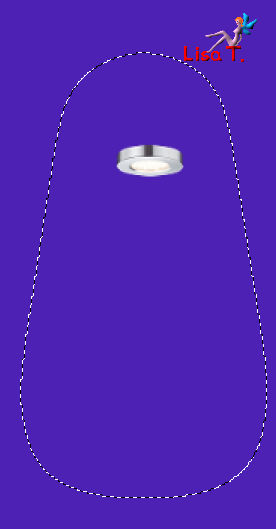
flood fill the layer white
layers > properties > opacity 20%
layers > arrange > move down
activate the layer just above
Step 34
copy / paste as new layer your main tube
resize it if necessary and sharpness > sharpen if you resize
effects > 3D effects > drop shadow > -15 / 0 / 40 / 30 / black
Step 35
layers > merge > merge all (flatten)
effects > plugns > AAA Frames > Foto Frame
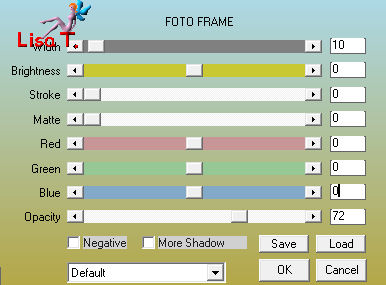
apply your watermark and save as... type .jpeg

Don't hesitate to write to Animabelle if you have any trouble with her tutorial
To be informed about her new tutorials, join her NewsLetter

If you created a tag with her tutorial and wish it to be shown,
send it to Animabelle !
It will be her pleasure to add it to the gallery at the end of the tutorial
don’t resize your tag under 800 pixels width if you want her to present your tag


Back to the boards of Animabelle's tutorials
board 1  board 2 board 2 

|