Love

you will find the original tutorial here :


This tutorial is a personal creation.
Any resemblance with another one would be only pure coincidence.
It is stricly forbidden to modify tubes, to change their name or take off the matermarks,
To present them on your sites or blog,
To share them in groups,
to make a bank of images, or to use them on lucrative purposes.

Thank you to respect Animabelle’s work and the tubers work.
Don’t hesitate to warn her (or me) if you have any trouble with this tutorial.


Material
1 decoration tube by Animabelle
1 mask by Animabelle
1 background image (jpeg)
1 selection
Animabelle uses her own tubes, not provided with the material to prevent the theft of her work


Animabelle’s important note
Tubers have been warned that disrespectful and dishonest bloggers come steeling our tubes
they grab them into the folders of material we use to provide for our tutorials.
These people rename and convert the tubes to png type,
and then they offer them for download in their blogs, pretending they have done the work.

To protect my work, I am therefore forced to no longer provide my tubes with the material.
Honest people will understand my way of doing, I hope.
I thank them for their understanding.
Very important Tip:
never take your tubes on these blogs, because most of the time all of these tubes are stolen tubes.
Always make sure that the tubes you take have been signed by their authors.
Thank you.
|

Filters
Flaming Pear
User Defined Filter
Tormentia
Plugin AB 06 (import in Unlimited 2)
Richard Rosenman

Translator’s note : This tutorial was created using PSP12, I use PSPX7
but it can be realized with another version.

use the pencil to you follow the steps
left click to grab it


Implementation
Open all images in PSP, duplicate them and close the originals.
Never work with original images.
open the mask and minimize it to tray
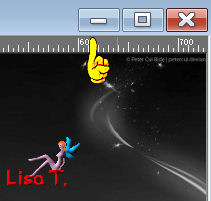
copy the selection in the special file « selections » of « My PSP files »

Colors
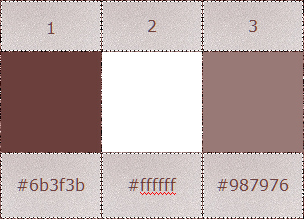
Don't hesitate to change the colors and the blend mode of the layers,
according to your tubes and images.

Realization
open a new transparent raster layer / 800 X 500 pixels
in the materials palette, set color 2 as foreground, and color 1 as background
prepare a sunburst gradient
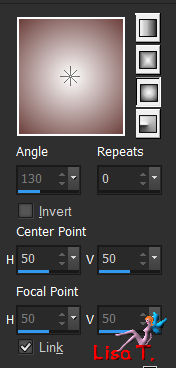
fill the layer with this gradient
layers/duplicate
effects/plugins/Flaming Pear/Flexify 2/tab color -> color 1
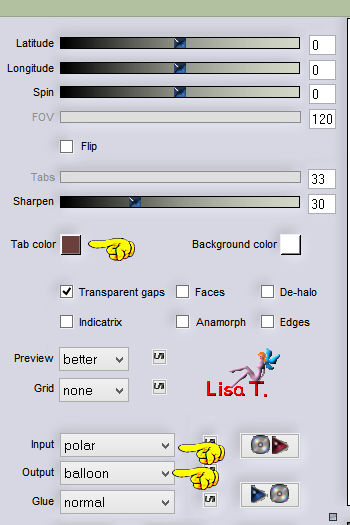
effects/image effects/seamless tiling/default settings
effects/geometric effets/perspective/horizontal
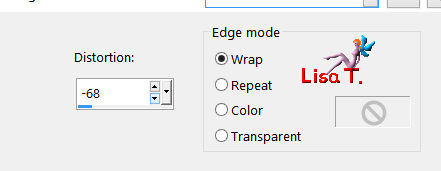
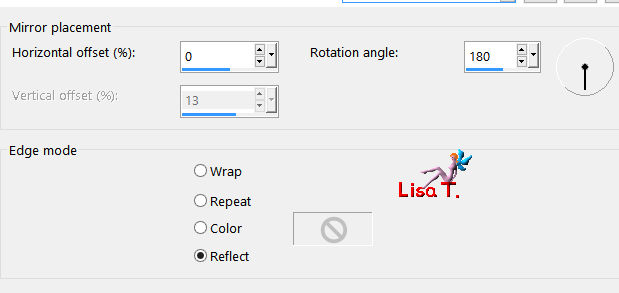
effects/reflection effects/rotating mirror
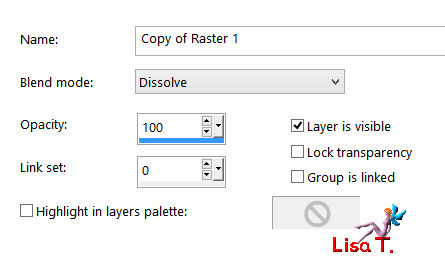
layers/properties/blend mode : « dissolve »
layers/new raster layer
flood fill with color 2
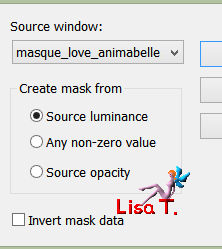
layers/new mask layer/from image, find mask « masque_love_animabelle »
adjust/sharpness/sharpen
layers/merge/merge group
effects/user defined filter/emboss 3
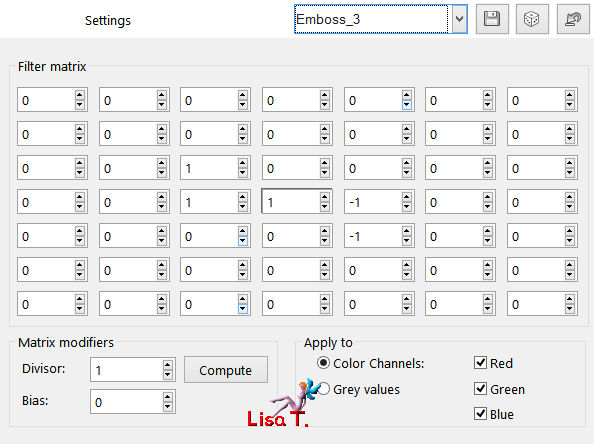
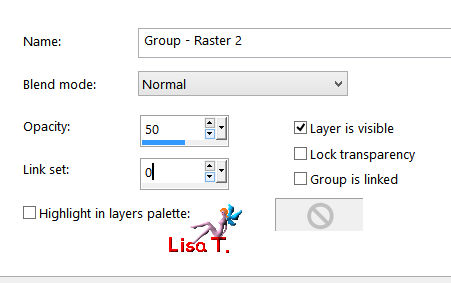
layers/properties/opacity : 50%
layers/merge/merge visible
selections/load-save selection/from disk
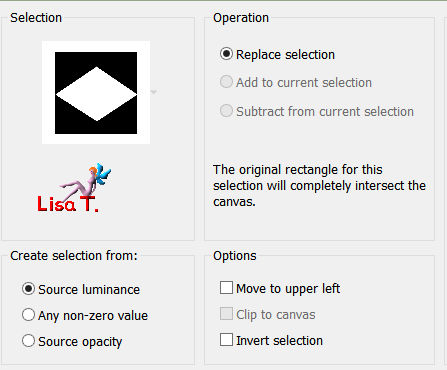
find the selection « selection1_love_animabelle.PspSelection »
edit/cut
selections/modify/select selection borders
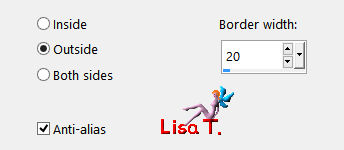
selections/promote selection to layer
selections/modify/feather -> 2 pixels
effects/plugins/Tormentia/CrissCross
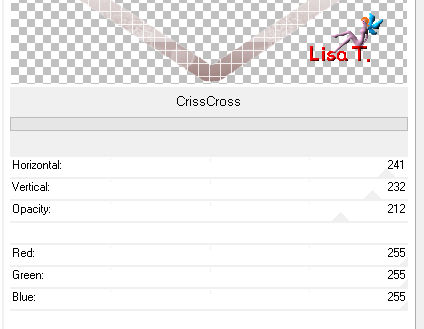
effects/edge effects/enhance
effects/3D effects/inner bevel
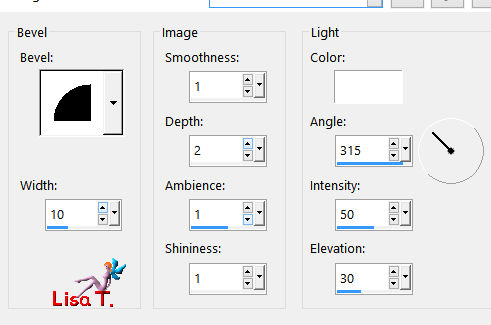
selections/select none
layers/duplicate
effects/image effects/seamless tiling (default settings)
in the layers palette, activate the layer below (promoted selection), and duplicate it again
effects/reflection effects/kaleidoscope
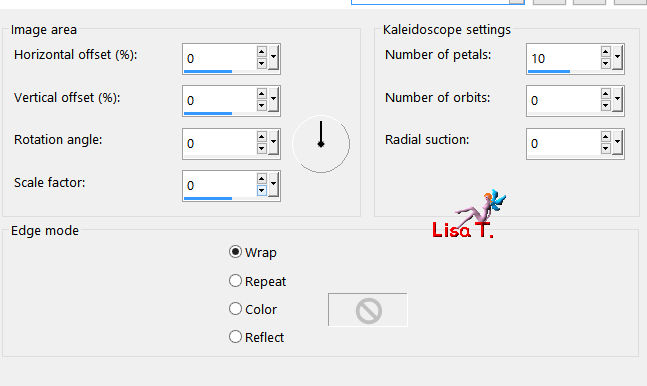
layers/properties/blend mod « Luminance »(or other according to your colors)
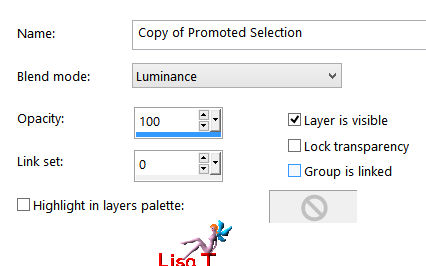
in the layers palette, close the visibility toggle of the layer at the bottom of the stack
activate another layer
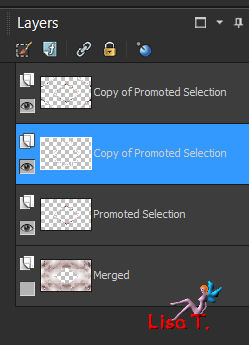
layers/merge visible
open the visibility toggle of the bottom layer, but keep the top layer active
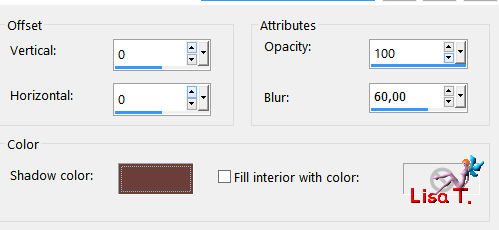
effects/3D effects/drop shadow -6 / 6 / 60 / 30 / color #6b3f3b (or other, as you wish)
activate the landscape image - edit/copy - back to your work - edit/paste as a new layer
layers/arrange/send to bottom
layers/merge/merge all (flatten)
selections/select all
effects/3D effects/cutout/color #6b3f3b
selections/select none
image/add borders :
2 pixels color 2
10 pixels color 3
2 pixels color 2
select the large border with the magic wand tool (tolerance and feather : 0 / inside)

selections/promote selection to layer
effects/plugins/plugins AB 06/Warping Warposity
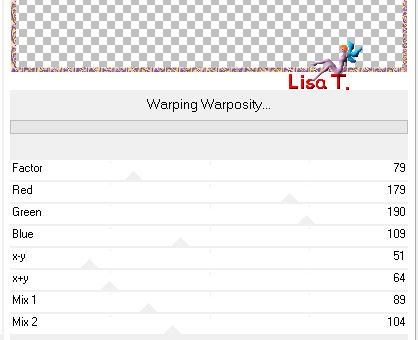
layers/properties/opacity/50%
layers/merge/merge down
effects/3D effects/inner bevel as before
selections/select none
image/add borders/60 pixels/color 1
select this large border with the magic wand
fill the selection with the following gradient
colors 1 and 2
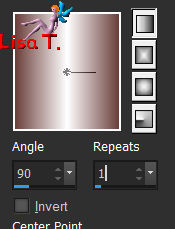
effects/Richard Rosenman/Halftone
background color 2
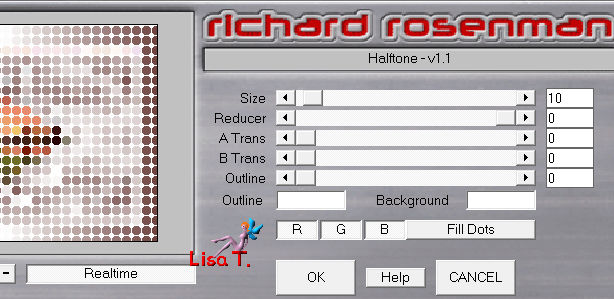
adjust/blur/radial blur

effects/edge effects/enhance
selections/promote selection to layer
effects/plugins/Richard Rosenman/Pixelate
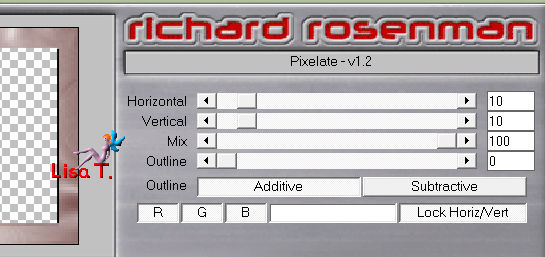
layers/properties/opacity 60%
layers/merge/merge down
adjust/sharpness/sharpen
selections/select all
selections/modify/contract/20 pixels
selections/promote selection to layer
selections/modify/contract/20 pixels (again)
edit/cut
selections/select none
effects/3D effects/inner bevel as before
image/mirror/mirror horizontal
effects/3D effects/drop shadow / 0 / 0 / 70 / 30 / same color as before
activate the tube « deco_coeurs_love_animabelle »
edit/copy - back to your work - edit/paste as a new layer (don’t move it)
effects/3D effects/drop shadow
-6 / 6 / 60 / 30 / color #6b3f3b
activate the character tube - edit/copy - back to your work - edit/paste as a new layer
place it at the bottom left
effects/3D effects/drop shadow/ -11 / 11 / 60 / 40 / same color
activate the tube of the text “Love”
edit/copy - back to your work - edit/paste as a new layer
place it on the right (see final result)
don’t drop any shadow, it is already done
you will find the Font provided in the material, so you can change the text if you wish
layers/duplicate
image/add borders
2 pixels color 2
2 pixels color 1
Sign and save as... type JPEG, or PNG, resize eventually.

don’t resize it less than 800 pixels wide
if your want Animabelle to present your creation on her site

Don't hesitate to write to Animabelle if you have any trouble with her tutorial
To be informed about her new tutorials, join her NewsLetter

If you created a tag with her tutorial and wish it to be shown,
send it to Animabelle !
It will be her pleasure to add it to the gallery at the end of the tutorial


Back to the Board of Animabelle's tutorials


|