

You will find the original tutorial here :

This tutorial is a personal creation.
Any resemblance with another one would be only pure coincidence.
It is stricly forbidden to modify tubes, to change their name or take off the matermarks,
To present them on your sites or blog,
To share them in groups,
to make a bank of images, or to use them on lucrative purposes.
 
Thank you to respect Animabelle’s work and the tubers work.
Don’t hesitate to warn me if you have any trouble with this translation,
and I’ll try to fix the problem as quickly as I can

Animabelle worked with PSP2020 and I worked with PSP2020 Ultimate
you can follow this tutorial with another version of PSP, but the result might be slightly different
 
Supplies
masks - Unlimited 2 texture - tubes - font - selections - palette

TIP 1 -> if you don’t want to install a font -->
open it in a software as « Nexus Font » (or other font viewer software of you choice)
as long as both windows are opened (software and font), your font will be available in your PSP
TIP 2 -> from PSPX4, in the later versions of PSP the functions « Mirror » and « Flip » have been replaced by -->
« Mirror »has become --> image => mirror => mirror horizontal
« Flip » has become --> image => mirror => mirror vertical
 
Plugins needed
I.C.NET Software - Filters Unlimited 2.0
Mehdi
MuR'as Seamless
FM Tile Tools
Thank you Renée Salon for sharing your plugins page

   
Use the pencil to mark your place
along the way
hold down left click to grab and move it
 |
   
1
duplicate all the tubes and work with the copies to preserve originals
save your work often in case of problems with your psp
place the selection in the folder « selections » of PSP general folder
open the masks and minimize to tray
2
use the Dropper tool to pick up your colors into your tubes and misted images
Animabelle chose these :
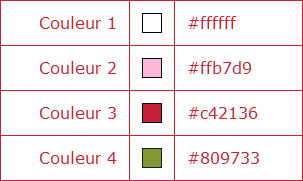
don’t hesitate to change blend modes and opacities of the layers to match your personal colors and tubes
3
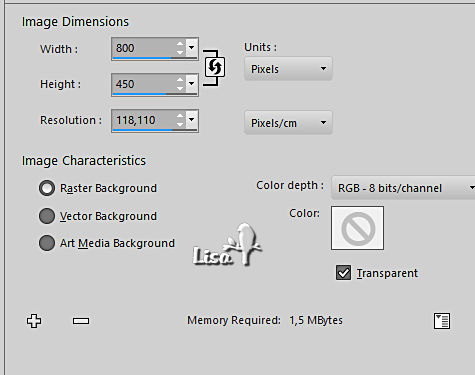
open a new image => transparent => 800 * 450 px
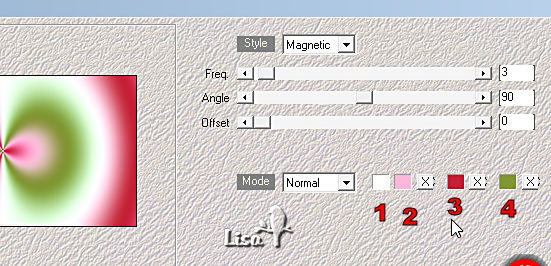
set FG to color 2 and BG to color 1 in materials palette
effects => plugins => Mehdi => Wavy Lab 1.1
adjust => blur => gaussian blur => 30
4
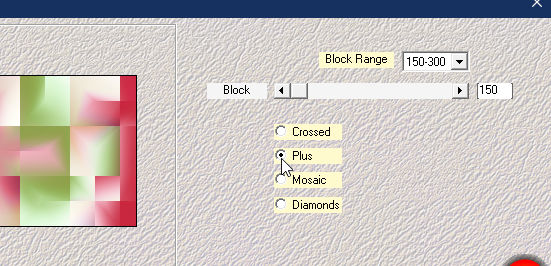
effects => plugins => Mehdi => Sorting Tiles
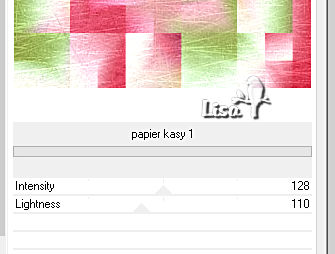
effects => plugins => Unlimited 2 => Paper Texture / papier Kasy 1 (provided)
5
layers => duplicate
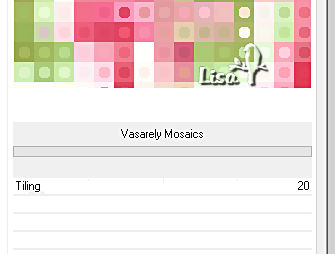
effects => plugins => Unlimited 2 => Neology / Vasarely Mosaics
blend mode of the layer : Soft Light
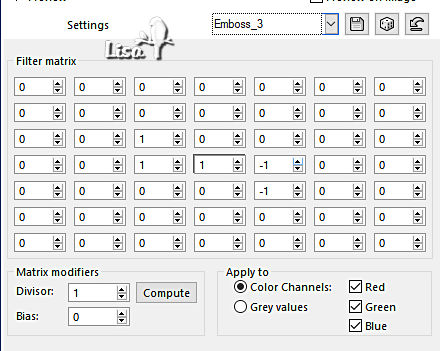
effects => plugins => User Defined Filter => Emboss 3
layers => merge => merge down
6
enable the Selection tool / custom selection

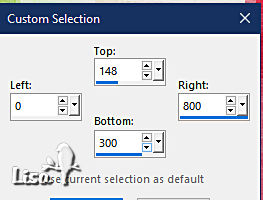
selections => promote selection to layer
selections => select none
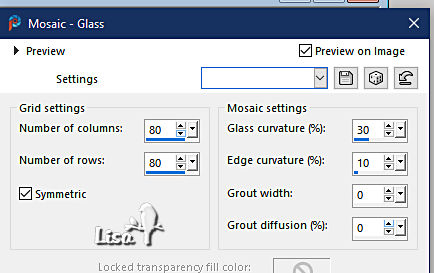
effects => texture effects => mosaic / Glass
7
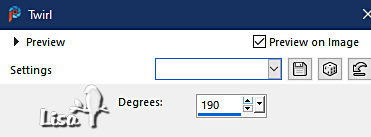
effects => distortion effects => Twirl
8
highlight bottom layer
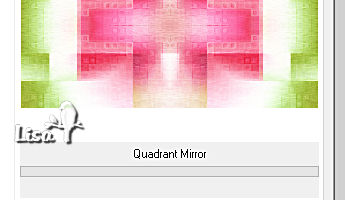
effects => plugins => Unlimited 2 => Tile & Mirror => Quadrant Mirror
9
layers => duplicate
effects => plugins => Unlimited 2 => &<Background Designers IV> => sf10 Slice N Dice
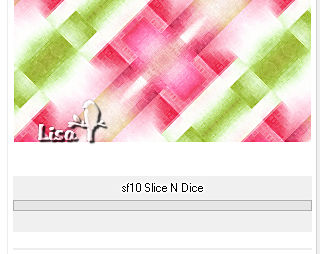
blend mode of the layer : Multiply / opacity : 60%
layers => merge => merge visible
10
layers => new raster layer
effects => plugins => Mehdi => Wavy Lab 1.1
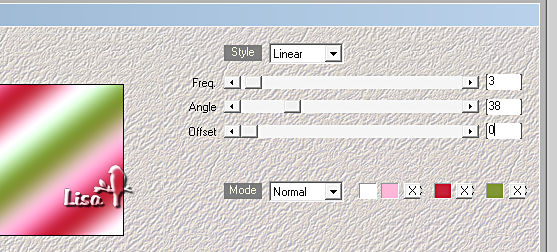
adjust => blur => gaussian blur => 50
11
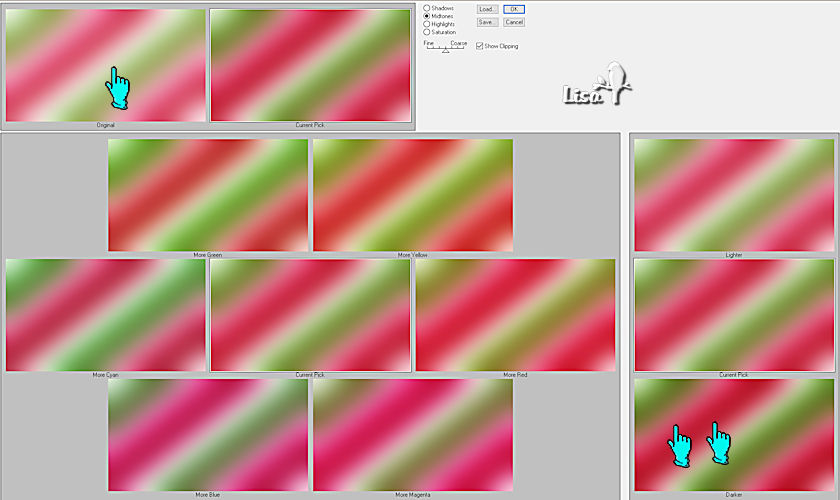
effects => plugins => Adjust => Variations
click once on « original » and twice on « darker »
if you colors are already dark, don’t apply this plugin
12
layers => new mask layer => from image
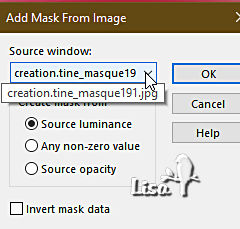
layers => merge => merge group
effects => plugins => Mura’s Seamless => Emboss at Alpha
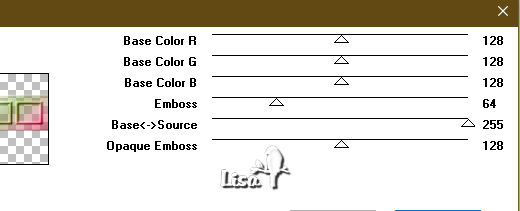
apply the plugin once more
13
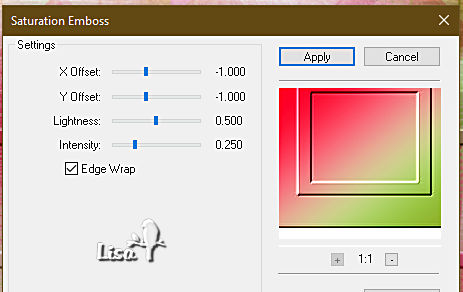
effects => plugins => FM Tile Tools / Saturation Emboss
selections => load-save selection => from disk => selection # 1
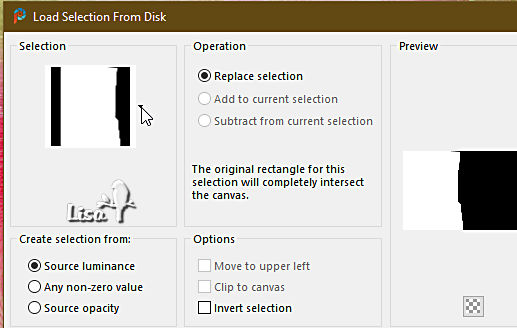
edit => cut
selections => select none
edit => paste as new layer / don’t move it
14
effects => reflection effects => kaleidoscope
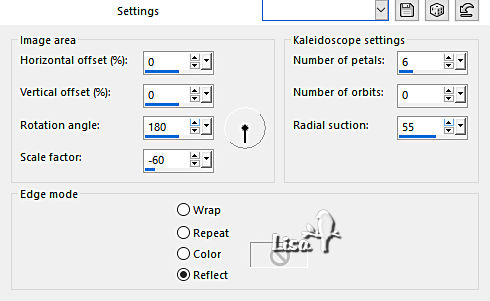
effects => plugins => Mura’s Seamless => Emboss at Alpha

layers => arrange => move down
15
highlight top layer
selections => load-save selection => from disk => selection # 2
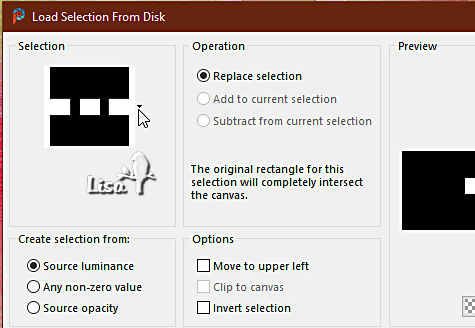
hit the DELETE key of your keyboard
keep selection active
layers => new raster layer
flood fill selection white
selections => select none
16
enable the Magic Wand tool

select the left white square
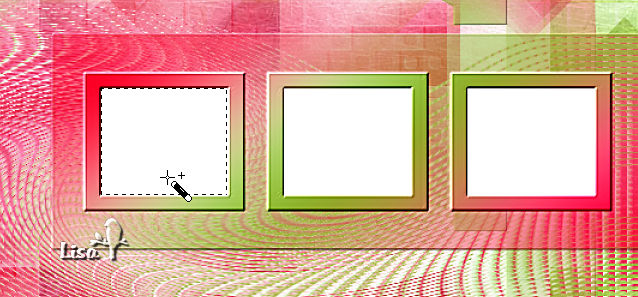
selections => modify => contract => 2 px
edit => cut
edit => paste as new image
17
on this small square, copy / paste « misted_paysage14_tine_03.2020-70 » as new layer
erase the watermark
image => resize => untick « resize all layers » => 35%
place the part of the misted you like in the white sqaure
adjust => sharpness => sharpen
layers => merge => merge all (flatten)
18
edit => copy
back to your main work
edit => paste into selection
effects => 3D effects => inner bevel
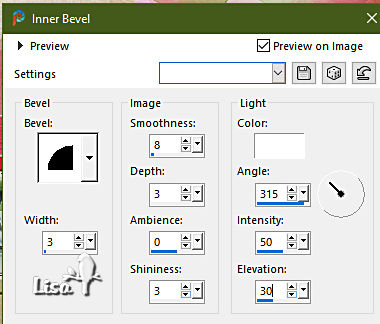
selections => select none
19
do do the same work with the second white square
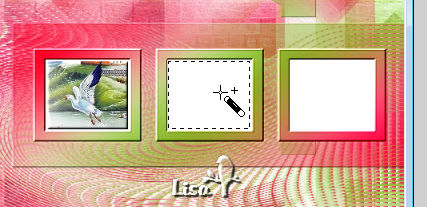
don’t forget to contract the selection each time
choose each time another part of the misted image
don’t forget to apply the 3D effet / inner bevel
20
do do the same work with the third white square
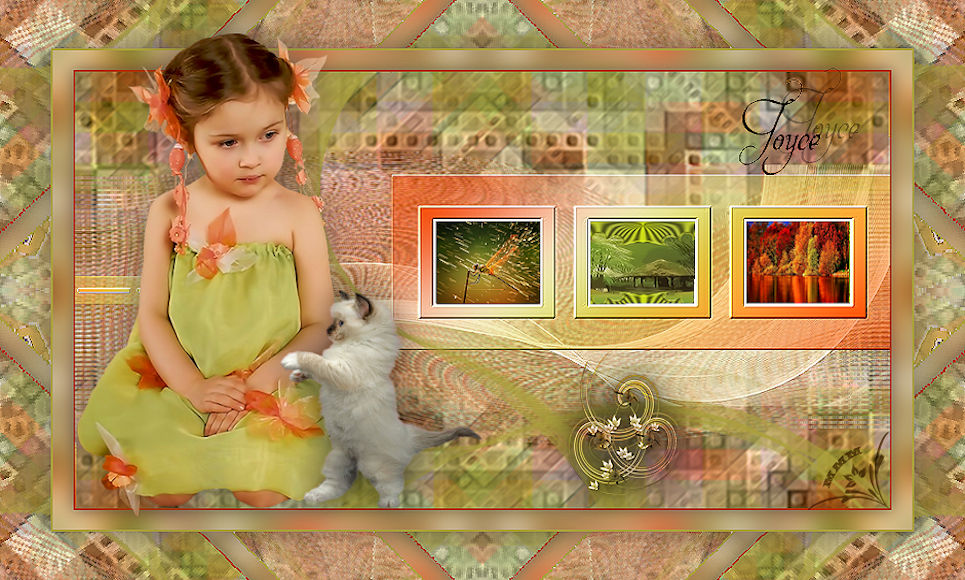
see final result
21
highlight bottom layer
layers => duplicate
adjust => blur => radial blur
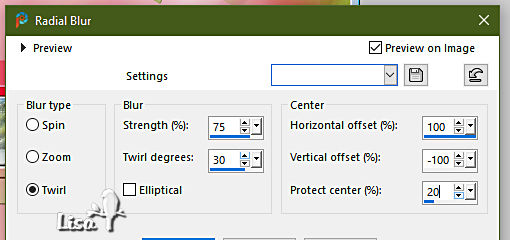
layers => new mask layer => from image
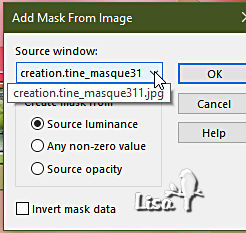
layers => merge => merge group
blend mode of the layer : Screen
layers => duplicate
22
image => add borders => tick « symmetric » => 2 px color 3
selections => select all
image => add borders => tick « symmetric » => 20 px color 1
selections => invert
effects => reflection effects => kaleidoscope ( same settings as previously )
adjust => blur => gaussian blur => 15
selections => invert
effects => 3D effects => drop shadow => 0 / 0 / 60 / 20 / black
selections => select none
23
image => add borders => tick « symmetric » => 2 px color 4
selections => select all
image => add borders => tick « symmetric » => 50 px color 1
selections => invert
effects => plugins => Unlimited 2 => Tile & Mirror => Kaleidoscope 2
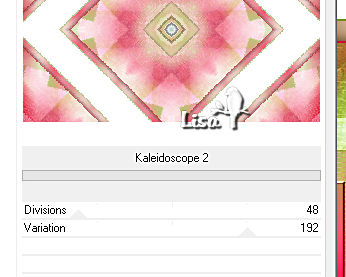
selections => select none
24
wityh th magic wand tool, select all the white parts of the frame
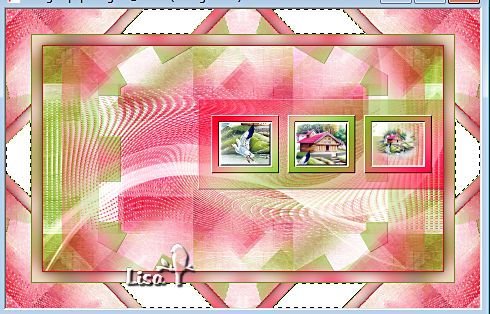
effects => plugins => Unlimited 2 => Tile & Mirror => Radial Tile
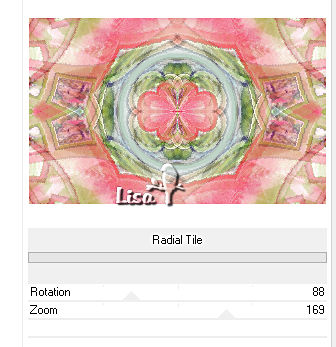
25
selections => select all
selections => modify => contract => 50 px
effects => 3D effects => drop shadow => 0 / 0 / 60 / 50 / black
selections => select none
26
copy / paste as new layer Tine’s tubes =
resize and place as shown on final result
drop a shadow of your choice on each one
27
copy / paste « Joyce » as new layer (Title)
Animabelle used the Font provided, so you can write another text of your choice
image => add borders => tick « symmetric » => 1 px black
image => resize => tick « resize all layers » => 900 px width
28
layers => new raster layer
apply your watermark or signature
write your licence number if you used a licenced tube
layers => merge => merge all (flatten)
save your work as... type .jpeg optimized
   
Another version with my tubes

 
Don't hesitate to write to me if you have any trouble with this tutorial
If you create a tag (using other tubes than those provided) with this tutorial
and wish it to be shown, send it to me !
It will be a real pleasure for me to add it to the gallery at the end of the tutorial

 
created by MMM
 
back to the boards of Animabelle’s tutorials / 20 tutorial on each board
board 1 board 2 board 2 board 3 board 3 board 4 board 4 board 5 board 5
board 6 board 7 board 7 board 8 board 8 board 9 board 9


|