

You will find the original tutorial here
:

This tutorial is a personal creation.
Any resemblance with another one would be only pure coincidence.
It is stricly forbidden to modify tubes, to change their
name or take off the matermarks,
To present them on your sites or blog,
To share them in groups,
to make a bank of images, or to use them on lucrative purposes.

Thank you to respect Animabelle’s work and the tubers
work.
Don’t hesitate to warn me if you have any trouble
with this translation,
and I’ll try to fix the problem as quickly as I can

Animabelle works with PSPX9 and I work with PSP 2019
you can follow this tutorial with another version of PSP,
but the result might be slightly different

Material
tubes - selections

TIP 1 -> if
you don’t
want to install a font -->
open it in a software as « Nexus Font » (or
other font viewer software of you choice)
as long as both windows are opened (software and font),
your font will be available in your PSP
TIP 2 -> from PSPX4,
in the later versions of PSP the functions « Mirror » and « Flip » have
been replaced by -->
« Mirror »has become --> image => mirror => mirror
horizontal
« Flip » has become --> image => mirror => mirror
vertical

Filters (plugins) used
VM Toolbox
UnPlugged Effects
AP [Utility]
Carolaine and Sensibility
°v° Kiwi`s Oelfilter
ScreenWorks
Richard Rosenman
Unlimited 2.0
RCS Filter Pak 1.0
Thank you Renée Salon for sharing your plugins’ page

use the pencil to you follow the steps
hold down left click of your mouse to grab it and move
it
Use the pencil to mark your place
along the way
hold down left click to grab and move it
 |

1
duplicate all the tubes and work with the copies to preserve
originals
save your work often in case of problems with your psp
2
use the Dropper tool to pick up your colors into your tubes
and misted images
Animabelle chose these :
color 1 => #d1b3a3
color 2 => #631f15
don’t hesitate to change blend modes and opacities
of the layers to match your personal colors and tubes
3
open a new transparent image 800 * 500 px
flood fill with the following gradient
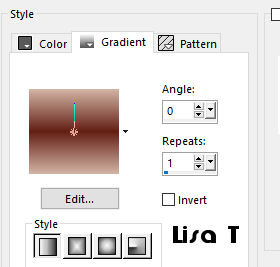
effects => plugins => VM Toolbox / Radial Mosaic
/ default settings
effects => plugins => Unplugged Effects => Rotate
/ 22
4
effects => plugins => AP[Utility] => Utility
/ Reflections
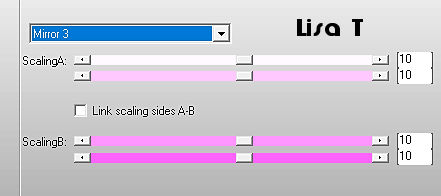
effects => reflection effects => Rotating Mirror
=> 0 / 180 / tick « Reflect »
effects => image effects => seamless tiling => default
settings
5
selections => load selection => from disk => choose
selection « Sel1_Improvisation_Animabelle »
selections => promote selection to layer
effects => plugins => Carolaine and Sensibility
=> CS-LDots => 50 / 3 / 1
effects => 3D effects => drop shadow => 10 / 10
/ 50 / 5 / black
selections => select none
6
highlight bottom layer
layers => duplicate
effects => plugins => °v° Kiwi`s Oelfilter
/ Leinwand / default settings
blend mode of the layer : Soft Light - Opacity :
13%
layers => merge => merge visible
7
copy / paste as new layer « Deco1_Improvisation_Animabelle »
blend mode of the layer : Overlay or Luminance Legacy (according
to your colors)
effects => 3D effects => drop shadow => 10 / 10
/ 50 / 5 / black
8
highlight layer below « merged »
copy / paste as new layer the misted landscape
don’t forget to erase the watermark
opacity of the layer : 75%
9
copy / paste as new layer « Deco2_Improvisation_Animabelle »
layers => arrange => bring to top
effects => 3D effects => drop shadow => 5 / 5
/ 50 / 10 / black
blend mode of the layer : Overlay or Luminance Legacy (according
to your colors)
opacity of the layer : 80%
layers => merge => merge all (flatten)
10
selections => select all
effects => 3D effects => cutout / black
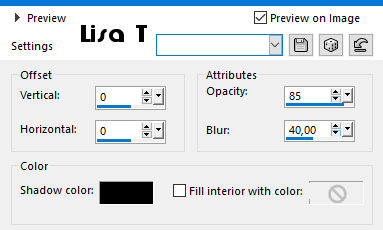
selections => select none
11
image => add borders => tick « symmetric » => ...
1 px color 2
35 px color 1
select the large border with the magic wand tool
selections => promote selection to layer
effects => plugins => ScreenWorks / Dot Screen
opacity of the layer : 16%
layers => merge => merge down
12
selections => select all
selections => modify => contract => 15 px
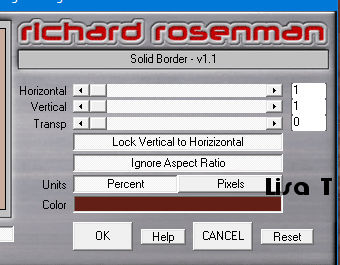
effects => plugins => Richard Rosenman / Solid Border
/ color 2
selections => invert
effects => plugins => Unlimited 2 / VM Texture /
Tile a GoGo / default settings
13
effects => reflection effects => rotating mirror
/ same settings as before
image => rotate left
effects => reflection effects => rotating mirror
/ same settings as before
image => rotate right
selections => invert
effects => 3D effects => drop shadow => 0 / 0
/ 75 / 40 / black
selections => select none
14
copy / paste as new layer the woman tube
don’t forget to erase the tuber’s watermark
image => resize => untick « resize all
layers » => 80%
move right
drop a shadow of your choice
15
image => add borders => tick « symmetric » => ...
2px color 1
50 px color 2
select the large border with the magic wand tool
effects => plugins => RCS Filter Pak 1.0 - RCS TripleExposure
/ default settings / 255
effects => reflection effects => rotating mirror
/ same settings as before
selections => invert
effects => 3D effects => drop shadow => 0 / 0
/ 80 / 60 / black
selections => select none
16
image => add borders => tick « symmetric » => ...
2 px color 1
copy / paste as new layer « Deco3_Improvisation_Animabelle »
move as shown on final result
effects => 3D effects => drop shadow => 6 / 6
/ 20 / 6 / black
17
copy / paste as new layer « Deco4_Improvisation_Animabelle »
effects => image effects => offset => 0 / -310
effects => 3D effects => drop shadow => 6 / 6
/ 20 / 6 / black
blend mode of the layer « Luminance (Legacy) » if
you changed the colors
18
layers => new raster layer
apply your watermark (or signature)
file => export => type .jpeg optimized

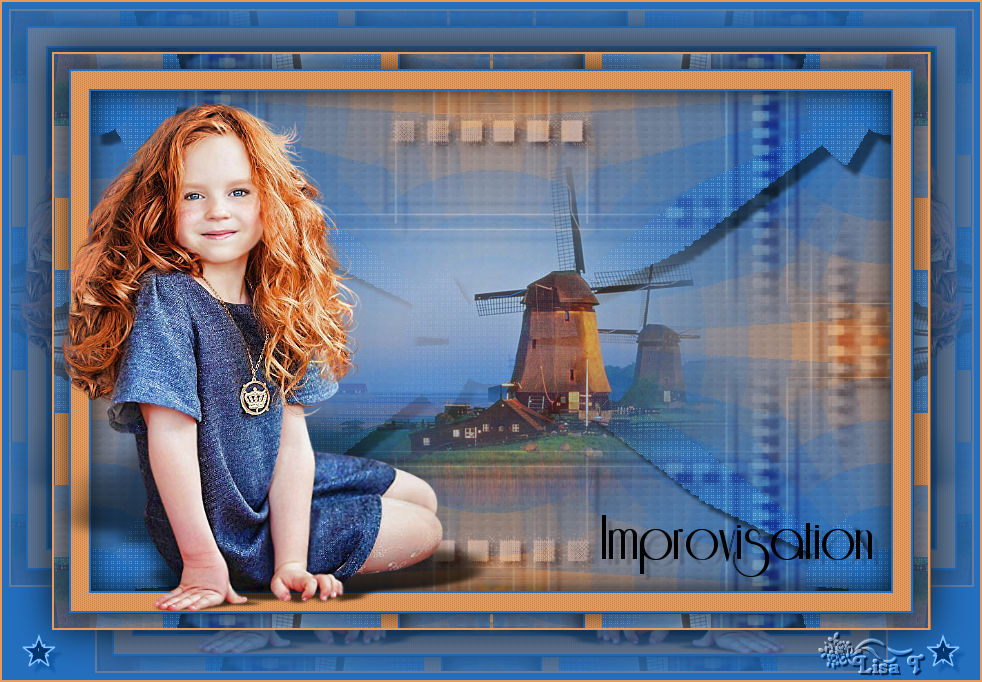
My tag with my tube and misted image
Don't hesitate to write to Animabelle
if you have any trouble with her tutorial
If you create a tag (using other tubes than those provided)
with this tutorial
and wish it to be shown, send it to Animabelle !
It will be a real pleasure for her to add it to the gallery
at the end of the tutorial


back to the boards of Animabelle’s tutorials
board 1  board 2 board 2 board
3 board
3 board 4 board 4


|