

You will find the original tutorial here :

This tutorial is a personal creation.
Any resemblance with another one would be only pure coincidence.
It is stricly forbidden to modify tubes, to change their
name or take off the matermarks,
To present them on your sites or blog,
To share them in groups,
to make a bank of images, or to use them on lucrative purposes.
 
Thank you to respect Animabelle’s work and the tubers
work.
Don’t hesitate to warn me if you have any trouble
with this translation,
and I’ll try to fix the problem as quickly as I can

 
Material

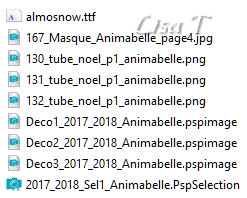
open all the tubes into PSP and duplicate them. Work with
the copies to preserve orignals
open the mask and minimize it to tray
copy / paste selection into the folder « selections » of
Corel PSP General folder
 
Filters (plugins) used
MuRa's Meister
Alien Skin Eye Candy 5: Nature
VDL Adrenaline
thank you Renée Salon for sharing your plugins ‘ page

 
use the pencil to you follow the steps
hold down left click of your mouse to grab it and move
it

 
Important
Open all images with PSP, duplicate them and close the
originals.
Never work on original images.
Animabelle works with PSPX9, I work with PSP2018
but you can follow the steps with another version of PSP
save your work often
 
realization
1
TIP 1 -> if you don’t
want to install a font -->
open it in a software as « Nexus Font » (or
any other font viewer software of your choice)
as long as both windows are opened (software and font),
your font will be available in your PSP
TIP 2 -> from PSPX4,
in the later versions of PSP the functions « Mirror » and « Flip » have
been replaced by -->
« Mirror » --> image -> mirror -> mirror horizontal
« Flip » --> image -> mirror -> mirror vertical
2
use the Dropper tool to pick up nice colors into your tube
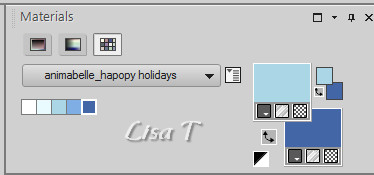
Animabelle chose these colors
color 1 -> #ffffff
color 2 -> #e9fbff
color 3 -> #abd6e6
color 4 -> 7faee4
color 5 -> #4366a6
Don't hesitate to change the colors and the blend modes
of the layers,
according to your tubes and images
3
open a new transparent image 900 * 500 pixels
prepare the materials palette -->
set color 3 as FG color and color 5 as BG color
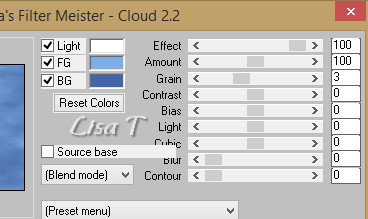
effects -> plugins -> Mura’s Meister / Cloud
4
layers -> new raster layer
flood fill white
layers -> new mask layer -> from image
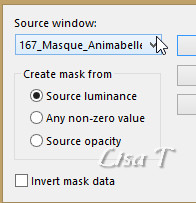
layers -> merge -> merge group
5
layers -> new raster layer
flood fill with color 2
layers -> new mask layer -> from image / use the
same mask as in step 4
layers -> merge -> merge group
image -> mirror -> mirror horizontal
image -> mirror -> mirror vertical
layers -> merge -> merge down
copy / paste as new layer « Deco1_2017_2018_Animabelle »
don’t move t
6
layers -> new raster layer
selections -> load/save selection -> from disk -> selection « 2017_2018_Sel1_Animabelle.PspSelection »
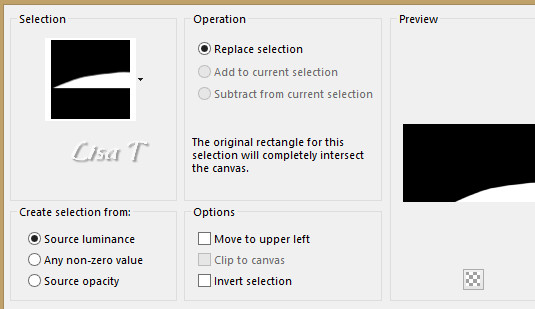
in the materials palette, set color 2 as FG color and color
4 as BG color
effects -> plugins -> Mura’s Meister / Cloud
click on « reset »

7
layers -> new raster layer
effects -> plugins -è> Alien Skin Eye Candy
5 - Nature / Snow Drift / « Large, First Flakes »
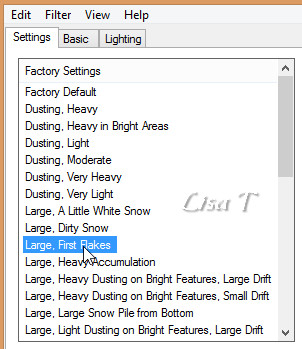
adjust -> harpness -> sharpen
keep selection active
8
effects -> plugins -è> Alien Skin Eye Candy
5 - Nature / Snow Drift / « Large, A Little
Snow »
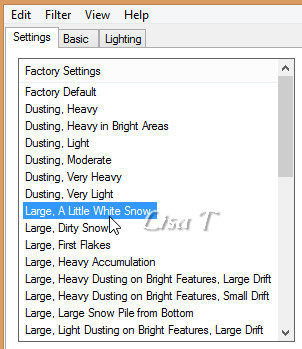
selections -> select none
effects -> image effects -> offset -> 0 / -5 /
cusstom / transparent
layers -> merge -> merge down
9
layers -> duplicate
image -> mirror -> mirror horizontal
effects -> image effects -> offset -> -110 / -20
layers -> duplicate
image -> free rotate / 15° left
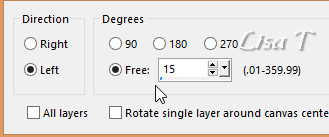
layers -> arrange -> move down TWICE
10
highlight top layer
layers -> merge -> merge down TWICE
layers -> duplicate
image -> mirror -> mirror horizontal
effects -> image effects -> offset -> 0 / 60
layers -> merge -> merge down
effects -> 3D effects -> drop shadow -> -8 / 0
/ 35 / 15 / color 5
hgighlight layer above
effects -> 3D effects -> drop shadow -> -8 / 0
/ 25 / 15 / color 5
layers -> merge -> merge down
adjust -> sharpness -> sharpen
11
copy / paste as new layer « 131_tube_noel_p1_animabelle.png »
(don’t forget to erase the watermark)
image -> resize -> untick « resize all
layers » -> 85%
adjust -> sharpness -> sharpen
blend mode of the layer -> Soft Light
effects -> image effects -> offset -> 0 / 100
layers -> duplicate
opacity of the layer : 40%
12
copy / paste as new layer « 130_tube_noel_p1_animabelle »
(don’t forget to erase the watermark)
(don’t drop any shadow, the tube is already shadowed)
effects -> image effects -> offset -> -270 / -75
copy / paste as new layer « 132_tube_noel_p1_animabelle »
(don’t forget to erase the watermark)
effects -> image effects -> offset -> 175 / -100
(don’t drop any shadow, the tube is already shadowed)
13
image -> add borders -> tick « symmetric » ->
2 pixels color 5
12 pixels color 1
1 pixel color 5
15 pixels color 1
1 pixel color 5
14
selections -> select all
image -> add borders -> tick « symmetric » -> 50
pixels color 4
selections -> invert
layers -> new raster layer
in the materials palette, set color 3 as FG color and color
5 as BG color
effects -> plugins -> Mura’s Meister -> Cloud
-> click on « Reset »

15
effects -> plugins -> VDL Adrenaline / Snowflakes
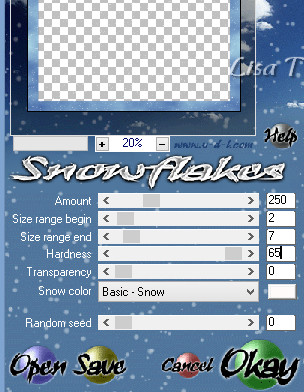
selections -> invert
effects -> 3D effects -> drop shadow -> 0/ 0
/ 100 / 55 / color #213151
selections -> select none
16
image -> add borders -> tick « symmetric » -> 2
pixels color 5
copy / paste as new layer « Deco2_2017_2018_Animabelle.pspimage »
don’t move it
copy / paste as new layer « Deco3_2017_2018_Animabelle.pspimage »
move it where you like
if you want to write another text, use the font provided
17
highlight top layer
layers -> new raster layer
apply your watermark
layers -> merge -> merge all (flatten)
file -> export -> type .jpeg optimized
your tag is finished
thank you to have followed this tutorial
 
My tag with my tubes

 
Don't hesitate to write to Animabelle if you have any trouble
with her tutorial
To be informed about her new tutorials, join her NewsLetter

If you create a tag (using other tubes than those provided)
with this tutorial
and wish it to be shown, send it to Animabelle !
It will be a real pleasure for her to add it to the gallery
at the end of the tutorial

 
back to the boards of Animabelle’s tutorials
board 1  board
2 board
2  board
3 board
3 

|