

You will find the original tutorial here
:

This tutorial is a personal creation.
Any resemblance with another one would be only pure
coincidence.
It is stricly forbidden to modify tubes, to change
their name or take off the matermarks,
To present them on your sites or blog,
To share them in groups,
to make a bank of images, or to use them on lucrative purposes.
Thank you to respect Animabelle’s work and the tubers
work.
Don’t hesitate to warn her (or me) if you have any
trouble with this tutorial.


Material
2 tubes Animabelle
1 image
2 masks Animabelle
2 decoration tubes Animabelle
1 selection


Plugins
User defined Filter
REnder
Eye Candy 5 / Impact

This tutorial was created using PSP12,
but it can be done with another version.
I created my tag with PSP 2020
use the pencil to you follow the steps


Important
Open all images in PSP, duplicate them and close
the originals.
Never work with original images to preserve them
Put the selections in the special file “selections” of “My
PSP files”
Colors used

Don't hesitate to change the colors and
the blend mode of the layers,
according to your tubes and images.
set FG to color 1 and BG to color 2 in materials palette

Step 1
open a new transparent background layer 800 * 500
pixels
in the materials palette, set color 1 as foreground
and color 2 as background
fill the layer with color 2 (white)
layers/new raster layer
fill with color 1 (green)
layers/new raster layer
fill with color 2 (white)
Step 2
layers/new mask layer/from image
choose mask gwladys_1
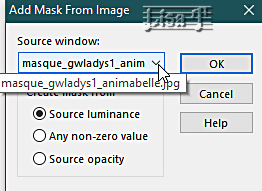
effects/user defined filter/emboss 6
layers/merge/merge group
Step 3
layers/merge/merge down
layers/new mask layer/from image
choose mask gwladys_2
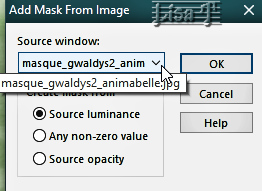
layers/merge/merge group
layers/properties/blend mode/darken

effects/3D effects/drop shadow/ 0 / 0
/ 100 / 100 / white
adjust/sharpness/sharpen more
Step 4
layers/merge/merge visible
selections/load-save selection/from disk//selection1_gwladys_animabelle
edit/cut
activate the flowers misted image
image => resize => UNtick “resize all layers” => 80%
edit/copy - back to your work - edit/paste as new layer
with the Move Tool (M), place it properly into the selection

selections/invert
edit/cut
selections/invert (again)
layers/new raster layer
effects/3D effects/cutout/color 4

selections/select none
Step 5
activate the decoration tube (deco_gwladys1_animabelle)
edit/copy - back to your work - edit/paste as new layer
effects => image effects => offset => H : -205
/ V : 0 / tick « custom » and « transparent »
effects/3D effects/drop shadow/ 3 / 3
/ 30 / 5 / color 4
layers/merge/merge all (flatten)
effects/reflection effects/rotating mirror
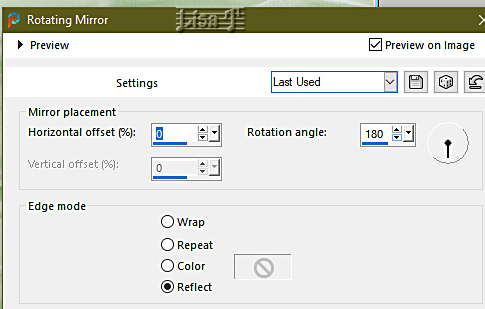
selections/select all
effects/3D effects/cutout

selections/select none
Step 6
image/add borders/check “symmetric”/2 pixels/white
image/add borders/uncheck “symmetric” /color
1
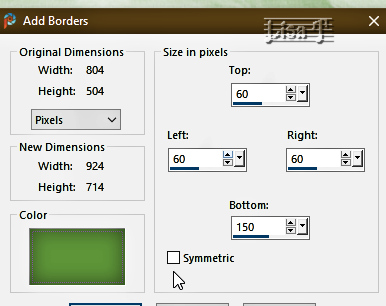
select the large border with the magic
wand
in the materials palette, prepare a linear gradient with
color 1 and 2
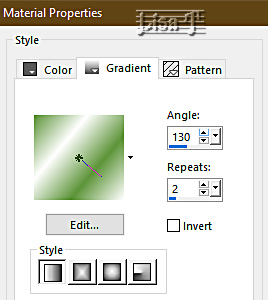
fill the selection with this gradient
Step 7
selections/promote selection to layer
effects/plugins/Render/Stones (Scaled, fore-/background)
import this plugin into Unlimited 2 (important)
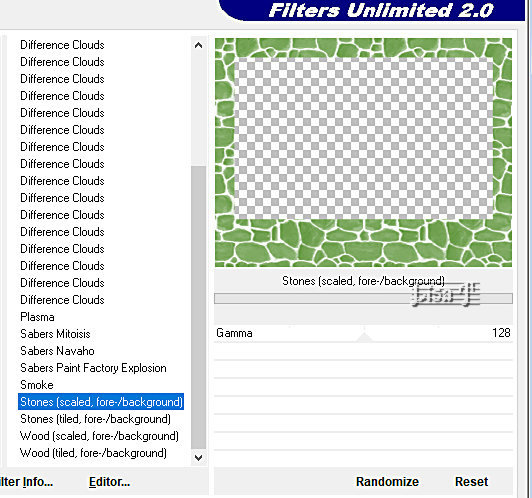
layers/properties/opacity : 17%
layers/merge/merge down
effects/3D effects/inner bevel
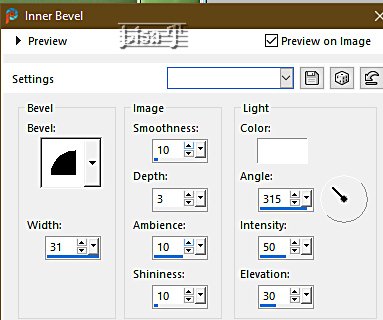
selections/select none
Step 8
activate the decoration tube “deco_gwladys2_animabelle”
edit/copy - back to your work - edit/paste as new layer
don’t move it
effects/3D effects/drop shadow/ 3 / 3 / 30
/ 5 / color 4
Step 9
activate the Girl tube
effects/plugins/Alien Skin Eye Candy 5 - Impact/Perspective
Shadow
tab « settings » => Short Perspective
- Shadow in back

effects/3D effects/drop shadow/ 0 / 0 / 80
/ 50 / color 4
move the tube as xshown on the final result (centre-right)
Step 10
activate the tulip tube
image => resize => UNtick “resize all layers” => 50%
edit/copy - back to your work - edit/paste as new layer
move it to bottom left (see final result)
effects/3D effects/drop shadow/ 0 / 0 / 80
/ 50 / color 4
activate the tube “gwladys_prenom_animabelle”
edit/copy - back to your work - edit/paste as new layer
effects => image effects => offset => H : 0
/ V : 210 / tick « custom » and « transparent »
effects/3S effects/inner bevel

effects/3D effects/drop shadow/ -26 /
13 / 15 / 5 / color 4
Step 11
layers/merge/merge all (flatten)
selections/select all
effects/3D effects/cutout (as before)
selections/select none
image/add borders/check “symmetric”/2 pixels/white
apply your signature
save as … type jpeg
resize eventually.

My tag with my tubes
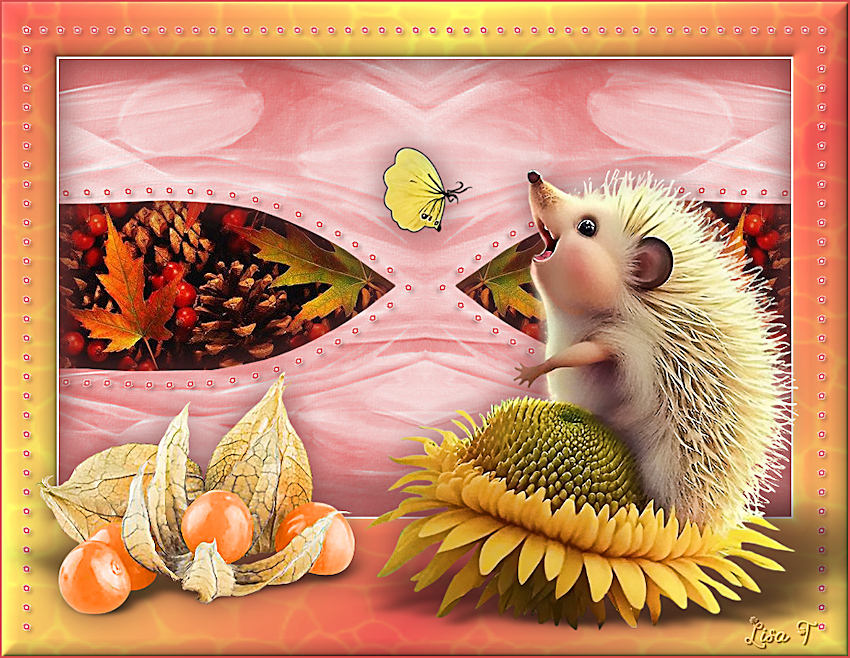
Don't hesitate to write to me if you have
any trouble with this tutorial
If you create a tag (using other tubes and colors than
those provided) with this tutorial
and wish it to be shown, send it to me !
It will be a real pleasure for me to add it to the gallery
at the end of the tutorial


back to the boards of Animabelle’s tutorials
20 tutorials on each board
board 13 => 
at the bottom of each board you will find
arrows allowing you to navigate from one board to another


|