
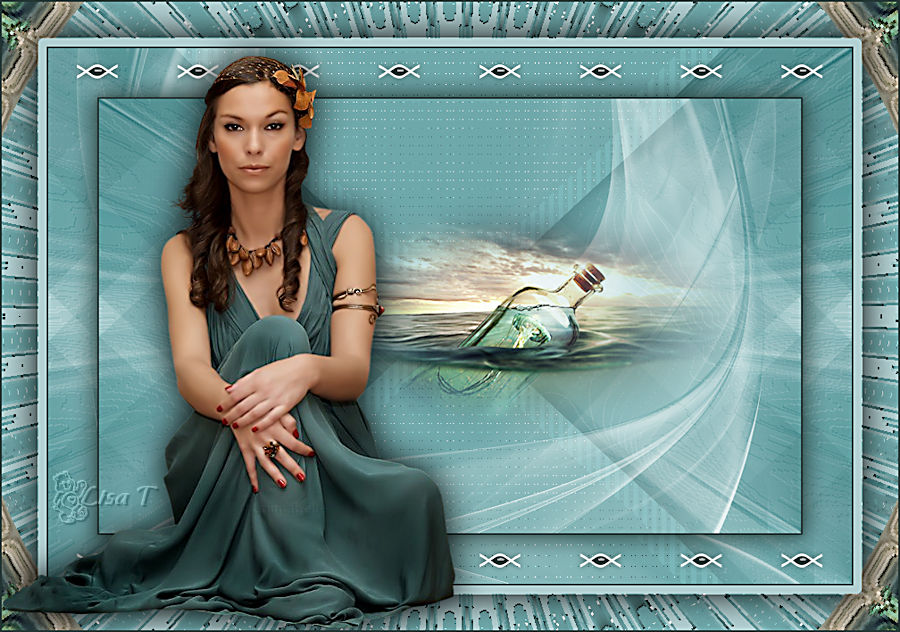
You will find the original tutorial here :

This tutorial is a personal creation.
Any resemblance with another one would be only pure
coincidence.
It is stricly forbidden to modify tubes, to change
their name or take off the matermarks,
To present them on your sites or blog,
To share them in groups,
to make a bank of images, or to use them on lucrative purposes.
 
Thank you to respect Animabelle’s work and the tubers
work.
Don’t hesitate to warn me if you have any trouble
with this translation,
and I’ll try to fix the problem as quickly as I can

Animabelle worked with PSP12 and I worked wwith PSP2020
Ultimate
you can follow this tutorial with another version of PSP,
but the result might be slightly different
 
Supplies
tubes – palette – Alpha layer (invisible selections
included) - mask

open the mask and minimize to tray
TIP 1 -> if you don’t
want to install a font -->
open it in a software as « Nexus Font » (or
other font viewer software of you choice)
as long as both windows are opened (software and font),
your font will be available in your PSP
TIP 2 -> from PSPX4,
in the later versions of PSP the functions « Mirror » and « Flip » have
been replaced by -->
« Mirror »has become --> image => mirror => mirror
horizontal
« Flip » has become --> image => mirror => mirror
vertical
 
Plugins needed
Unlimited 2
Mehdi
VM Distortion
Flaming Pear
L en K’s
Toadies
Alien Skin Eye Candy 5 / Impact
Buttons & Frames
Thank you Renée Salon for sharing you plugins page

   
Use the pencil to mark your place
along the way
hold down left click to grab and move it
 |
   
duplicate all the tubes and work with the copies
to preserve originals
save your work often in case of problems with your psp
use the Dropper tool to pick up your colors into your tubes
and misted images
Animabelle chose these :
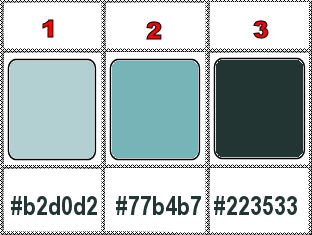
don’t hesitate to change blend modes and opacities
of the layers to match your personal colors and tubes
1
set FG to color 1 and BG to color 2 in materials palette
open the alpha layer, duplicate, close the original and
work with the copy
effects => plugins => Mehdi => Wavy Lab 1.1
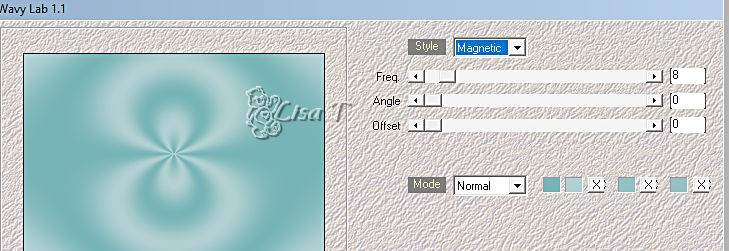
effects => plugins => Unlimited 2 => Simple => Half
Wrap
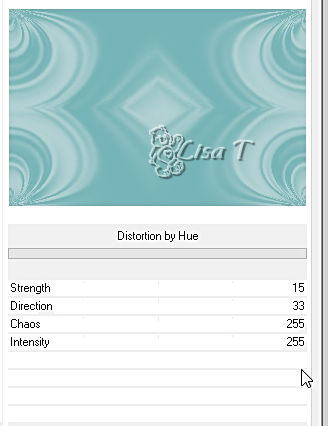
effects => plugins => Unlimited 2 => VM Distortion
/ Distortion by Hue
2
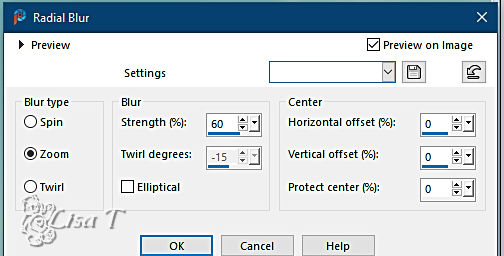
adjust => blur => radial blur
effects => plugins => Flaming Pear => Boss
Emboss
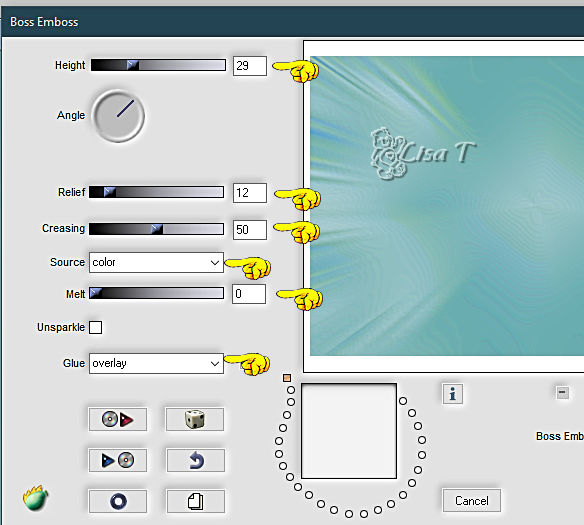
if you don’t like the result try other settings,
like this
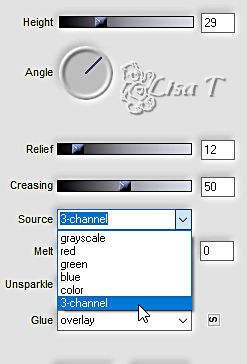
test and choose what you like best
adjust => sharpness => sharpen more
3
selections => load-save selection => from alpha channel
=> selection # 1
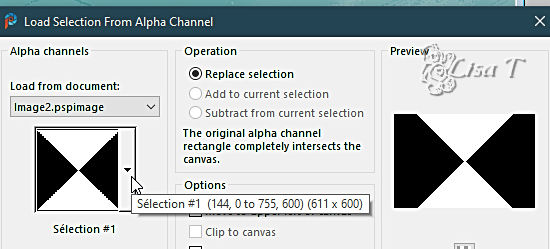
selections => promote selection to layer
flood fill selection with color 2
selections => select none
effects => plugins => L en K’s => Zitah
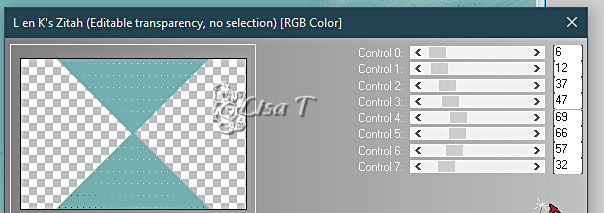
apply once more
4
layers => duplicate
highlight layer below (original)
effects => plugins => Unlimited 2 => Toadies => Look,
Butthead,a TV !...What are You ?...
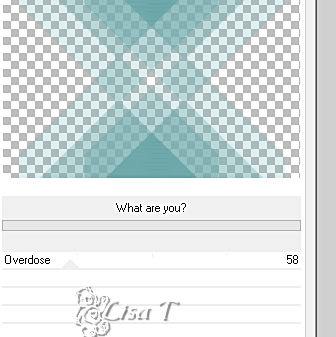
blend mode of the layer : Multiply / opacity : 60%
effects => image effects => seamless tiling
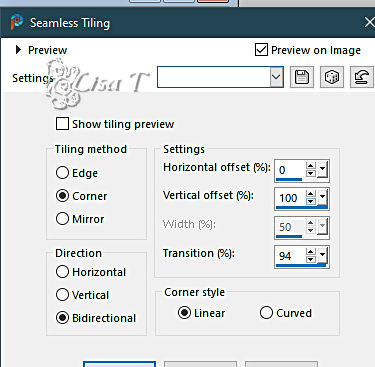
5
highlight top layer
effects => plugins => L en K’s => Katharina
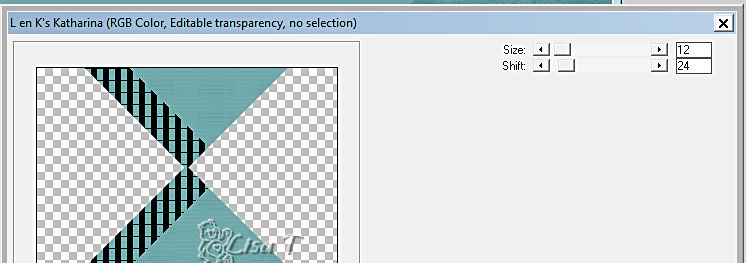
effects => reflection effects => rotating Mirror
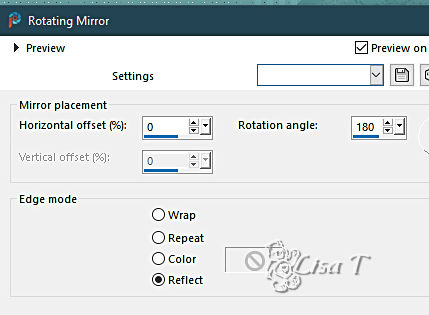
effects => 3D effects => drop shadow => 0 / 0
/ 40 / 60 / color 3 or black
6
layers => new raster layer
flood fill white
layers => new mask layer => from image
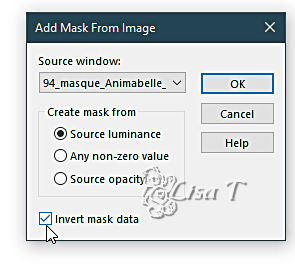
layers => merge => merge group
blend mode of the layer : Normal / opacity : 80%
7
copy / paste the misted tube as new layer
image => resize => UNtick « resize all layers » => 80%
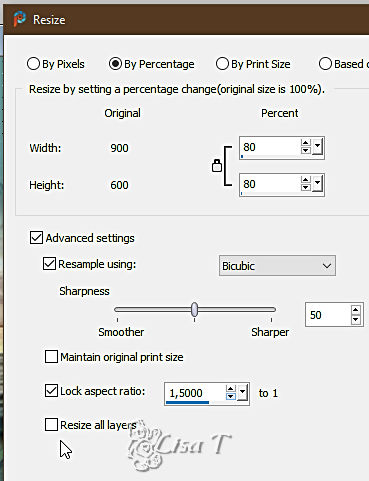
place properly (see final result)
adjust => sharpness => unsharp mask
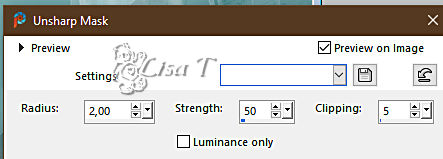
8
image => add borders => tick « symmetric » => 2
px color 3
layers => duplicate
image => resize
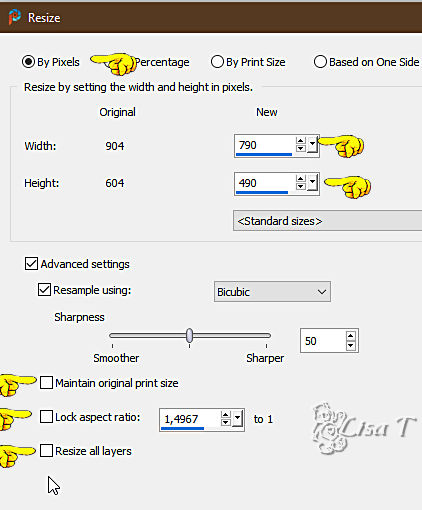
effects => 3D effects => drop shadow => 0 / 0
/ 80 / 40 / color 3
9
highlight bottom layer
image => mirror => mirror horizontal
copy / paste the decoration tube as new layer
layers => new raster layer
selections => load-save selection => from alpha channel
=> selection # 2
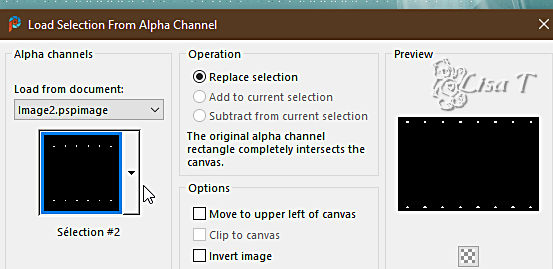
flood fill selection with color 3
effects => plugins => Alien Skin Eye Candy 5 Impact
/ Glass
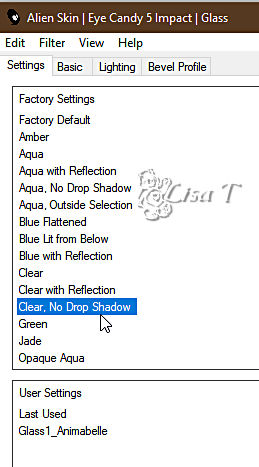
selections => select none
layers => arrange => move down
10
highlight top layer
layers => merge => merge down
effects => 3D effects => drop shadow => 0 / 0
/ 80 / 10 / color 3
image => add borders => tick « symmetric » => 50
px color 1
select this border with the Magic Wand tool (tick « inside »)
effects => plugins => Unlimited 2 => Buttons & Frames
/ Kaleidoscope Frame (Rectangular)
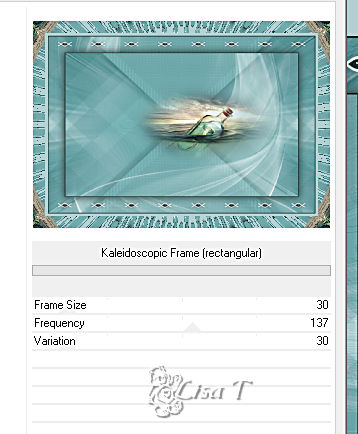
selections => invert
selections => modify => expand => 10 px
effects => 3D effects => drop shadow => 0 / 0
/ 100 / 60 / black
selections => select none
11
copy / paste the character tube as new layer
place as shown on final result
effects => 3D effects => drop shadow => 0 / 0
/ 100 / 60 / black
image => add borders => tick « symmetric » => 2
px color 3
12
apply your watermark or signature on a new layer
write your licence number if you used a licenced tube
layers => merge => merge all (flatten)
file => save your work as... type .jpeg optimized
   
Another version with my tube and misted image
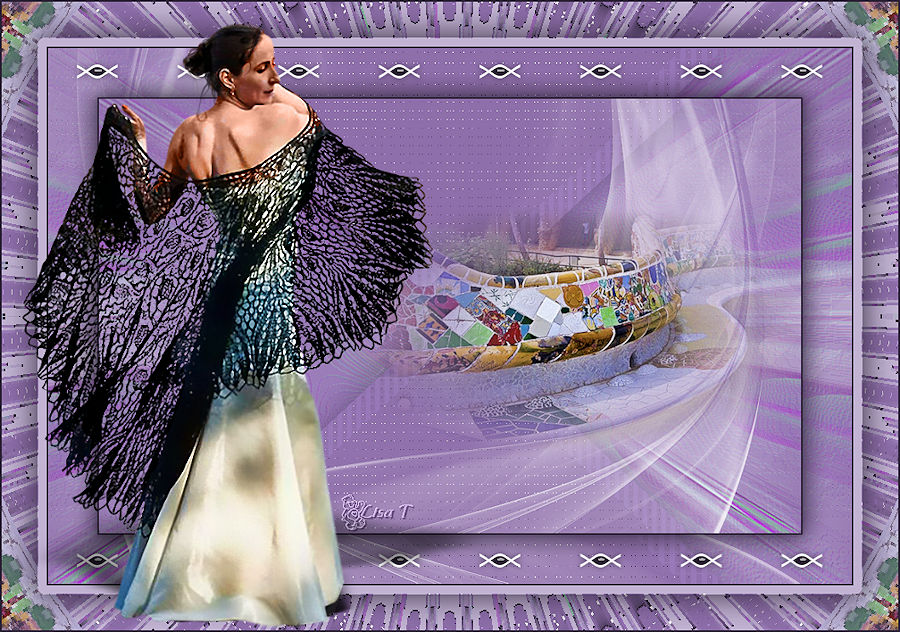
 
Don't hesitate to write to me if you have any trouble
with this tutorial
If you create a tag (using other tubes than those provided)
with this tutorial
and wish it to be shown, send it to Animabelle !
It will be a real pleasure for her to add it to the gallery
at the end of the tutorial

 
back to the boards of Animabelle’s tutorials
20 tutorials on each board
board 11 => 
at the bottom of each board you will find the arrows
allowing you to navigate from one board to another


|