

You will find the original tutorial here :

This tutorial is a personal creation.
Any resemblance with another one would be only pure
coincidence.
It is stricly forbidden to modify tubes, to change
their name or take off the matermarks,
To present them on your sites or blog,
To share them in groups,
to make a bank of images, or to use them on lucrative purposes.

Thank you to respect Animabelle’s work and the tubers
work.
Don’t hesitate to warn me if you have any trouble
with this translation,
and I’ll try to fix the problem as quickly as I can


Material
tubes - preset - mask - selections

duplicate tubes and work with the originals
place the selections into the dedicated folder of
Corel PSP general folder
open the mask and minimize it to tray
TIP 1 -> if you don’t
want to install a font -->
open it in a software as « Nexus Font » (or
other font viewer software of you choice)
as long as both windows are opened (software and font),
your font will be available in your PSP
TIP 2 -> from PSPX4,
in the later versions of PSP the functions « Mirror » and « Flip » have
been replaced by -->
« Mirror » --> image -> mirror -> mirror horizontal
« Flip » --> image -> mirror -> mirror vertical

Filters (plugins) used
Alien Skin - Eye Candy 5: Impact
MuRa's Meister
[AFS IMPORT]
Toadies
Filters Unlimited 2.0
It@lian Editors Effect
Mock
Graphics Plus
MuRa's Seamless
thank you Renée Salon for sharing your plugins ‘ page
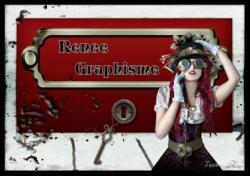
 
Use the pencil to follow the steps
hold down left click to grab it and move it
 |
 
1
open the material, duplicate the tubes, wordk with
the copie to preserve original images
save your work often
2
pick up 5 nice colors in your tubes
Animabelle chose these
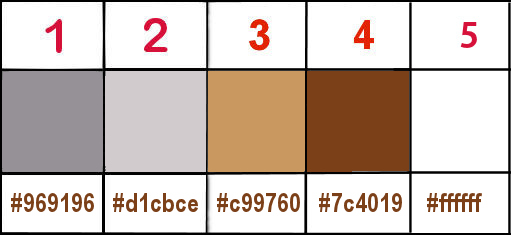
don’t hesitate to change blend modes and opacities
of the layers to match your colors
3
double click on the preset to import it
open a new trasnparent image 800 * 500 pixels
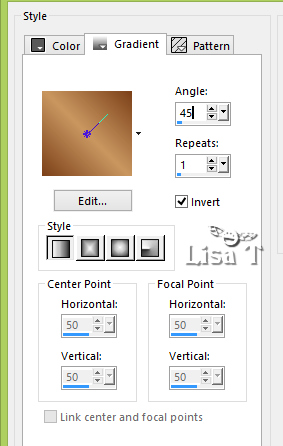
in the materials palette, set colors 3 and 4 as FG and
BG colors
flood fill layer with a linear gradient
layers - duplicate
layers -> new mask layer -> from image -> mask
1 provided / untick « invert mask data »
layers -> merge -> merge group
blend mode of the layer : Dodge
effects -> edge effects -> enhance
effects -> 3 d effects -> drop shadow -> 5 / 5
/ 80 / 5 / black
4
edit -> copy - > copy special -> copy merged
enable selection toll -> custom selection

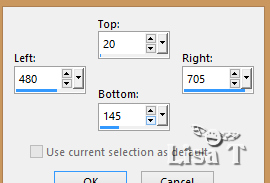
layers -> new raster layer
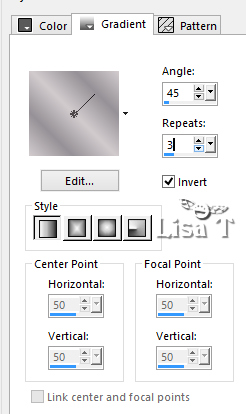
flood fill selection with the following gradient, colors
1 and 2
5
selections -> modify -> contract -> 10 px
edit -> paste into selection
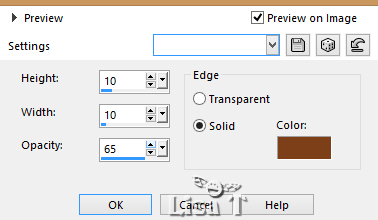
effects -> 3D effects -> buttonize color 4
selections -> modify -> contract -> 10 px
effects -> edge effects -> enhance
effects -> plugins -> Alien Skin Eye Candy 5 / Impact
-> Preset Clear
selections -> select none
effects -> 3 D effects -> drop shadow -> 5 / 5
/ 80 / 20 / black
6
layers - duplicate
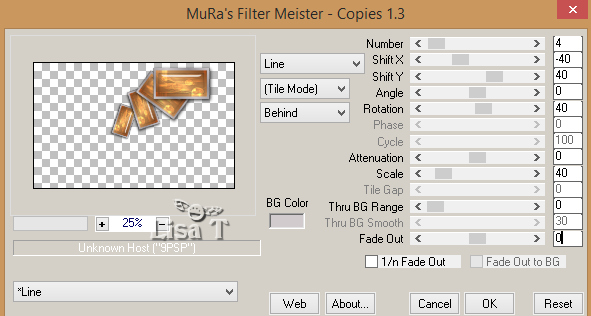
effects -> plugins -> Mura’s Meister / Copies
layers -> arrange -> move down
blend mode of the layer : Hard Light - opacity : 38%
layers -> merge -> merge visible
7
selections -> load-save selection -> from disk -> selection « Sel1_Cookie_Animabelle »
adjust -> sharpness -> sharpen
effects -> 3 d effects -> drop shadow -> 8 / 8
/ 40 / 15 / color 4
selections -> select none
8
highlight bottom layer (merged)
enable selection toll -> custom selection
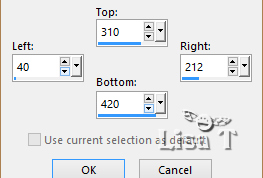
selections -> promote selection to layer
effects -> plugins -> [AFS Import] / sqborder2
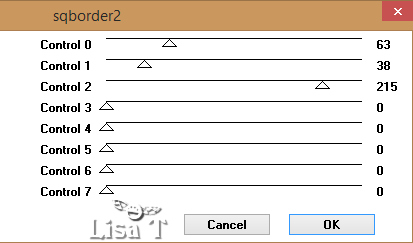
selections -> select none
9
effects -> plugins -> Toadies -> Weaver / default
setting : 59 / 48 / 222
blend mode of the layer : Multiply
layers -> duplicate
effects -> reflection effects -> feedback
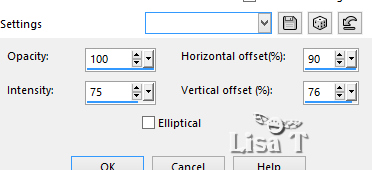
10
enable selection toll -> custom
selection
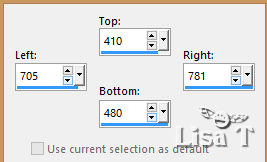
edit -> cut
selections -> select none
11
image -> add border -> tick « symmetric » -> ...
2 px white
15 px color 4
2 px white
30 px color 2
select the last borders with the magic wand tool
effects -> plugins -> It@lian Editors Effect / Effetto
Fantasma : 26 / 37
effects -> edge effects -> enhance
selections -> promote selection to layer
effects -> plugins -> Mock / Bevel : 31
selections -> select none
13
image -> add border -> tick « symmetric » -> 1
px black
image -> add border -> tick « symmetric » -> 40
px white
select the last borders with the magic wand tool
effects -> reflection effects -> Kaleidoscope
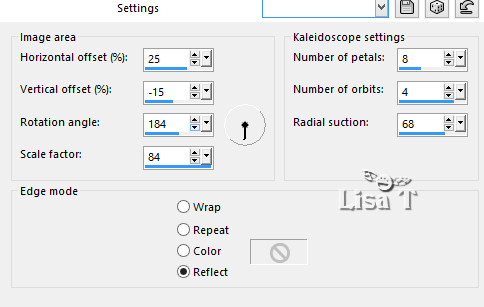
adjust -> blur -> gaussian blur / 40
14
selections -> promote selection to layer
effects -> plugins -> Graphic Plus / Cross Shadow
/ default settings : 50 / 50 / 50 / 50 / 50 / 50 /
128 / 128
blend mode of the layer : Luminance (Legacy)
selections -> select none
15
copy / paste as new layer your charcter tube / don’ forget
to erase the tuber’s watermar
image -> resize -> untick « resize all
layers » -> 80%
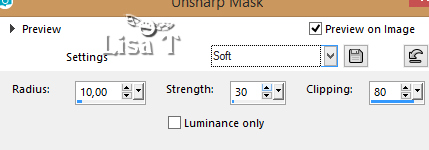
adjust -> sharpness -> unsharp mask
move the tube as shown on final result
16
layers -> duplicate
highlight layer below (original)
adjust -> blur -> gaussian blur / 20
blend mode of the layer : Multiply
image -> add border -> tick « symmetric » -> 2
px color 4
17
layers -> new raster layer
selections -> load-save selection -> from disk -> selection « Sel12Cookie_Animabelle »
flood fill selection with color 5
effects -> plugins -> Graphic Plus / Cross Shadow
/ default settings
selections -> select none
18
effects -> plugins -> Mura’s Seamless / Emboss
at Alpha / default settings
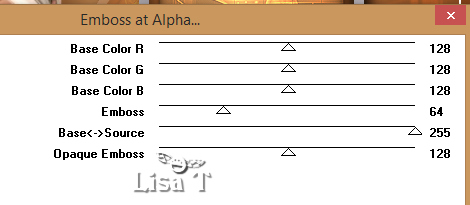
opacity of the layer 80%
optional : blend mode of the layer : Luminance
(Legacy)
19
layers -> new raster layer
apply your watermark or signature
layers -> merge -> merge all (flatten)
file -> save as.... type .jpeg optimized
 
Don't hesitate to write to Animabelle if you have any
trouble with her tutorial
To be informed about her new tutorials, join her NewsLetter
on her home page

If you create
a tag (using other tubes than those provided) with this
tutorial
and wish it to be shown, send it to Animabelle !
It will be a real pleasure for her to add it to the gallery
at the end of the tutorial

My version with one of my tubes
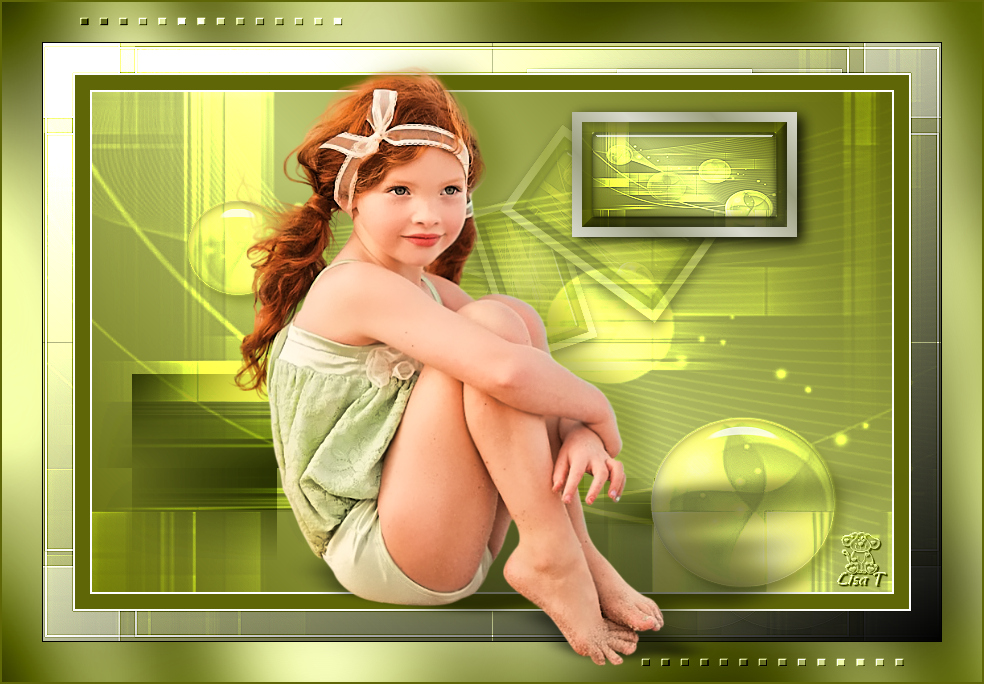

back to the boards of Animabelle’s tutorials
board 1 board 2 board 2 board
3 board
3 board 4 board 4

|