

You will find the original tutorial here
:

This tutorial is a personal creation.
Any resemblance with another one would be only pure coincidence.
It is stricly forbidden to modify tubes, to change their
name or take off the matermarks,
To present them on your sites or blog,
To share them in groups,
to make a bank of images, or to use them on lucrative purposes.

Thank you to respect Animabelle’s work and the tubers
work.
Don’t hesitate to warn me if you have any trouble
with this translation,
and I’ll try to fix the problem as quickly as I can

Animabelle works with PSPX9 and I work with PSP 2019
you can follow this tutorial with another version of PSP,
but the result might be slightly different

Material
selection - tubes and decorations - 4 selections - mask
- palette

TIP 1 -> if
you don’t
want to install a font -->
open it in a software as « Nexus Font » (or
other font viewer software of you choice)
as long as both windows are opened (software and font),
your font will be available in your PSP
TIP 2 -> from PSPX4,
in the later versions of PSP the functions « Mirror » and « Flip » have
been replaced by -->
« Mirror »has become --> image => mirror => mirror
horizontal
« Flip » has become --> image => mirror => mirror
vertical

Filters (plugins)
used
Alien Skin Eye Candy 5: Impact
Toadies
Tramages
******************
< I.C.NET Software > -
Filters Unlimited 2.0
VM Textures
Toadies

 
Use the pencil to follow the steps
hold down left click to grab and move it
 |
 
1
duplicate the tubes and wortk with the copies
double click on the preset to install (or import)
place the selections into the folder « selections » of
Corel PSP general folder
open the mask and minimize to tray
2
pick up 4 nice colors into your tubes and decorations
Animabelle chose these
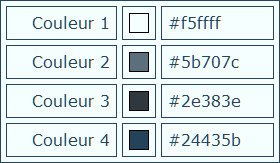
don’t hesitate to change the blend modes and opacities
of the layers if necessary
3
set colors 1 and 2 as FG and BG colors
open a new transparent image 850 * 500 px
flood fill with the following radial gradient
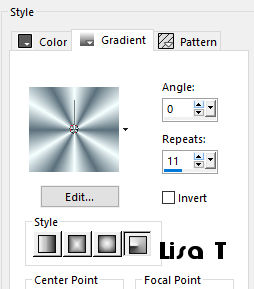
adjust => blur => gaussian blur / 20
4
layers => duplicate
effects => plugins => Unlimited 2 => VM Textures
/ Papercut
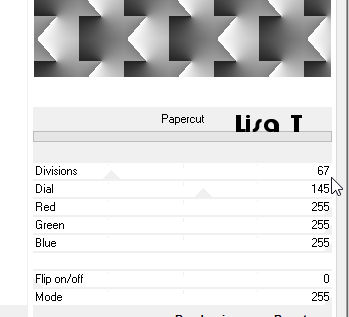
blend mode of the layer : Overlay - opacity :
65%
effects => reflection effects => rotating mirror
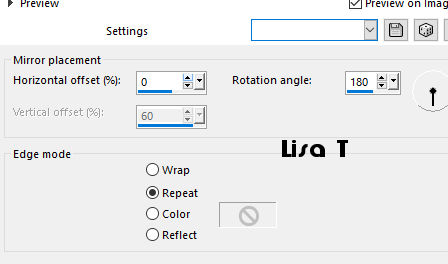
layers => merge => merge down
5
layers => duplicate
effects => plugins => Unlimited 2 => Toadies
/ Blast’n Blur
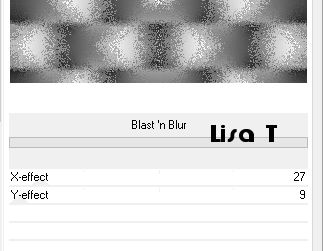
opacity of the layer : 75%
6
layers => new raster layer
flood fill with color 2
effects => plugins => Unlimited 2 => Toadies
/ *Sucking Toad*Bevel III
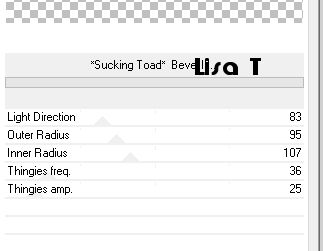
7
effects => image effects => seamless tiling
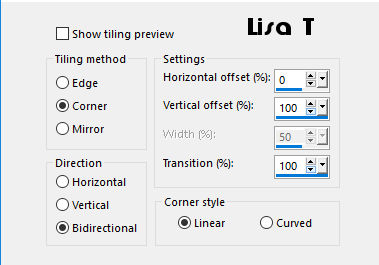
blend mode of the layer : Soft Light
effects => 3D effects => drop shadow => 8 / 8
/ 100 / 30 / black
effects => 3D effects => drop shadow => -8 / -8
/ 100 / 30 / black
layers => merge => merge visible
adjust => sharpness => high pass sharpen
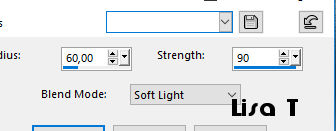
8
layers => new raster layer
flood fill with color 4
layers => new mask layer => from image
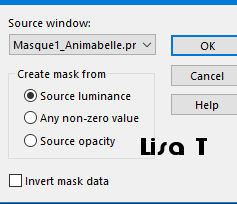
layers => merge => merge group
9
selections => load-save selection => from disk => selection « Sel1_Clemence_Animabelle »
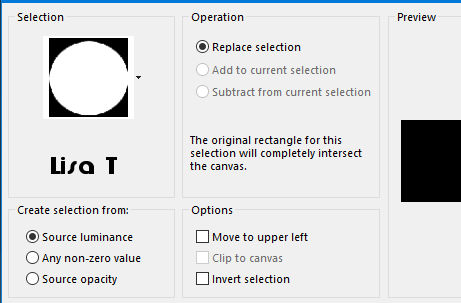
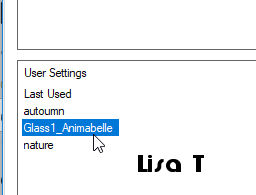
effects => plugins => Alien Skin Eye Candy 5 Impact
/ Glass
select the preset provided
selections => select none
layers => duplicate
image => mirror => mirror vertical
layers => merge => merge down
layers => merge => merge down
10
highlight layer below « merged »
selections => load-save selection => from disk => selection « Sel2_Clemence_Animabelle»
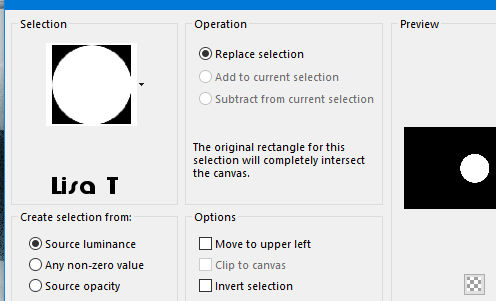
adjust => blur => gaussian blur / 15
11
selections => promote selection to layer
adjust => add-remove noise => add noise
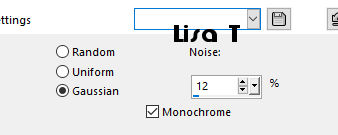
selections => select none
effects => 3D effects => drop shadow => 0 / 0
/ 100 / 30 / color 3
effects => image effects => seamless tiling / same
settings as before

12
layers => duplicate
highlight layer below « promoted selection »
effects => plugins => Toadies => What Are You ?...
/ 33 / 33
note : Do not use this plugin with Unlimited !!
the result would be different
blend mode of the layer : Multiply
layers => duplicate
effects => image effects => seamless tiling / default
settings
13
highlight top layer
layers => new raster layer
selections => load-save selection => from disk => selection « Sel3_Clemence_Animabelle»
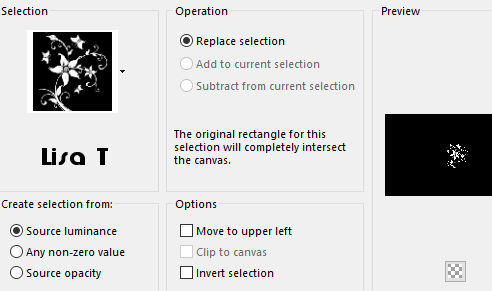
flood fill selection with color 4
selections => select none
effects => 3D effects => drop shadow => 1 / 1
/ 100 / 8 / white
effects => 3D effects => drop shadow => 6 / 6
/ 35 / 8 / color 3
effects => image effects => seamless tiling
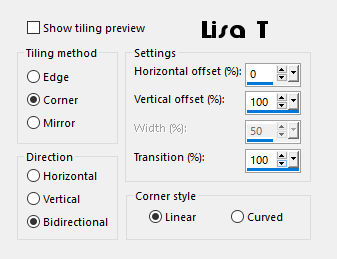
14
highlight bottom layer
layers => new raster layer
flood fill selection with color 4
effects => plugins => Tramages => Tow The Line
=> default settings => 80 / 54 / 48 / 9
blend mode of the layer : Soft light - opacity : 45%
layers => merge => merge all (flatten)
15
image => add borders => tick « symmetric » => ...
1 px color 3
20 px color 1
1 px color 4
selections => select all
image => add borders => tick « symmetric » => 40
px color 1
effects => 3D effects => drop shadow => 9 / 9
/ 75 / 35 / color 3
selections => select none
16
copy / paste as new lqyer « Deco1_Clemence_Animabelle »
don’t move it
optional : blend mode of the layer : Screen
effects => 3D effects => drop shadow => 4 / 4
/ 30 / 0 / color 4
17
layers => new raster layer
selections => load-save selection => from disk => selection « Sel4_Clemence_Animabelle»
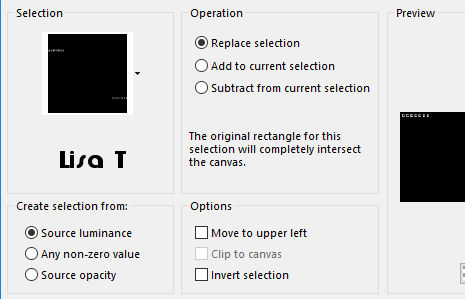
flood fill selection TWICE with color
4
selections => select none
effects => 3D effects => drop shadow => 4 / 4
/ 30 / 2 / color 4
18
copy / paste as new layer « 117_enfant_p2_animabelle »
image => resize => untick « resize all
layers » => 55%
move to the left (or elsewhere as you like)
layers => duplicate
highlight layer below (the original)
adjust => blur => gaussian blur / 15
blend mode of the layer : Multiply
image => add borders => tick « symmetric » => 1
px color 3
19
layers => new raster layer
apply your watermark opr signature
file => save as... type .jpef optimized
 
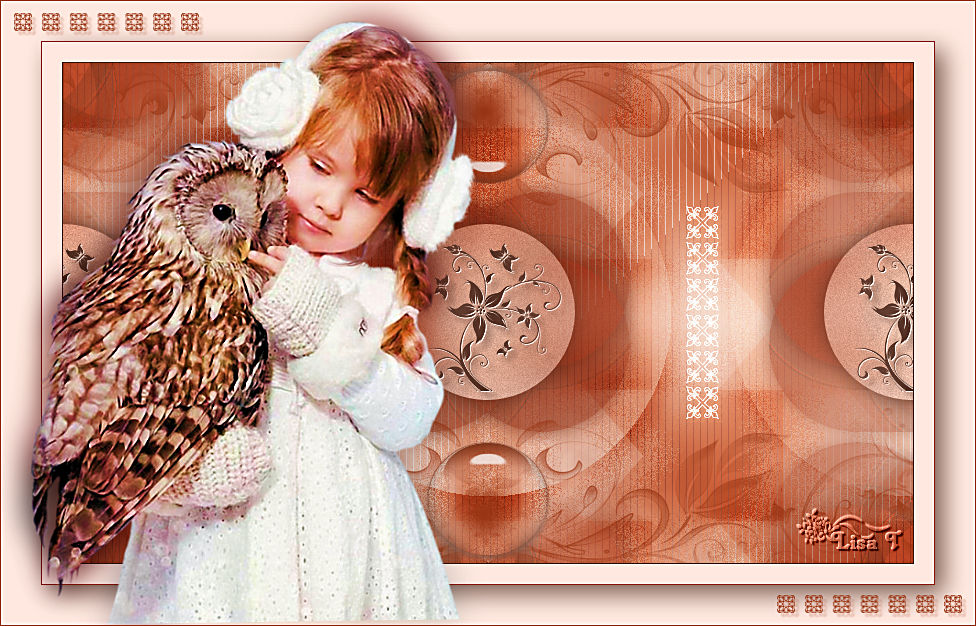
My creation with my tube
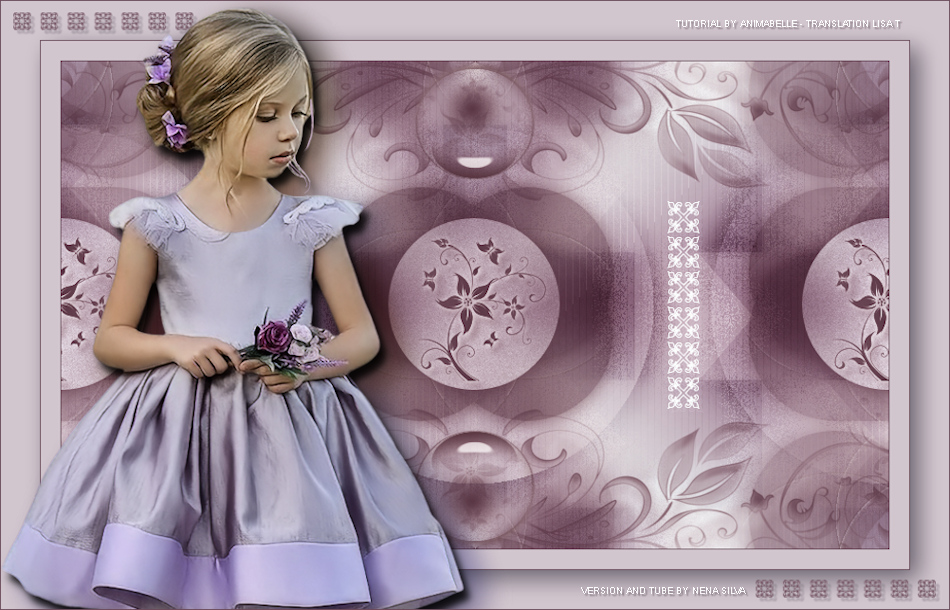
Created by Nena
Don't hesitate to write to Animabelle
if you have any trouble with her tutorial
If you create a tag (using other tubes than those provided)
with this tutorial
and wish it to be shown, send it to Animabelle !
It will be a real pleasure for her to add it to the gallery
at the end of the tutorial


back to the boards of Animabelle’s tutorials
board 1 board 2 board 2 board
3 board
3 board 4 board 4

|