

You will find the original tutorial here
:

This tutorial is a personal creation.
Any resemblance with another one would be only pure coincidence.
It is stricly forbidden to modify tubes, to change their
name or take off the matermarks,
To present them on your sites or blog,
To share them in groups,
to make a bank of images, or to use them on lucrative purposes.

Thank you to respect Animabelle’s work and the tubers
work.
Don’t hesitate to warn me if you have any trouble
with this translation,
and I’ll try to fix the problem as quickly as I can=

Animabelle works with PSPX9 and I work with PSP 2019
you can follow this tutorial with another version of PSP,
but the result might be slightly different

Supplies
selections - preset Flexify 2 - tubes - mask - plugin « Fantastic
Machine »

place the selection into the dedicated
folder of Corel Paint Shop Pro
TIP 1 -> if you don’t
want to install a font -->
open it in a software as « Nexus Font » (or
other font viewer software of you choice)
as long as both windows are opened (software and font),
your font will be available in your PSP
TIP 2 -> from PSPX4,
in the later versions of PSP the functions « Mirror » and « Flip » have
been replaced by -->
« Mirror »has become --> image => mirror => mirror
horizontal
« Flip » has become --> image => mirror => mirror
vertical

Plugins needed
Mehdi
Fantastic Machine
Filter Factory Gallery J
MuRa's Seamless
Filters Unlimited 2.0
Flaming Pear
Carolaine and Sensibility
Alien Skin Eye Candy 5: Impact
Simple
L en K
MuRa's Meister
Thank you Renée Salon for sharing your plugins page


Use the pencil to mark your place
along the way
hold down left click to grab and move it
 |

1
duplicate all the tubes and work with the copies to preserve
originals
save your work often in case of problems with your psp
open the mask and minimize to tray
2
use the Dropper tool to pick up your colors into your tubes
and misted images
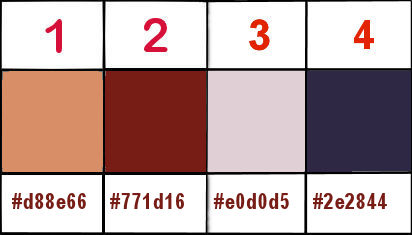
Animabelle chose these :
color 1 => #d88e66
color 2 => #771d16
color 3 => #e0d0d5
color 4 => #2e2844
don’t hesitate to change blend modes and opacities
of the layers to match your personal colors and tubes
3
open a new transparent image 800 * 500 px
effects => plugins => Mehdi => Wavy Lab 1.1 => colors
2 / 1 / 4
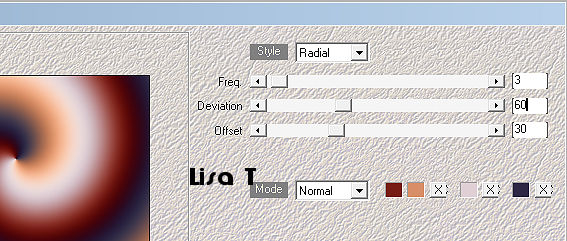
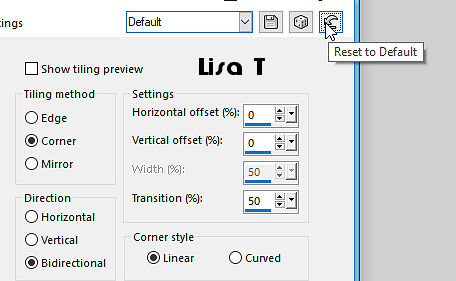
effects => image effects => seamless tiling => default
settings
4
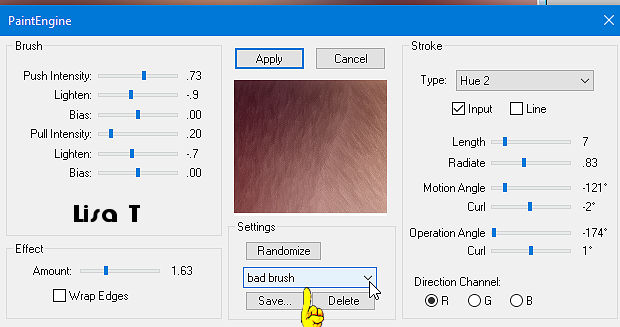
effects => plugins => Fantastic Machine / Paint
Engine
5
layers => duplicate
effects => plugins => Filter Factory Gallery J /
Circle Cell... / default settings / 11 / 212
effects => image effects => seamless tiling
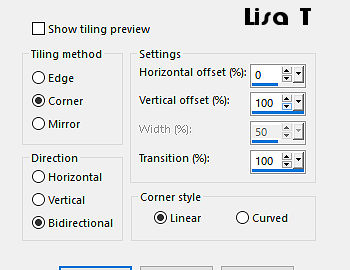
opacity of the layer : 40%
effects => edge effects => enhance
layers => merge => merge down
6
layers => new raster layer
flood fill selection with color 3 (or white)
layers => new mask layer => from image = mask « VSP234 » (dont
tick the box at the bottom)
layers => merge => merge group
blend mode of the layer : overlay / opacity : 70%
7
effects => image effects => seamless tiling => default
settings
effects => plugins => Mura’s Seamless => Emboss
at Alpha => default settings
layers => merge => merge down
8
layers => duplicate
effects => plugins => Unlimited 2 => Buttons & Frames
=> 3D Glass Frame 1 / default settings
9
selections => select all
selections => modify => contract => 48 px
hit the DELETE key of your keyboard
adjust => sharpness => sharpen more
10
image => resize => untick « resize all layers » => 65%
effects => plugins => Flaming Pear => Flexify
2
click on the red arrow to find the preset provided into
the material floder
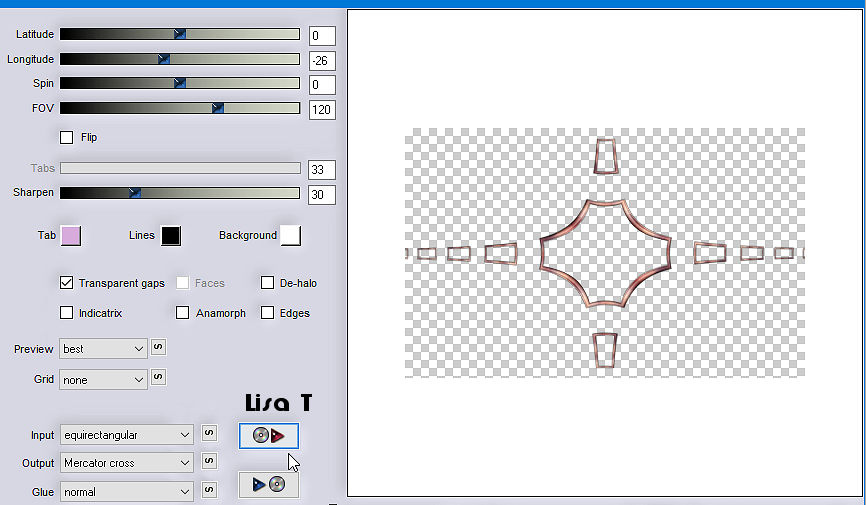
11
selections => load-save selection => from alpha channel
=> selection # 1
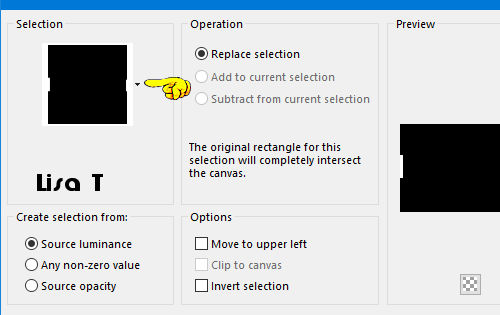
hit the DELETE key of your keyboard
selections => select none
12
layers => duplicate
highlight layer « copy of Raster 1 » (just
below)
adjust => blur => gaussian blur / 10
blend mode of the layer : Multiply
13
highlight bottom layer «Raster 1 »
effects => plugins => Carolaine and Sensibility
=> CS-LDots => default settings / 50 / 3 / 2
copy / paste the misted image as new layer
place it in the middle of the tag
14
highlight bottom layer «Raster 1 »
selections => load-save selection => from alpha channel
=> selection # 2
selections => promote selection to layer
layers => arrange => move up
15
effects => plugins => Alien Skin Eye Candy 5 Impact
/ Glass
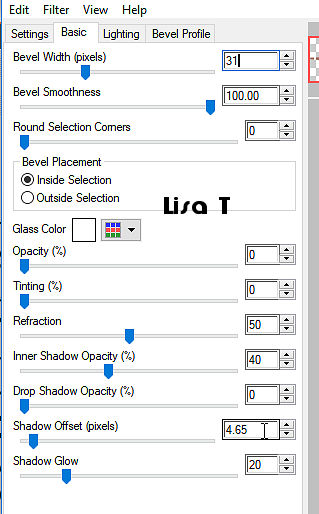
adjust => sharpness => sharpen
selections => select none
16
layers => duplicate
highlight layer underneath « promoted selection »
effects => plugins => Alien Skin Eye Candy 5 Impact
/ « Backlight »
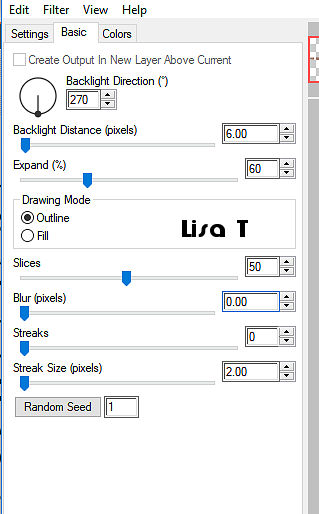
blend mode of the layer : Soft Light
translator’s note : I colorized with the Hue and Saturation values
of color 3 (243 / 53)
17
highlight « Raster 2 » (misted landscape)
selections => load-save selection => from alpha channel
=> selection # 3
selections => promote selection to layer
layers => arrange => bring to top
effects => plugins => Alien Skin Eye Candy 5 Impact
/ Glass / same settings as before
selections => select none
effects => 3D effects => drop shadow => 0 / 0
/ 60 / 30 / black or color 2
layers
=> merge => merge visible
18
image => add borders => tick « symmetric » => 1
px color 3
selections => select all
image => add borders => tick « symmetric » => 30
px color 3
selections => invert
effects = > plugins => Simple => Quick Tile
19
adjust => blur => radial blur
xxxx 7 bis xxxxxxxxxxxx
effects => texture effects => Weave / color 2
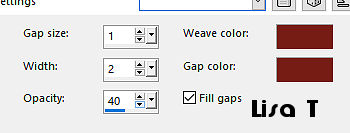
20
selections => invert
effects => 3D effects => drop shadow => 0 / 0
/ 80 / 35 / black
selections => select none
image => add borders => tick « symmetric » => 1
px color 3
21
selections => select all
image => add borders => tick « symmetric » => 50
px color 3
selections => invert
effects = > plugins => Simple => Half Wrap
adjust => blur => gaussian blur / 50
22
effects => plugins => L en K => Adonis
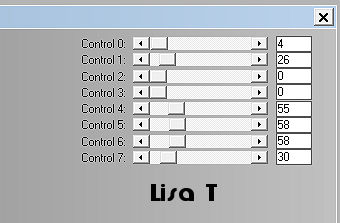
adjust => sharpness => sharpen
23
selections => promote selection to layer
effects => plugins => Unlimited 2 => Buttons
and Frames / Glass Frame 1 / 64 / 128
opacity of the layer : 64%
layers => arrange => move down
24
selections => invert
effects => 3D effects => drop shadow => 0 / 0
/ 80 / 55 / black or color 2
selections => select none
25
copy / paste the woman tube as new layer
don’t forget to erase the watermark
image => resize => untick « resize all layers » => 80%
adjust => sharpness => sharpen
move the tube bottom left
26
effects => plugins => Alien Skin Eye Candy 5 Impact
/ Perspective Shadow
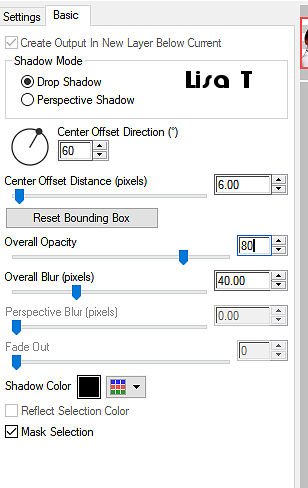
27
highlight bottom layer
layers => new raster layer
selections => load-save selection => from alpha channel
=> selection # 2
flood fill selection with color 2
effects => plugins => Alien Skin Eye Candy 5 Impact
/ Glass / don’t change the settings
selections => select none
28
effects => plugins => Mura’s Meister => Copies
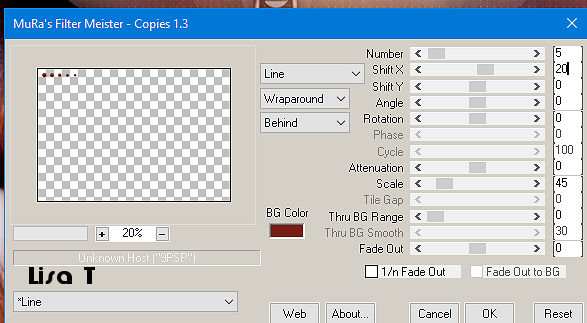
effects => 3D effects => drop shadow => 0 / 0
/ 60 / 15 / black or color 2
29
effects = > plugins => Simple => Top Left Mirror
image => add borders => tick « symmetric » => 1
px color 4 (or other of your choice)
30
layers => new raster layer
apply your watermark or signature
edit => save your work as... type .jpeg optimized

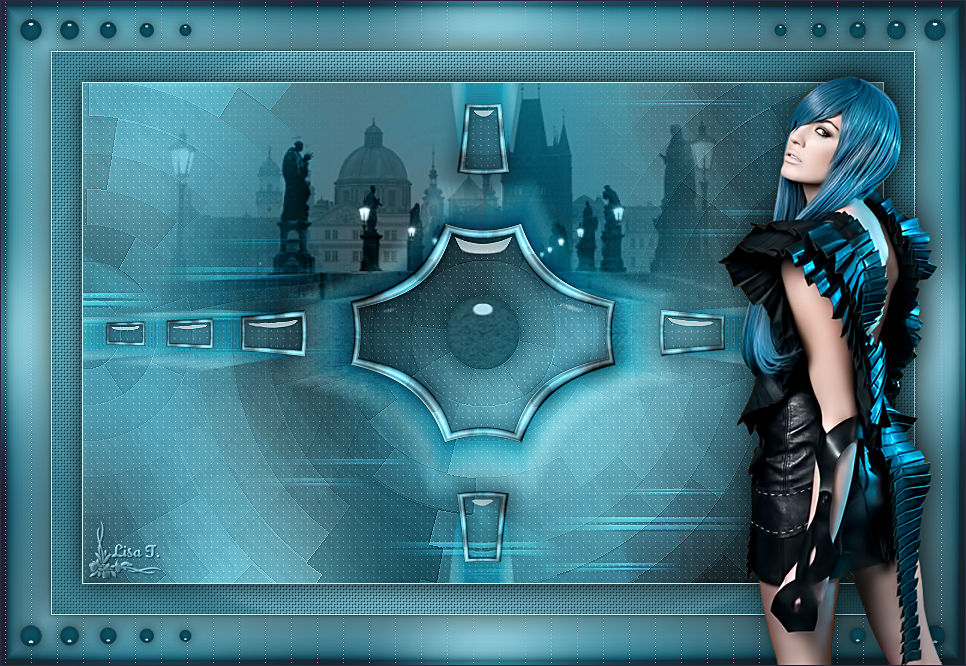
My tag with Cibi's tubes
Don't hesitate to write to Animabelle
if you have any trouble with her tutorial
If you create a tag (using other tubes than those provided)
with this tutorial
and wish it to be shown, send it to Animabelle !
It will be a real pleasure for her to add it to the gallery
at the end of the tutorial


back to the boards of Animabelle’s tutorials
board 1  board
2 board
2 board
3 board
3 board
4 board
4 board
5 board
5 

|