

You will find the original tutorial here :

This tutorial is a personal creation.
Any resemblance with another one would be only pure coincidence.
It is stricly forbidden to modify tubes, to change their name or take off the matermarks,
To present them on your sites or blog,
To share them in groups,
to make a bank of images, or to use them on lucrative purposes.

Thank you to respect Animabelle’s work and the tubers work.
Don’t hesitate to warn me if you have any trouble with this translation,
and I’ll try to fix the problem as quickly as I can

Animabelle worked with PSP2020 and I worked with PSP2020 Ultimate
you can follow this tutorial with another version of PSP, but the result might be slightly different

Supplies
tubes - selection - mask - palette

TIP 1 -> if you don’t want to install a font -->
open it in a software as « Nexus Font » (or other font viewer software of you choice)
as long as both windows are opened (software and font), your font will be available in your PSP
TIP 2 -> from PSPX4, in the later versions of PSP the functions « Mirror » and « Flip » have been replaced by -->
« Mirror »has become --> image => mirror => mirror horizontal
« Flip » has become --> image => mirror => mirror vertical

Plugins needed
Thank you Renée Salon for sharing your plugins page


Use the pencil to mark your place
along the way
hold down left click to grab and move it
 |

prepare your material
1
duplicate all the tubes and work with the copies to preserve originals
save your work often in case of problems with your psp
place the selection in the folder « selections » of PSP general folder
open the mask and minimize to tray
2
use the Dropper tool to pick up your colors into your tubes and misted images
Animabelle chose these :
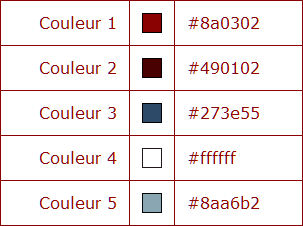
don’t hesitate to change blend modes and opacities of the layers to match your personal colors and tubes

3
open a new image => transparent => 800 * 500 px
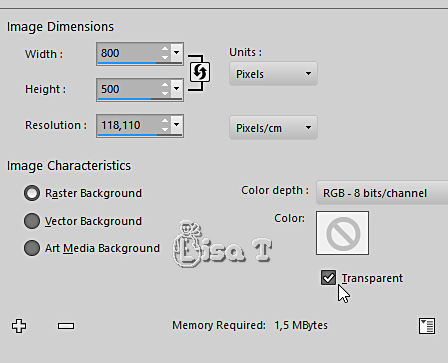
selections => select all
copy / paste « Image1_Noel_2020 » as new layer
adjust => sharpness => sharpen more
selections => select none
4
adjust => one step photo fix (optional, if your image is very nice, don’t apply)
5
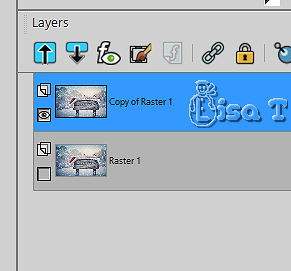
layers => duplicate
close the eye of the layer
highlight top layer
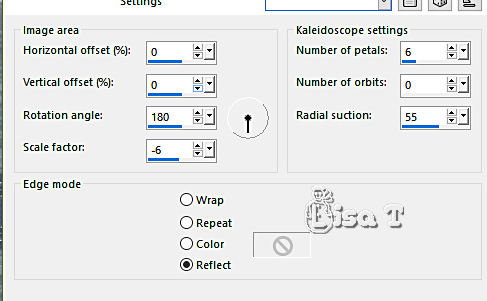
effects => reflection effects => kaleidoscope
effects => geometric effects => Circle / tick « transparent »
6
effects => image effects => seamless tiling
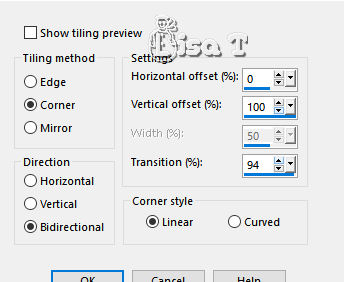
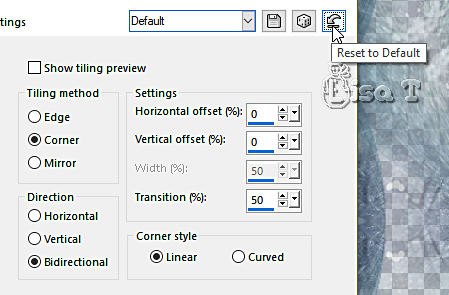
effects => image effects => seamless tiling => default settings
7
layers => new raster layer
flood fill white
layers => arrange => move down
highlight top layer
layers => merge => merge down
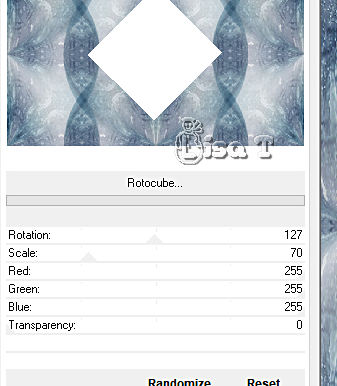
effects => plugins => Unlimited 2 => unPlugged Shapes / Rotocube...
8
enable the Magic Wand tool

select the white square
hit the DELETE key of your keyboard
layers => new raster layer
selections => modify = > select selection borders
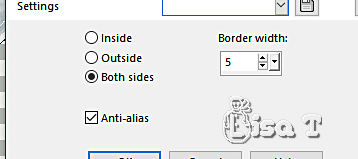
flood fill selection with color 1
selections => select none
effects => 3D effects => drop shadow => 16 / 16 / 100 / 0 / color 1 => TWICE
9
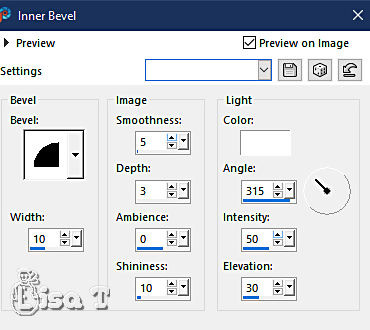
effects => 3D effects => inner bevel
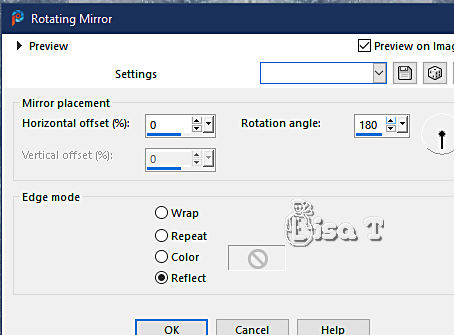
effects => reflection effects => rotating Mirror
10
image => rotate Left
effects => reflection effects => rotating Mirror ( same settings as previously )
image => rotate Right
11
highlight bottom layer - open the eye
image => resize => untick « resize all layers » => 75 %
place in the empty space in the middle of the 3 squares
adjust => sharpness => sharpen more
12
highlight top layer
enable the Magic Wand tool - select outside the red squares
selections => invert
layers => new raster layer
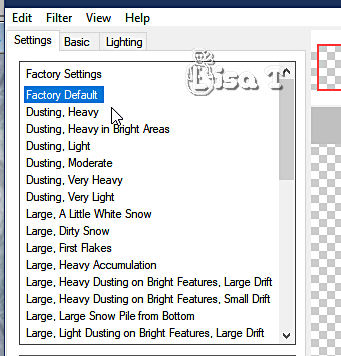
effects => plugins => Alien Skin Eye Candy 5 => Nature => Snow Drift
selections => select none
13
effects => image effects => offset => H : 0 / V : 6 / tick « custom » and « transparent »
layers => duplicate
image => mirror => mirror vertical
layers => merge => merge down
effects => 3D effects => drop shadow => 10 / 10 / 80 / 50 / black or color 2
14
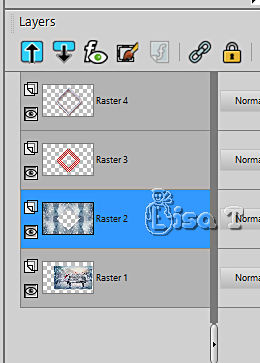
highlight second layer from the bottom (Raster2)
layers => new raster layer
flood fill with color 3
layers => new mask layer => from image
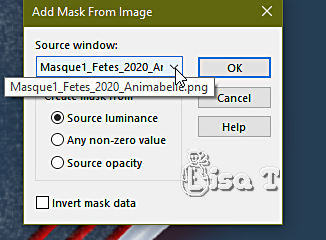
layers => duplicate
layers => merge => merge group
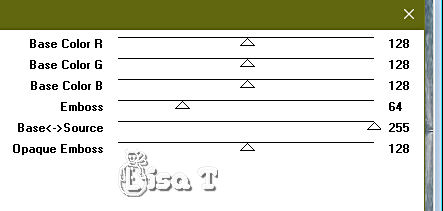
effects => plugins => Mura’s Seamless => Emboss at Alpha
15
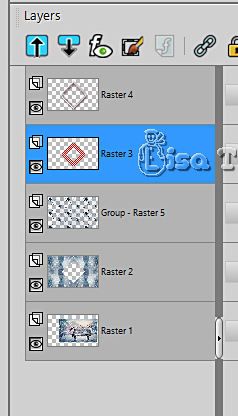
highlight layer with the 3 square frames (Raster 3)
enable the Magic Wand tool
select ourside de frames
selections => invert
highlight layer below (the mask)
hit the DELETE key of your keyboard
selections => select none
16
highlight top layer
layers => new raster layer
selections => load-save selection => from disk => selection # 1
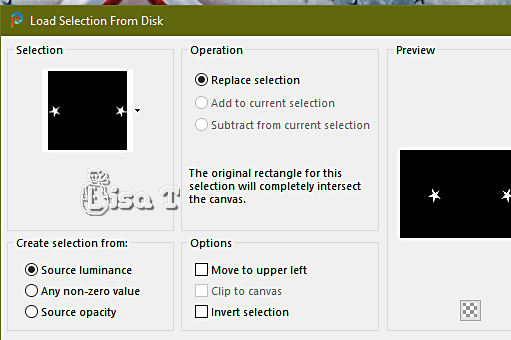
flood fill selection with color 3
keep selection active
effects => plugins => Mura’s Seamless => Emboss at Alpha

17
layers => new raster layer
effects => plugins => Alien Skin Eye Candy 5 => Nature => Snow Drift
same settings as previously but click on the tab « basic » - top number : 6
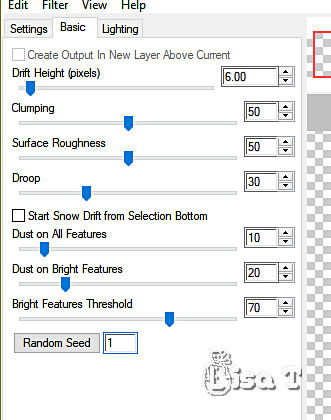
18
layers => new raster layer
enable the Selection tool / custom selection

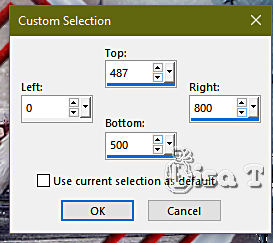
set FG to white and BG to color 5 in materials palette
effects => plugins => Mura’s Meister => Cloud
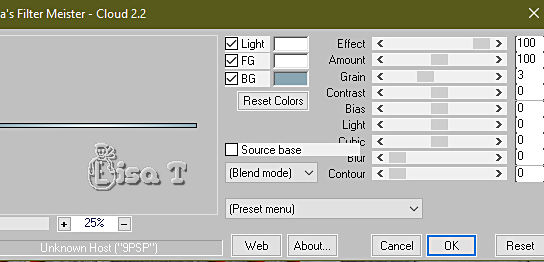
19
effects => plugins => Alien Skin Eye Candy 5 => Nature => Snow Drift
click on the tab « Settings » then on « Factory Default » to reset
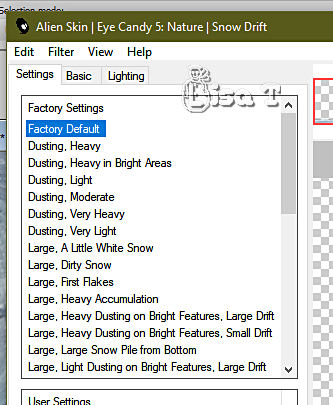
selections => select none
20
image => add borders => tick « symmetric » => 2 px color 3
selections => select all
image => add borders => tick « symmetric » => 50 px white
selections => invert
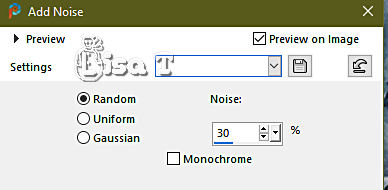
adjust => add-remove noise => add noise
21
selections => invert
layers => new raster layer
effects => 3D effects => drop shadow => 16 / 16 / 100 / 0 / color 1
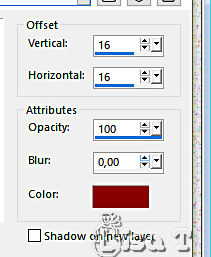
effects => 3D effects => drop shadow => -16 / -16 / 100 / 0 / color 1
selections => select none
effects => 3D effects => inner bevel

effects => 3D effects => drop shadow => 0 / 0 / 80 / 40 / black
22
copy / paste all the tubes one by one
resize the owl and the hut
add sharpness ton each one
drop a shadow of your choice to each element
23
selections => select all
image => add borders => tick « symmetric » => 5 px color 1
selections => invert
effects => 3D effects => inner bevel / same settings as previously
selections => select none
image => resize => tick « resize all layers » => 900 px width
24
layers => new raster layer
apply your watermark or signature
write your licence number if you used a licenced tube
layers => merge => merge all (flatten)
save your work as... type .jpeg optimized

Another version with my tubes


Don't hesitate to write to me if you have any trouble with this tutorial
If you create a tag (using other tubes than those provided) with this tutorial
and wish it to be shown, send it to Animabelle !
It will be a real pleasure for her to add it to the gallery at the end of the tutorial


back to the boards of Animabelle’s tutorials
board 1 board 2 board 2 board 3 board 3 board 4 board 4 board 5 board 5
board 6 board 7 board 7 board 8 board 8 board 9 board 9


|