
You will find the original tutorial here :

This tutorial is a personal creation.
Any resemblance with another one would be only pure coincidence.
It is stricly forbidden to modify tubes, to change their name or take off the matermarks,
To present them on your sites or blog,
To share them in groups,
to make a bank of images, or to use them on lucrative purposes.

Thank you to respect Animabelle’s
work and the tubers work.
Don’t hesitate to warn me if you have any trouble with this translation,
and I’ll try to fix the problem as quickly as I can

Animabelle works with PSPX9 and I work with PSP 2019
you can follow this tutorial with another version of PSP, but the result might be slightly different

Material
masks - preset - tubes - selection

duplicate the tubes and wortk with the copies
TIP 1 -> if you don’t want
to install a font -->
open it in a software as « Nexus Font » (or
other font viewer software of you choice)
as long as both windows are opened (software and font), your font will be available in your PSP
TIP 2 -> from PSPX4, in the later
versions of PSP the functions « Mirror » and « Flip » have
been replaced by -->
« Mirror »has become --> image => mirror => mirror
horizontal
« Flip » has become --> image => mirror => mirror
vertical

Filters (plugins) used
Thank you Renée Salonfor sharing
your plugins' page
Mehdi
Filters Unlimited 2.0
Carolaine and Sensibility
Simple
MuRa's Seamless
Toadies
Alien Skin Eye Candy 5: impact


Use the pencil to follow the steps
hold down left click to grab it and move it

|

1
open the material provided
duplicate tubes, work with the copies
open the masks and minimize to tray
paste the selection into the folder « selection » of
Corel PSP general folder
2
enable the pick toot, and select 4 colors in your main tubes or mists
Animabelle chose these
color 1 => #ffffff
color 2=> #4a6286
color 3 => #872d49
color 4 => #bddabe
don’t hesitate to change blend modes and opacities
of the layers to match your tubes and colors
3
double click on the preset to install (or import)
open a new transparent image 800 * 500 px
in the materials palette, set color 1 and 2 as FG and BG colors
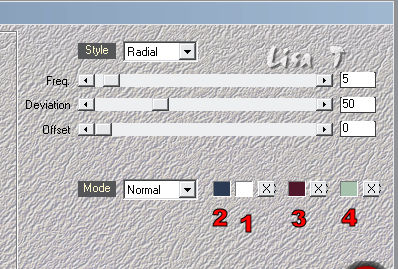
effects => plugins => Mehdi / Wavy Lab 1.1
4
adjust => blur => gaussian blur / 20
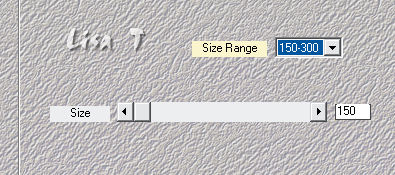
effects => plugins => Mehdi => Weaver
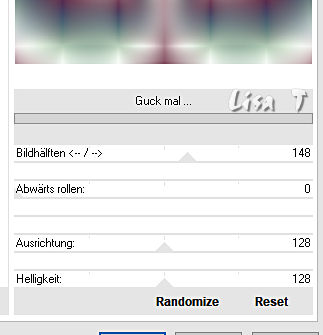
effects => plugins => Unlimited 2 => °v°Kiwi’ww
Oelfilter / Guck Mal / default settings
5
layers => duplicate
effects => Art Media effects => Brush Strokes
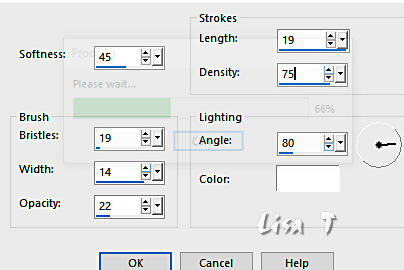
blend mode of the layer : Lighten - opacity :
70%
layers => merge => merge down
6
effects => plugins => Carolaine and Sensibility => CS-LDots
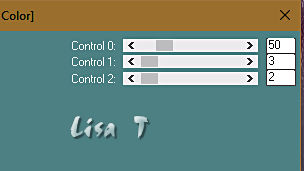
adjust => Sharpness => Sharpen
effects => geometric effects => Skew
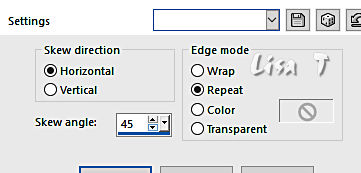
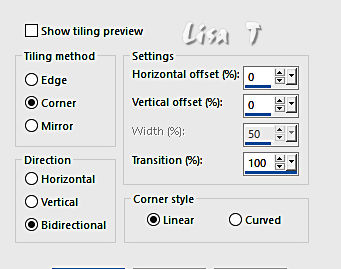
effects => image effects => seamless
tiling
7
effects => plugins Simple => Top Left Mirror
layers => duplicate
layers => new mask layer => from image
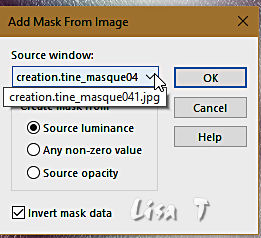
layers => merge => merge group
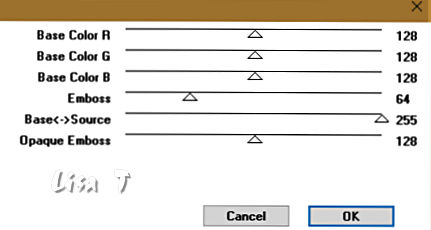
effects => plugins => Mura’s Seamless / Emboss at Alpha / default
settings
8
layers => duplicate
effects => plugins => Toadies / Weaver / default settings
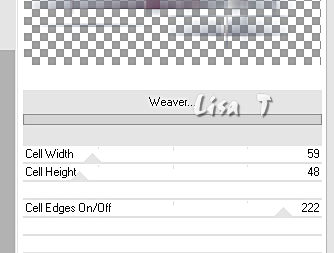
layers => arrange => move down
effects => image effects => seamless tiling / same settings as before
blend mode of the layer : Multiply - opacity : 70%
9
highlight bottom layer
selections => load-save selection => frm disk => « Sel 1_Cassandre_Animabelle »
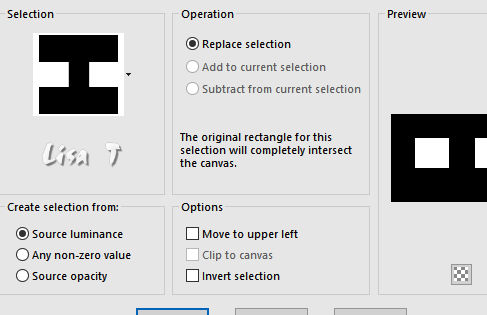
selections => promote selection to
layer
effects => plugins => Unlimited 2 => Plugins AB06 => Raspberry
Ice Cream...
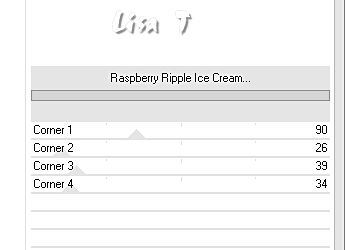
blend mode of the layer : Overlay - opacity : 60%
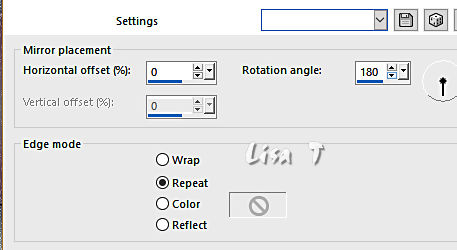
effects => reflection effects => rotating mirror
10
layers => new raster layer
effects => plugins => Alien Skin Eye Candy 5-Impact => Glass
apply the preset provided « Glass1_Animabelle »
selections => select none
layers => duplicate
image => mirror => mirror vertical
effects => image effects => offset => 0 / 64 / transparent / custom
layers => merge => merge down
effects => 3D effects => drop shadow => 0 / 0 / 45 / 20 / black
11
highlight bottom layer
layers => new raster layer
flood fill white
layers => new mask layer => from image
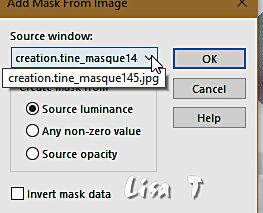
layers => merge => merge group
12
highlight the layer below (original)
image => add borders => Tick « symmetric » =>...
1 px color 3
10 px color 1
1 pxcolor 2
40 px color 1
select this largge border with the magic wand tool
effects => plugins => Toadies => What Are You ?...
/ 20 / 20
adjust => sharpness => sharpen more
selections => select none
13
copy / paste as new layer the character tube
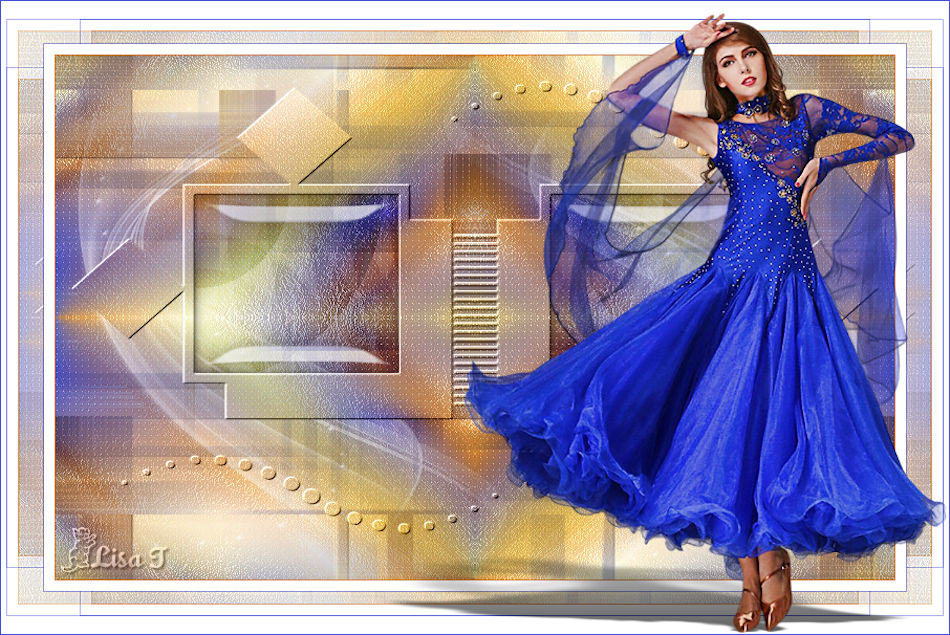
move as shown on final result
laeyrs => duplicate
adjust => blur => gaussian blur => 15
blend mode of the layer : Multiply
14
image => add borders => Tick « symmetric » => 1 px color
2
layers => new raster layer
apply your watermark (or signature)
file => export => type .jpeg Optimized

Don't hesitate to write to Animabelle if you have any trouble with her tutorial
If you create a tag (using other tubes than those provided) with this tutorial
and wish it to be shown, send it to Animabelle !
It will be a real pleasure for her to add it to the gallery at the end of the tutorial


My tag with my tube
back
to the boards of Animabelle’s tutorials
board 1 board
2 board
2 board
3 board
3 board
4 board
4

|