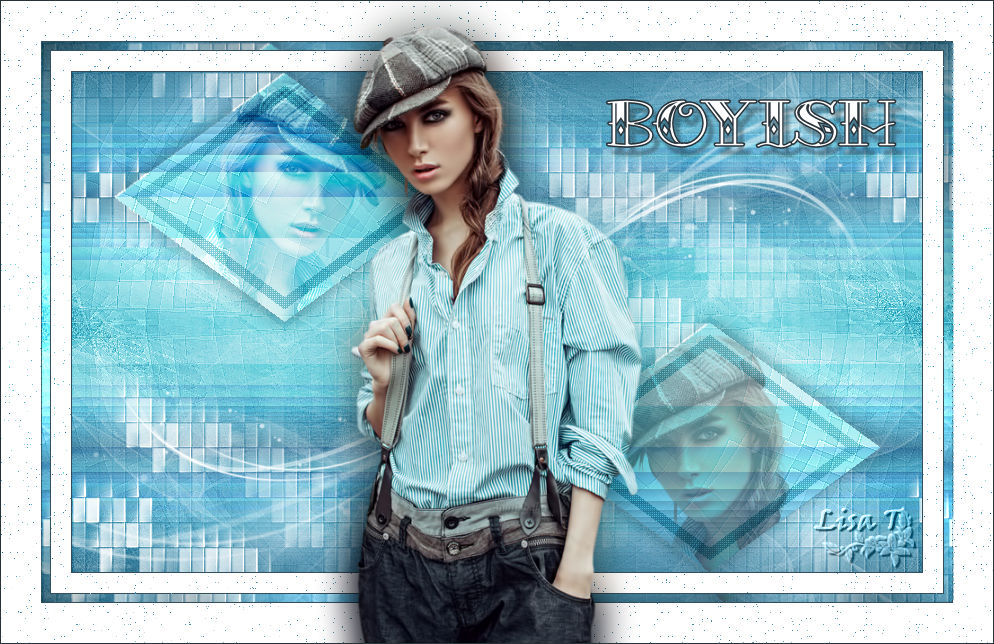
Boyish
You will find the original tutorial here
This tutorial is a personal creation.
Any resemblance with another one would be only pure coincidence.
It is stricly forbidden to modify tubes, to change their name or take off the matermarks,
To present them on your sites or blog,
To share them in groups,
to make a bank of images, or to use them on lucrative purposes.

Thank you to respect Animabelle’s work and the tubers work.
Don’t hesitate to warn me if you have any trouble with this translation

Material
masks (open and minimize to tray)
tubes
selection (copy / paste into « selections » folder of corel PSP folder)
Filters (plugins) used
VanDerLee
Unlimited 2.0 / Alf's Power Toys
Simple
penta.com
Filtre personnalisé
Tramages
Thank you Renée Graphisme for sharing your Plugins’ page

use the pencil to you follow the steps
hold down left click of your mouse to grab it and move it

Important
Open all images with PSP, duplicate them and close the originals.
Never work on original images.
Animabelle works with PSP X8 and I work with PSPX9
but you can follow this tutorial with another version of PSP.
The results might be slightly different according to the version of PSP you use
Colors
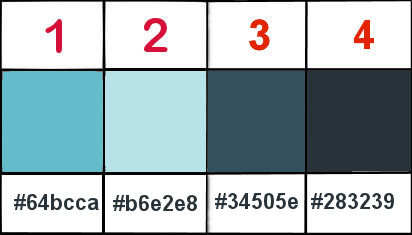
Don't hesitate to change the colors and the blend mode of the layers,
according to your tubes and images.
realization
1
don’t forget to save your work often
thank you to Linette for her tutorial for the function Mirror and Flip (french tutorial)

open the tube « 129_femme_page6_animabelle »
window -> duplicate (close original tube) - erase the watermark (selection or eraser, as you prefer)
minimize this tube to tray for a later use
Proceed the same way throughout this tutorial
2
open a new transparent image 850 * 500 pixels
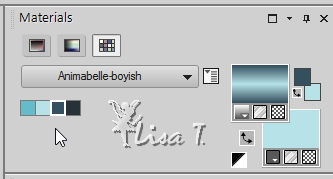
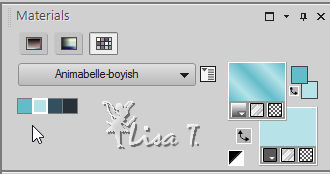
flood fill with color 1
layers -> new raster layer
flood fill with color 2
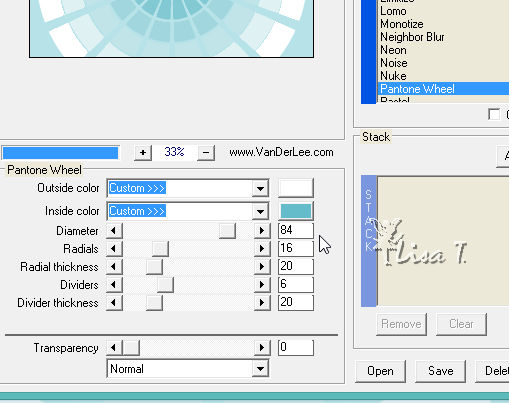
effects -> plugins -> VanDerLee -> Unplugged_X -> Pantone wheel / color 1
3
effects -> plugins -> VanDerLee -> Unplugged_X -> Defocus
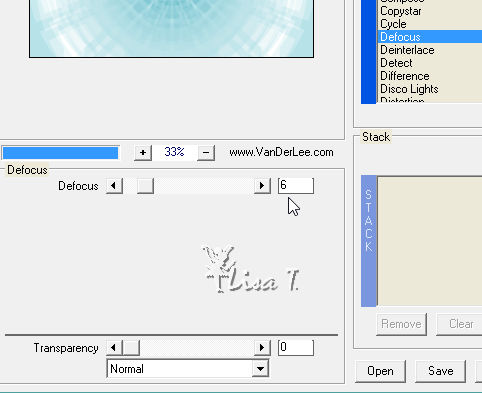
layers -> merge -> merge visible
effects -> edge effects -> enhance more
4
layer s-> new raster layer
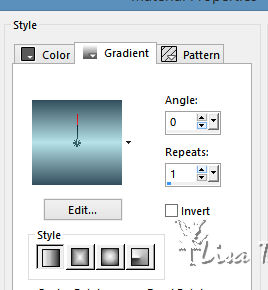
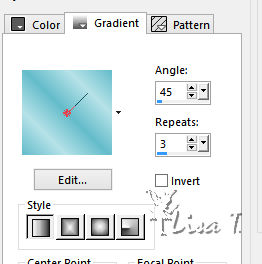
flood fill with the following gradient -> FG color : color 3 - BG color : color 2
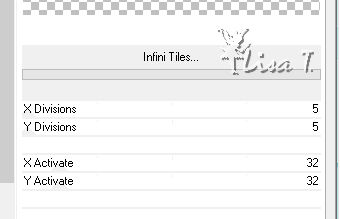
effects -> plugins -> Unlimited 2 -> Alf’s Power Toys / Infini Tiles... / default settings
5
layers -> duplicate
image -> mirror -> mirror vertical
opacity of the layer : 50%
layers -> merge -> merge down
blend mode of the layer : « Hard Layer »
layers -> merge -> merge visible
layers -> duplicate
effects -< geometric effects -> skew
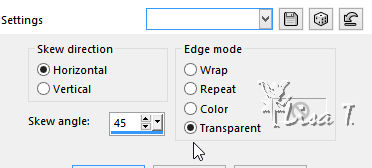
apply the same effet once more but change skew angle by 20
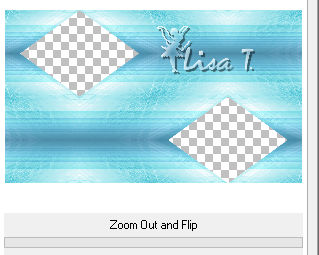
effects -> plugins -> Unlimited 2 -> Simple -> Zoom Out and Flip
blend mode of the layer : « Multiply »
6
activate Magic Wand Tool

select inside bottom right triangle
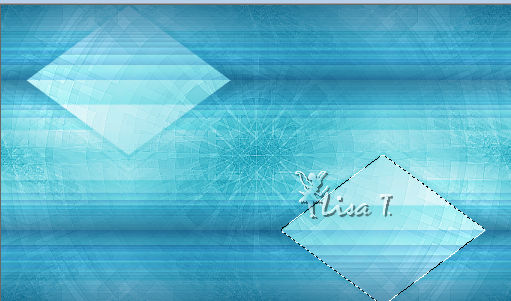
copy / paste « 129_Femme_Page6_Animabelle » as new layer
move it inside selection
selections -> invert
edit -> cut
layers -> arrange -> move down
layer’s properties -> blend mode -> darken - opacity : 35%
7
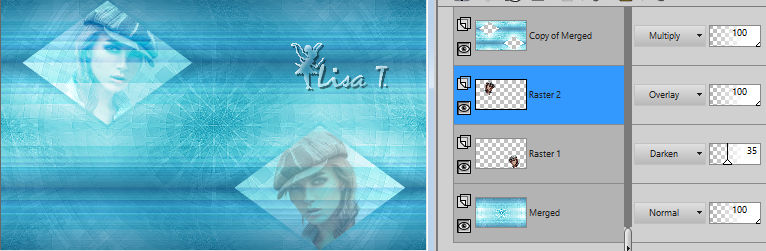
highlight « copy of merged »
select inside the second triangle with the magic wand tool
highlight « 129_Femme_Page6_Animabelle » -> image -> mirror -> mirror horizontal
edit -> copy
highlight your tag -> edit -> paste as new layer
move it inside the selection
selections -> invert
DELETE
selections -> select none
blend mode of the layer : « Overlay »
layers -> arrange -> move down
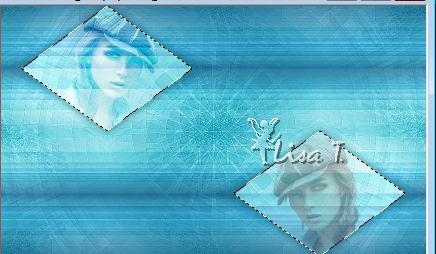
your work and layers palette look like this
8
hightlight top layer
select inside both triangles with the magic wand tool (mode Add)
effects -> 3D effect s-> drop shadow -> 0 / 0 / 60 / 30 / color 3
keep selection active
layers -> new raster layer
selections -> modify -> contract -> 10 pixels
flood fill selection with the following gradient (color 1 as FG color and color 2 as BG color)
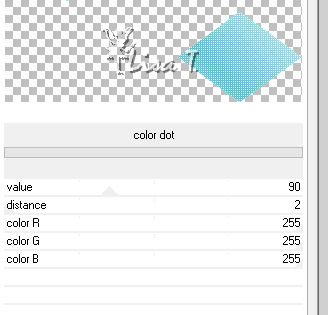
effects -> plugins -> Unlimited 2 -> penta.com / color dot
selections -> modify -> contract -> 10 pixels
DELETE
selections -> select none
blend mode of the layer : « Multiply »
layers -> merge -> merge visible
9
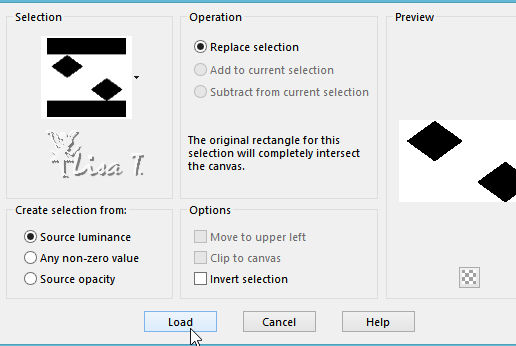
selections -> load-save selection -> from disk -> « selection1_garconne_Animabelle »
layers -> new raster layer
copy / paste « 065_animabelle_masques » into selection
blend mode of the layer : « Screen » - opacity : 35%
adjust -> sharpness -> sharpen more
keep selection active
layers -> new raster layer
flood fill selection white
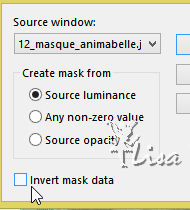
layers -> new mask layer -> from image
layers -> merge -> merge group
selections -> select none
layer s-> duplicate
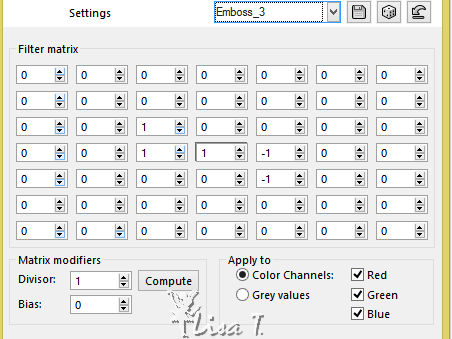
effects -> user defined filter -> Emboss 3
10
layers -> new raster layer
flood fill white
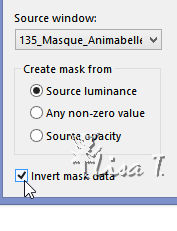
layers -> new mask layer -> from image
layers -> merge -> merge group
image -> mirror -> mirror horizontal
layers -> duplicate
image -> resize -> uncheck » resize all layers » -> 150%
blend mode of the layer : opacity : 60%
layers -> merge -> merge visible
layers -> duplicate
blend mode of the layer : « Multiply » - opacity : 25%
layers -> merge -> merge visible
window -> duplicate
minimize it to tray for a later use
12
your original work is highlighted
image -> add borders -> check « symmetric » -> ...
1 pixel color 3
20 pixels white
1 pixel color 3
8 pixels color 1
1 pixel color 3
40 pixels white
13
select the 8 pixel’s border with magic wand tool
layers -> new raster layer
copy / paste into selection the image set aside in step 11
layer s-> duplicate
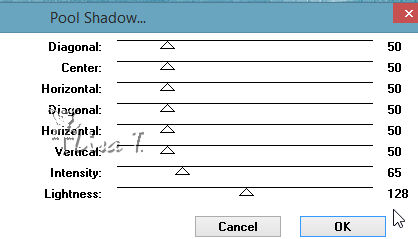
effects -> plugins -> Tramages -> Pool Shadow
selections -> select none
14
highlight « Raster 1 »
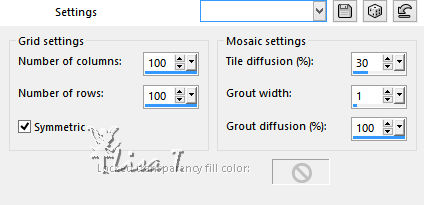
effects -> texture effects -> mosaic antique
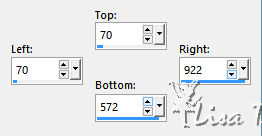
selection tool -> custom selection

edit -> cut
selections -> select none
layers -> merge -> merge visible
15
coy / paste woman tube as new layer
image -> resize to 90%
move it in the middle of the tag
layers -> duplicate
highlight bottom layer
adjust -> blur -> gaussian bour / 20
blend mode of the layer : « Multiply »
16
highlight top layer
acitvate text tool with the following settings

in the materials palette, set color 4 as FG color and white as BG color
write « boyish » (or another text of your choice)
layer s-> convert to raster layer
move it where you like
effects -> 3D effects -> drop shadow -> 8 / 6 / 40 / 4 / color 3
image -> add borders -> 1 pixel color 4
17
highlight top layer
layer s-> new raster layer
apply your watermark
layers -> merge -> merge all (flatten)
file -> export -> jpeg optimized

your tag is finished
thank you for following this tutorial
Don't hesitate to write to Animabelle if you have any trouble with her tutorial
To be informed about her new tutorials, join her NewsLetter

If you create a tag (using other tubes than those provided) with this tutorial
and wish it to be shown, send it to Animabelle !
It will be a real pleasure for her to add it to the gallery at the end of the tutorial
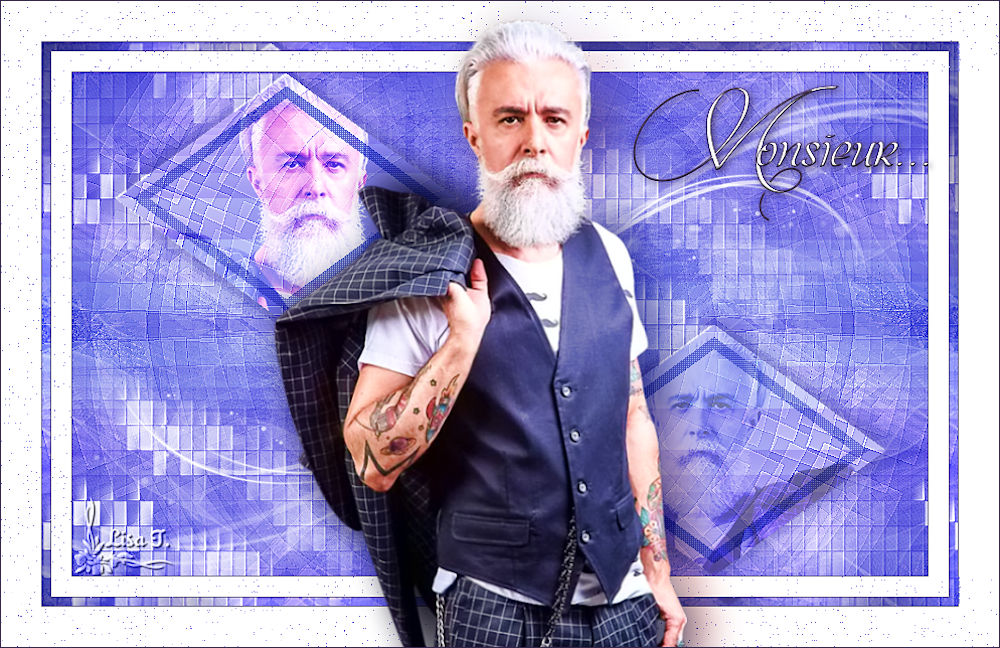
My tag with my tube
back to the boards of Animabelle’stutorials
board 1  board 2 board 2

|