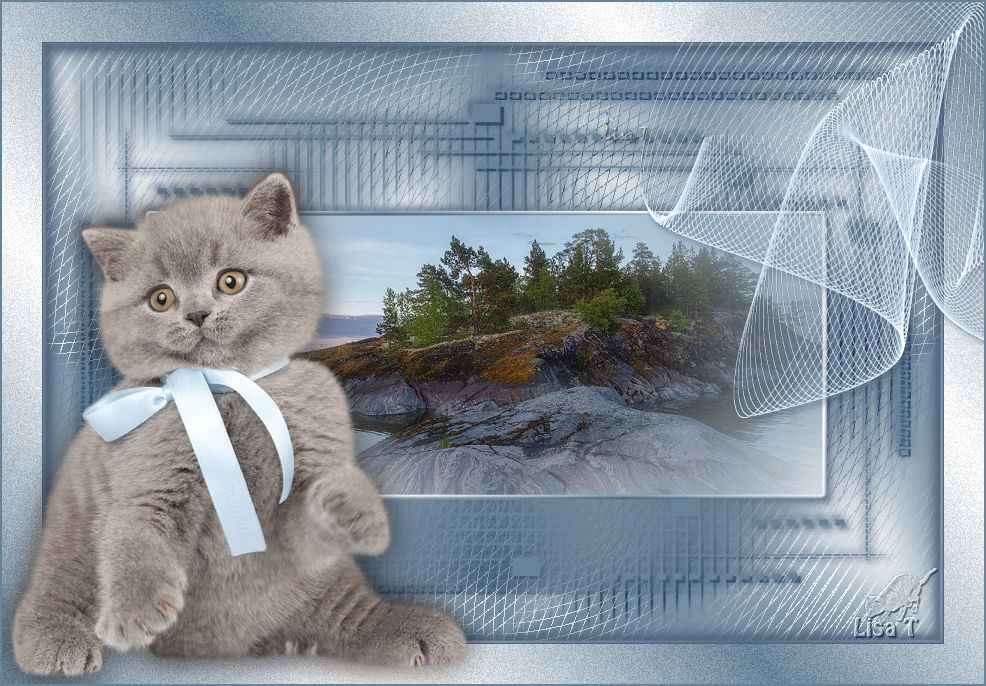
 You will find the original tutorial here You will find the original tutorial here

This tutorial is a personal creation.
Any resemblance with another one would be only pure coincidence.
It is stricly forbidden to modify tubes, to change their name or take off the matermarks,
To present them on your sites or blog,
To share them in groups,
to make a bank of images, or to use them on lucrative purposes.

Thank you to respect Animabelle’s work and the tubers work.
Don’t hesitate to warn me if you have any trouble with this translation


Material
preset - images and tubes - mask


Filters (plugins) used
Tramages
Dragonfly
Thank your Renée Salon for sharing your plugins' page


use the pencil to you follow the steps


Important
Open all images with PSP, duplicate them and close the originals.
erase tuber’s watermark before using
Never work with original images.
open mask and minimize it to tray
Animabelle and I work with PSPX9
but you can follow this tutorial with another version of PSP.
The results might be slightly different according to the version of PSP you use

Colors
Don't hesitate to change the colors and the blend mode of the layers,
according to your tubes and images.

realization
1
don’t forget to save your work often
thank you to Linette for her tutorial for the function Mirror and Flip

2
with the dropper tool, pick up two nice lolors into your main tubes
Animabelle chose the following colors
ForeGround color --> color 1 --> #688398
BackGrond color --> color 2 --> #ffffff
3
open a new transparent layer 900 * 600 pixels
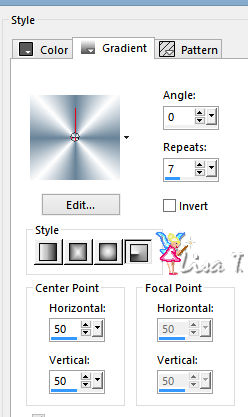
flood fill with the following radial gradient
adjust -> blur -> gaussian blur -> 20
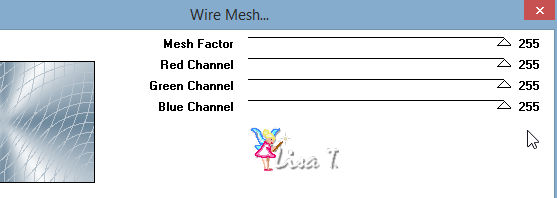
effects -> plugins -> Tramages / Wire %esh
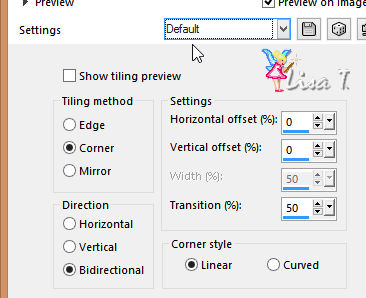
effects -> image effect s-> seamless tiling default settings
4
layers -> new raster layer
flood fill with color 1
layers -> new mask layer -> from image -> mask « 2edt4iu »
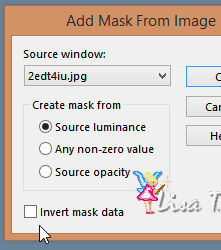
layers -> merge -> merge group
layers -> duplicate
layer s-> merge -> merge down
effects -> 3D effects -> drop shadow
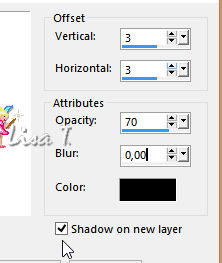
shadow’s layer is highlighted
layer s-> blend mode -> « Overlay »
5
activate Selection tool -> rectangle -> custom selection

with the following settings
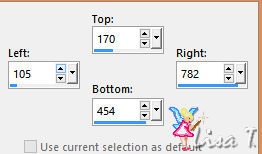
highlight bottom layer (Raster 1)
selections -> promote selection to layer
adjust -> blur -> gaussian blur -> 20
layers -> arrange -> bring to top
6
copy / paste as new layer « 293_paysage_p3_animabelle » (erase the watermark)
image -> resize -> uncheck « resize all layers » -> 75%
adjust -> sharpness -> sharpen
selections -> invert
DELETE
layers -> merge -> merge down
7
selections -> modify -> select selection borders
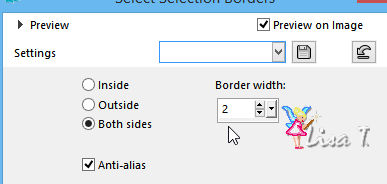
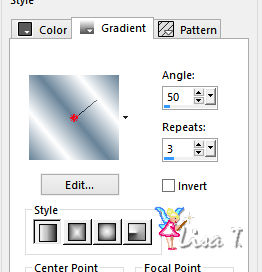
flood fill selection with the following gradient
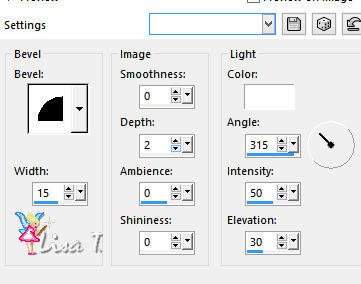
effects -> 3D effects -> inner bevel
selections -> select none
layers -> merge -> merge down
effects -> 3D effects -> drop shadow -> uncheck « shadow on new layer »
4 / 4 / 75 / 10 / color #495d77 *** -4 / -4 / 75 / 10 / color #495d77
8
image -> add borders -> check « symmetric » -> 2 pixels color 1
selections -> select all
image -> add borders -> check « symmetric » -> 40 pixels color 2
selections -> invert
flood fill selection with the linear gradient used before
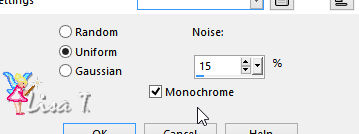
adjust-> add/remove noise -> add noise
effects -> 3D effects -> drop shadow -> uncheck « shadow on new layer »
10 / 10 / 75 / 20 / color #495d77 *** -10 / -10 / 75 / 20 / color #495d77
selections -> select none
9
layers -> new raster layer
effects -> plugins -> Dragonfly / Sinedot II
at the bottom of the window, click on « Open »

then go into the material’s folder and choose the preset provided « Bouli.Sinedot2_Animabelle.cfg »
this preset should then appear into the menu, click on « OK » to finish
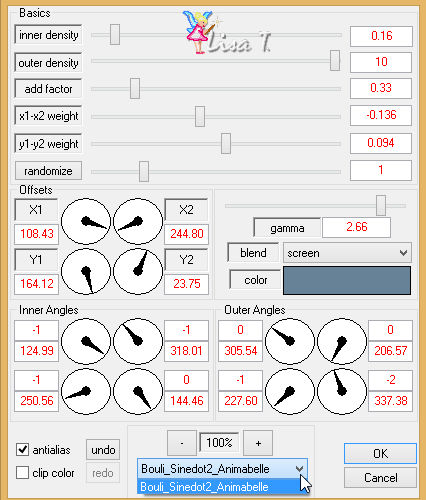
if you have troubles with this preset, you will find the result into the material’s folder
10
image -> resize -> 70%
move the tube top right (see final result)
effects -> 3D effects -> drop shadow -> uncheck « shadow on new layer »
4 / 4 / 75 / 10 / color #495d77
11
copy / paste as new layer « 264_animabelle_tubes_animaux »
erase the watermark
image -> mirror -> mirror horizontal
move it bottom left (see final result)
layers -> duplicate
highlight bottom layer
adjust -> blur -> gaussian blur / 15
blend mode of the layer : Multiply »
12
iamge -> add borders -> 2 pixels color 1
layers -> new raster layer -> apply your watermark
layers -> merge -> merge all (flatten)
file -> save as... -> type .jpeg

Don't hesitate to write to Animabelle if you have any trouble with her tutorial
To be informed about her new tutorials, join her NewsLetter

If you create a tag (using other tubes than those provided) with this tutorial
and wish it to be shown, send it to Animabelle !
It will be a real pleasure for her to add it to the gallery at the end of the tutorial


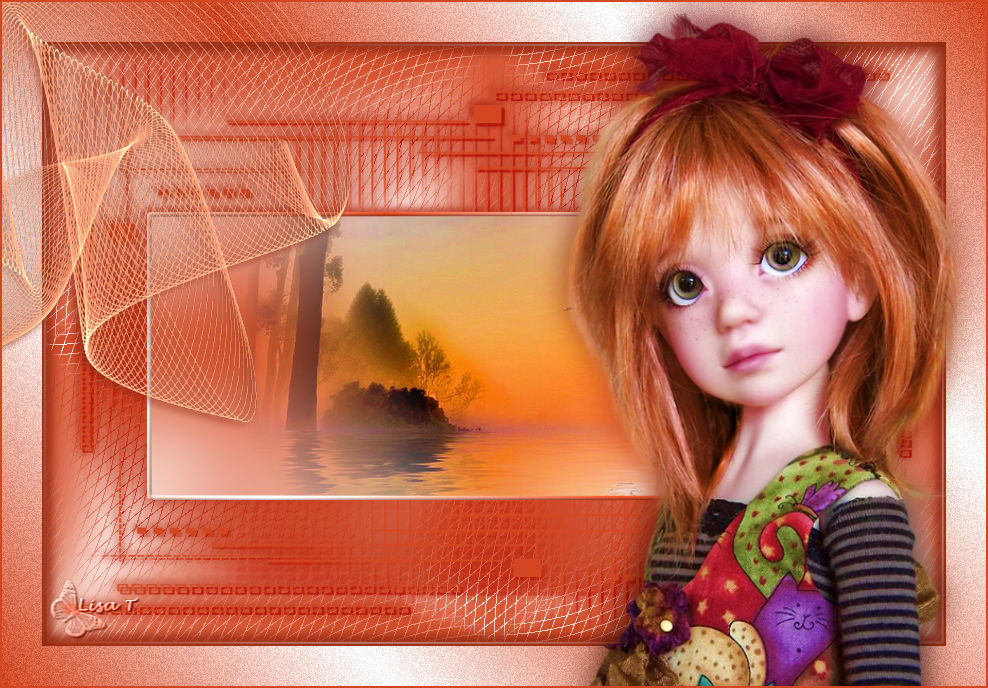
My tag with my tubes
back to the boards of Animabelle’stutorials
board 1  board 2 board 2 

|