
You will find the original tutorial here :

This tutorial is a personal creation.
Any resemblance with another one would be only pure
coincidence.
It is stricly forbidden to modify tubes, to change
their name or take off the matermarks,
To present them on your sites or blog,
To share them in groups,
to make a bank of images, or to use them on lucrative purposes.

Thank you to respect Animabelle’s work and the tubers
work.
Don’t hesitate to warn me if you have any trouble
with this translation,
and I’ll try to fix the problem as quickly as I can


Material
font - selection - palette - tubes

open all the tubes into PSP and duplicate them. Work
with the copies to preserve orignals
open the masks and minimize them to tray
copy / paste selections into the folder « selections » of
Corel PSP General folder
TIP 1 -> if you don’t
want to install a font -->
open it in a software as « Nexus Font » (or
other font viewer software of you choice)
as long as both windows are opened (software and font),
your font will be available in your PSP
TIP 2 -> from PSPX4,
in the later versions of PSP the functions « Mirror » and « Flip » have
been replaced by -->
« Mirror » --> image -> mirror -> mirror horizontal
« Flip » --> image -> mirror -> mirror vertical

Filters (plugins) used
< I.C.NET Software > Filters Unlimited 2.0
&<Background Designers IV>
Distortion Filters
thank you Renée Salon for sharing your plugins ‘ page


Use the pencil to follow the steps
hold down left click to grab it and move it
 |

Important
Open all images with PSP, duplicate them and close
the originals.
Never work on original images.
Animabelle works with PSPX9, I work with PSP2018
but you can follow the steps with another version of PSP
save your work often

Colors
use the Dropper tool to pick up ..... colors into
your tube
Animabelle chose these colors

color 1 -> ForeGround color -> #fae4e7
color 2 -> BackGround color -> #c24b5b
color 3 -> #602029
Don't hesitate to change the colors and the blend modes
of the layers,
according to your tubes and images

realization
1
open the material
duplicate the originals and work with the copies
don’t forget to save your work often
2
with the dropper tool, pick up 3 nice colors matching your
main tube or misted
or you may use Animabelle’s colors
3
open a new transparent image 900 * 500 pixels
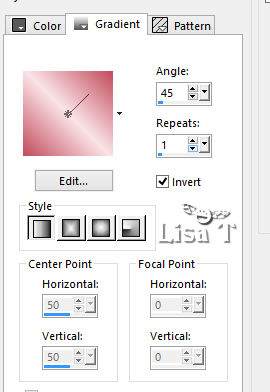
flood fill with the following gradient / colors 1 and 2

effects -> plugins -> Unlimited 2 -> &<Background
Designers IV> -> @ Randow Smelter
window -> duplicate
set this copy aside for a later use (minimize it to tray)
4
effects -> plugins -> Unlimited 2 -> &<Background
Designers IV> -> @Splish

effects -> plugins -> Unlimited 2 -> &<Background
Designers IV> -> sf10 Diamond Flip

5
layers -> duplicate
effects -> plugins -> Unlimited 2 -> Distortion
Filters -> Black Hole / size : 85
select the transparent part with the magic wand tool (tolerance
ans feather : 0)

highlight bottom layer (Raster 1)
selections -> promote selection to layer
adjust -> blur -> gaussian blur / 30
copy / paste into selection « Fleurs_Anwar_Animabelle.pspimage »
6
layers -> new raster layer
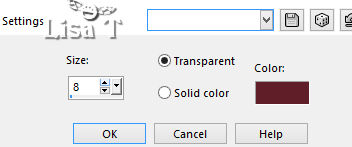
effects -> 3D effects -> cutout / color 3

layers -> new raster layer
copy / paste into selection « bulle_Animabelle.pspimage »
blend mode of the layer : « Luminance
(Legacy) » or « Soft Light »
selections -> select none
layers -> merge -> merge visible
copy / paste as new layer « Deco1_Anwar_Animabelle.pspimage »
don’t move it
blend mode of the layer : « Luminance (Legacy) » if
you changed the colors of the tutorial
7
layers -> new raster layer
selections -> load selection -> from disk -> selection « Sel1_Anwar_AnimabelleAnimabelle.PspSelection »

flood fill selection with the following gradient (colors
1 and 2)

effects -> texture effects -> weave / white and
color 2

selections -> select none
8
effects -> 3D effects -> chisel / color 3

effects -> 3D effects -> drop shadow -> 0 /
0 / 70 / 1 / color 3
layers -> duplicate
image -> mirror -> mirror horizontal
9
copy / paste as new layer « deco2_Animabelle.pspimage »
blend mode of the layer : « Luminance (Legacy) » if
you changed the colors of the tutorial
effects - image effects -> offset -> 0 / -8 / tick « Transparent » and « Custom »
effects -> 3D effects -> drop shadow -> 4 / 4
/ 35 / 5 / color 3
layers -> merge -> merge all (flatten)
10
image -> add borders -> tick « symmetric » -> ...
1 pixel color 3
15 pixels color 1
1 pixel color 3
25 pixels color 1
1 pixel color 3
11
selections -> select all
image -> add borders -> tick « symmetric » -> 45
pixels color 1
selections -> invert
copy / paste into seleciton the image you set aside in
step 3
adjust -> blur -> radial blur

effects -> texture effects -> weave / color 1

selections -> invert
effects -> 3D effects -> drop shadow -> 0 / 0
/ 70 / / color 3
selections -> select none
12
copy / paste as new layer « 192_Femme_Page6_Animabelle.png »
move it to bottom left
drop a shadow of your choice
copy / paste as new layer « Texte_Anwar_Animabelle.pspimage »
move it to bottom right
blend mode of the layer : « Luminance (Legacy) » if
you changed the colors of the tutorial
Animabelle used the Font provided if you want to change
the text
image -> add borders -> tick « symmetric » -> 1
pixel color 3
13
layers -> new raster layer
apply your watermark
file -> export -> .jpeg File optimized


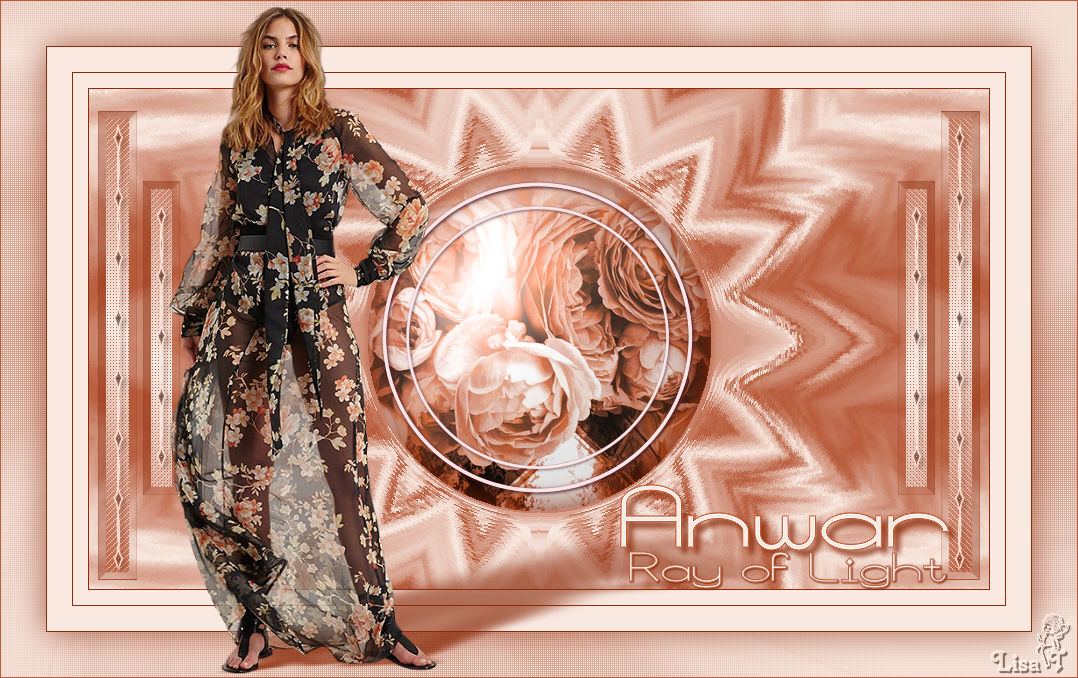
My tag with Noisette's Tube - Thank you to her

Don't hesitate to write to Animabelle if you have any
trouble with her tutorial
To be informed about her new tutorials, join her NewsLetter

If you create a tag (using other tubes than those
provided) with this tutorial
and wish it to be shown, send it to Animabelle !
It will be a real pleasure for her to add it to the gallery
at the end of the tutorial


back to the boards of Animabelle’s tutorials
board 1  board 2 board 2  board
3 board
3 

|