

You will find the original tutorial here :

This tutorial is a personal creation.
Any resemblance with another one would be only pure
coincidence.
It is stricly forbidden to modify tubes, to change
their name or take off the matermarks,
To present them on your sites or blog,
To share them in groups,
to make a bank of images, or to use them on lucrative purposes.

Thank you to respect Animabelle’s work and the tubers
work.
Don’t hesitate to warn me if you have any trouble
with this translation,
and I’ll try to fix the problem as quickly as I can

Animabelle and I worked with PSP2012and I worked
with PSP 2020
you can follow this tutorial with another version of PSP,
but the result might be slightly different

Supplies
tubes – animation file

TIP 1 -> if
you don’t
want to install a font -->
open it in a software as « Nexus Font » (or
other font viewer software of you choice)
as long as both windows are opened (software and font),
your font will be available in your PSP
TIP 2 -> from PSPX4,
in the later versions of PSP the functions « Mirror » and « Flip » have
been replaced by -->
« Mirror »has become --> image => mirror => mirror
horizontal
« Flip » has become --> image => mirror => mirror
vertical

Plugins needed
No Plugin needed
Animation Shop if you want to animate you tag
Thank you Renée Salon for sharing you plugins page


Use the pencil to mark your place
along the way
hold down left click to grab and move it
 |

Prepare your work – Tips
duplicate all the tubes and work with the copies to preserve
originals
save your work often in case of problems with your psp
use the Dropper tool to pick up your colors into your tubes
and misted images
Animabelle chose these :
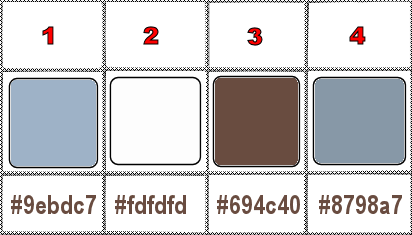
don’t hesitate to change blend modes and opacities
of the layers to match your personal colors and tubes
1
open a new image => transparent => 900 * 600
px
flood fill with color 1
2
layers => new raster layer
flood fill white
3
open the misted tube (by Corinne Vicaire-paysage 04.12.1.01)
open the eye of the two bottom layers
delete the watermark layer
layers => merge => merge visible
4
we are going to create a mask
adjust => hue and saturation => colorize
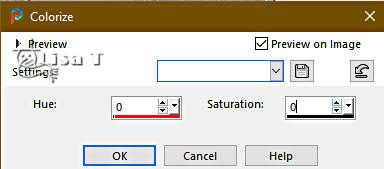
your mask is ready to use –> minimize to tray
5
back to your main work
layers => new mask layer => from image
6
select the mask you have created in step 4
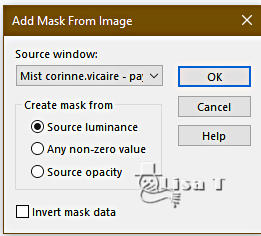
7
layers => duplicate
layers => merge => merge group
8
layers => merge => merge down
adjust => sharpness => unsharp mask => default
settings
9
copy / paste « mist corinne vicaire paysage 113-2012 » » as
new layer
don’t move it
10
copy / paste the snowman tube as new layer
image => resize => untick « resize all layers » => 60%
effects => image effects => offset => H : -190
/ V : 0 / tick « custom » and « transparent »
effects => 3D effects => drop shadow => -9 / 9
/ 30 / 50 / color 4
11
enable the Selection tool / feather => 25
select at the bottom of the tube as shown below
the red cross shows where to start the selection
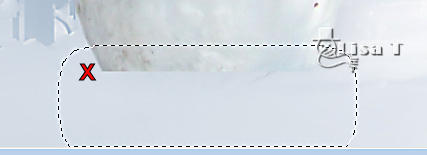
12
hit the Delete key of you keyboard 3 or 4 times
selections => select none
13
copy / paste the woman tube as new layer
image => resize => untick « resize all layers » => 35%
effects => image effects => offset => H : 230
/ V : 0 / tick « custom » and « transparent »
adjust => sharpness => sharpen
effects => 3D effects => drop shadow => -9 / 9
/ 30 / 50 / Black
14
copy / paste « noel_chocolat_animabelle » tube as
new layer
image => resize => untick « resize all layers » => 25%
effects => 3D effects => drop shadow => -5 / 5
/ 50 / 30 / Black
place as shown on final result
15
copy / paste « noel_chocolat2_animabelle » tube as
new layer
image => resize => untick « resize all layers » => 40%
adjust => sharpness => sharpen
place as shown on final result
effects => 3D effects => drop shadow => -3 / 3
/ 50 / 40 / Black
16
copy/paste one by one the 2 tubes « papillottes_animabelle »
image => resize both tubes => untick « resize
all layers » => 50%
place where you like
merge the two layers together
17
copy / paste « noel_chocolat3_animabelle » tube as
new layer
image => mirror => mirror horizontal
image => resize => untick « resize all layers » => 50%
effects => 3D effects => drop shadow => -3 / 3
/ 50 / 40 / Black
adjust => sharpness => unsharp mask => default
settings
place as shown on final result
18
if you like, place some chocolate sweets in the snow
Animabelle added a tube with several chocolate sweets
19
copy / paste the bird tube as new layer
image => resize => untick « resize all layers » => 55%
effects => image effects => offset => H : 40/
V : -110 / tick « custom » and « transparent »
effects => 3D effects => drop shadow => -3 / 3
/ 50 / 40 / Black
adjust => sharpness => unsharp mask => default
settings
20
enable the Selection tool / feather => 25
draw a selection at the bottom of the trunk
hit the Delete key of you keyboard 3 or 4 times
selections => select none
layers => merge => merge all (flatten)
21
layers => duplicate
image => resize => untick « resize all layers » => 90%
selections => select all / selections => float /
selections => defloat
selections => modify = > select selection borders
=> inside / 3 px / UNtick « anti-alias »
flood fill selection with color 3
selections => select none
22
effects => 3D effects => drop shadow => -10 /
10 / 40 / 30 / color 3
effects => 3D effects => drop shadow => 10 / -10
/ 40 / 30 / color 3
23
highlight layer below (the original)
effects => texture effects => mosaic / Antique
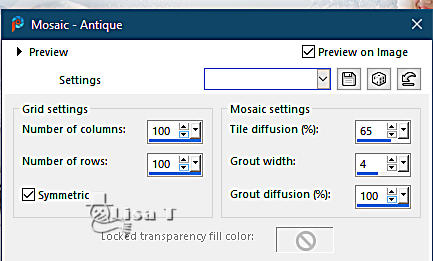
layers => duplicate
image => mirror => mirror vertical
opacity of the layer : 50%
24
image => add borders => tick « symmetric » => 3
px color 3
25
copy / paste « noel_chocolat4_animabelle » (Raster
1) tube as new layer
image => mirror => mirror horizontal
image => free rotate => right / 40°
image => resize => untick « resize all layers » => 50%
place as shown on final result
effects => 3D effects => drop shadow => -3 / 3
/ 80 / 10 / color 3
adjust => sharpness => sharpen
26
copy / paste « noel_chocolat4_animabelle » (Raster
3) tube as new layer
image => free rotate => left / 32°
image => resize => untick « resize all layers » => 50%
effects => 3D effects => drop shadow => 3 / -3
/ 80 / 10 / color 3
adjust => sharpness => sharpen
27
layers => merge => merge all (flatten)
apply your watermark or signature on a new layer
write your licence number if you used a licenced tube
layers => merge => merge all (flatten)
file => save your work as... type .jpeg optimized
Animation (Optional)
open Animation Shop / open your tag
edit => paste as new animation
duplicate 5 times => you obtain 6 frames
edit => select all
open the animation provided
edit => select all
edit => copy
back to you work
right click inside the first frame
edit => paste into selected frame (Ctrl + E)
choose the good position and apply with the left click
view the result to make sure your animation is good
otherwise « undo » and redo (Ctrl
+ E)
save your work as... type .gif
Animated tag
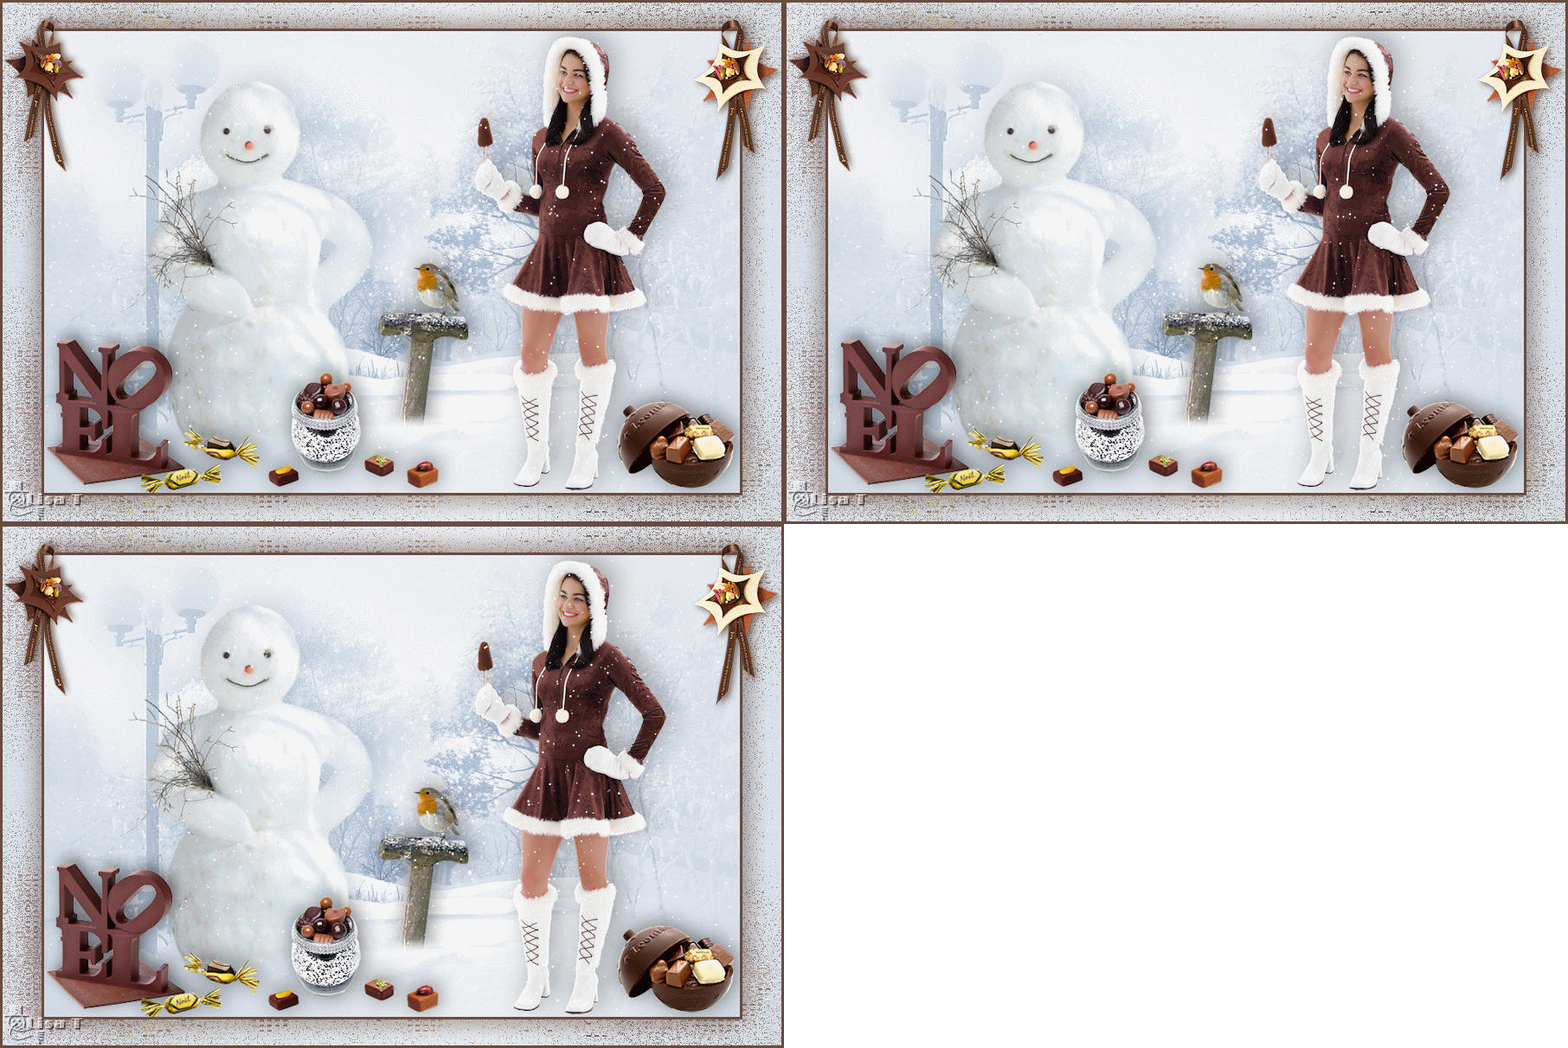

Another version
with some of my tubes


Don't hesitate to write to me if you have any trouble
with this tutorial
If you create a tag (using other tubes and colors than
those provided) with this tutorial
and wish it to be shown, send it to Animabelle !
It will be a real pleasure for her to add it to the gallery
at the end of the tutorial


back to the boards of Animabelle’s tutorials
20 tutorials on each board
board 12 => 
at the bottom of each board you will find the arrows
allowing you to navigate from one board to another


|