

You will find the original tutorial here :*

This tutorial is a personal creation.
Any resemblance with another one would be only pure coincidence.
It is stricly forbidden to modify tubes, to change their name or take off the matermarks,
To present them on your sites or blog,
To share them in groups,
to make a bank of images, or to use them on lucrative purposes.

Thank you to respect Alyciane’s work and the tubers work.
Don’t hesitate to warn me if you have any trouble with this translation,
and I’ll try to fix the problem as quickly as I can

Alyciane and I work with PSP 2020
but you can follow this tutorial with another version of PSP, however the result might be slightly different

Thank you Garances for testing Alyciane’s tutorials

Supplies
tubes - background images - alpha layer (selections included)
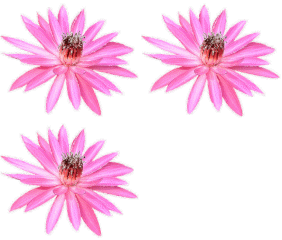
double-click on the preset to install, or import
open the tubes, duplicate, close the originals, and work with the copies
place the selections, gradients, patterns,... provided into the dedicated folders of Corel PSP General folder
open the mask(s) and minimize to tray
TIP 1 -> if you don’t want to install a font -->
open it in a software as « Nexus Font » (or other font viewer software of you choice)
as long as both windows are opened (software and font), your font will be available in your PSP
TIP 2 -> from PSPX4, in the later versions of PSP the functions « Mirror » and « Flip » have been replaced by -->
« Mirror »has become --> image => mirror => mirror horizontal
« Flip » has become --> image => mirror => mirror vertical

Plugins needed
Unlimited 2

colors
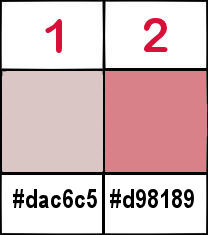

Use the pencil to mark your place
along the way
hold down left click to grab and move it
 |

Realization
Alyciane’s note =>
I called this tutorial "Pink Christmas" but of course you can adapt this theme to another theme of your choice, and change the colors and harmonies. The "star" selection is created from the tube. You will need to create another one if you use another tube and wish to animateyour tag.

open the alpha layer
selections => select all
copy / paste the background « fond » into selection
selections => select none
copy / paste « fond 2 » as new layer
place at the bottom
copy / paste « cadre » as new layer
place as shown on final result(left of the tag)
select inside the first frame (using the freehand selection type / point to point)
highlight layer under the frame layer
copy / paste image 1 as new layer
place properly in the selection
selections => invert
hit the DELETE key of your keyboard
selections => select none
do the same work with the other image and the second frame
highlight top layer
copy / paste « boule » as new layer
place as shown on final result
copy / paste the character tube as new layer
enable the Pick tool with the following settings, to move the layer acurately => position X : 456 / position Y : 63
effects => 3D effects => drop shadow => 10 / 10 / 50 / 100 / color #dac6c5 / tick « shadow on new layer»
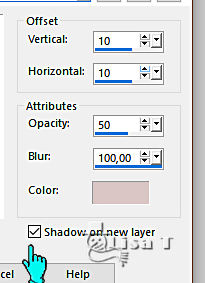
shadow layer is highlighted
blend mode of the layer : Dissolve
layers => merge => merge visible
layers => duplicate / close the eye of the original
copy is highlighted (top layer)
image => resize => untick « resize all layers » => 80%
enable selection Tool => layer opaque
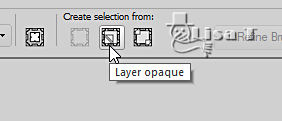
selections => modify = > select selection borders / inside
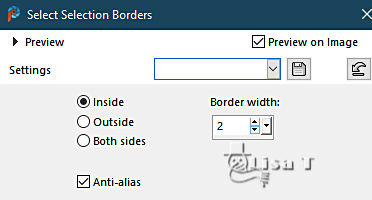
flood fill selection with color 2
effects => 3D effects => inner bevel
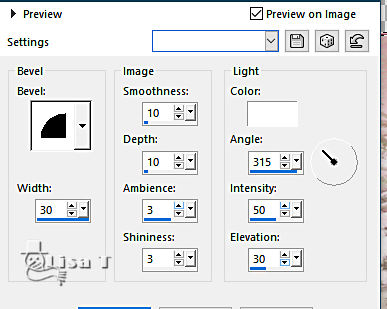
selections => select none
layers => duplicate TWICE
highlight third layer from the top
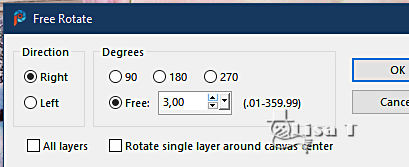
image => free rotate
highlight second layer from the top
image => free rotate => right / 6
highlight top layer
layers => merge => merge down 2 times
your tag looks like this
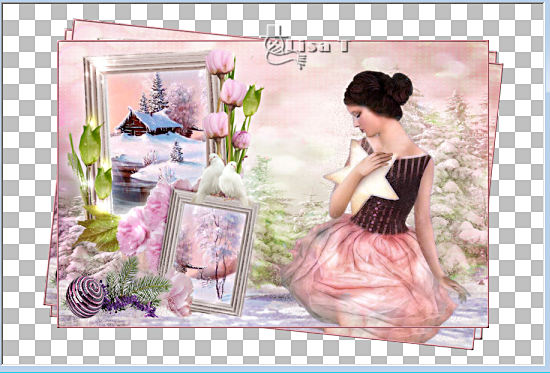
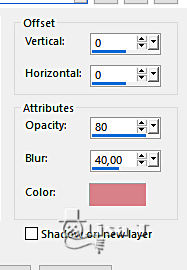
effects => 3D effects => drop shadow => 10 / 10 / 80 / 40 / color #dac6c5 / UNtick « shadow on new layer»
highlight bottom layer / open the eye
adjust => blur => gaussian blur => 20
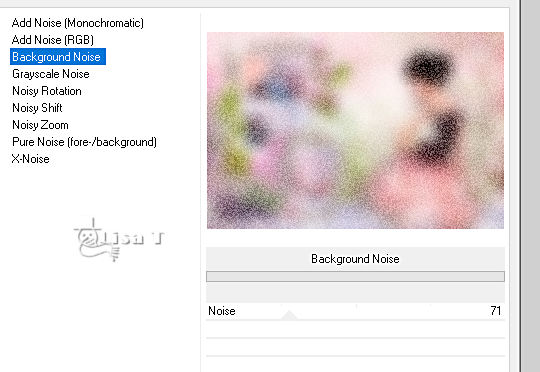
effects => plugins => Unlimited 2 => Noise Filters / Background Noise / 71
adjust => sharpness => sharpen more
selections => select all
selections => modify => contract => 3 px
selections => invert
flood fill selection with color 2
effects => 3D effects => inner bevel ( same settings as previously )
selections => select none
copy / paste « deco » as new layer
layers => duplicate TWICE
rename the three layers « decor 1 » and « decor 2 » and « decor 3 » (from bottom to top in the layers stack)
highlight « decor 1 »
adjust => add-remove noise => add noise
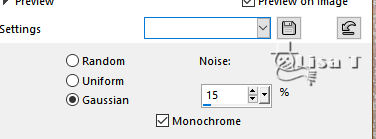
highlight « decor 2 » adjust => add-remove noise => add noise / 25
highlight « decor 3 » adjust => add-remove noise => add noise / 35
highlightlayer top layer
selections => load-save selection => from alpha channel => selection # 2
translator’s note =>
the alpha channel selection did not match the star as it was positioned on my tag.
So I selected the two parts of the star with the freehand "selection" tool / point to point / mode : add - to replace the alpha channel selection
selections => promote selection to layer
layers => duplicate TWICE
rename the three layers « star 1 » and «star 2 » and «star 3 » (from bottom to top in the layers stack)
highlight « star 1 »
adjust => add-remove noise => add noise

highlight « star 2 » adjust => add-remove noise => add noise / 25
highlight « star 3 » adjust => add-remove noise => add noise / 35
selections => select none
apply your watermark or signature
write your licence number if you used a licenced tube
your layers palette looks like this

if you don’t want to animate your tag => layers => merge => merge all (flatten)
save your work as... type .jpeg
if you want to animate =>
ANIMATION
close the eyes of « deco 2 » « deco 3 » « star 2 » « star 3 »
edit => copy special => copy merged
open Animation Shop => paste as new animation
back into PSP
open the eyes of « deco 2 » and « star 2 »
close the eyes of « deco 1 » « star 1 »
edit => copy special => copy merged
back into Animation Shop => paste after current frame
back into PSP
open the eyes of « deco 3 » and « star 3 »
close the eyes of « deco 2 » « star 2 »
edit => copy special => copy merged
back into Animation Shop => paste after current frame
save your work as... type .gif

My tag with my tubes


Don't hesitate to write to me if you have any trouble with this tutorial
If you create a tag (using other tubes than those provided) with this tutorial
and wish it to be shown, send it to Alyciane !
It will be a real pleasure for her to add it to the gallery at the end of the tutorial


back to the boards of Alyciane’s tutorials
board 1D board 2 board 2


|