
You will find the original tutorial here
:

This tutorial is a personal creation.
Any resemblance with another one would be only pure coincidence.
It is stricly forbidden to modify tubes, to change their
name or take off the matermarks,
To present them on your sites or blog,
To share them in groups,
to make a bank of images, or to use them on lucrative purposes.

Thank you to respect Alyciane’s work and the tubers
work.
Don’t hesitate to warn me if you have any trouble
with this translation,
and I’ll try to fix the problem as quickly as I can

Alyciane and I work with PSP2019
but you can follow this tutorial with another version of
PSP, however the result might be slightly different

Thank you Garances for testing Alyciane’s
tutorials

Supplies
misted images - tubes - decorations - text - pattern -
script (restrcited)

open the tubes, duplicate, close the originals,
and work with the copies
place the script abnd pattern provided into the dedicated
folders of Corel PSP General folder
TIP 1 -> if you don’t
want to install a font -->
open it in a software as « Nexus Font » (or
other font viewer software of you choice)
as long as both windows are opened (software and font),
your font will be available in your PSP
TIP 2 -> from PSPX4,
in the later versions of PSP the functions « Mirror » and « Flip » have
been replaced by -->
« Mirror »has become --> image => mirror => mirror
horizontal
« Flip » has become --> image => mirror => mirror
vertical

Plugins needed
no plugin - no animation

Use the pencil to mark your place
along the way
hold down left click to grab and move it
 |

Realization
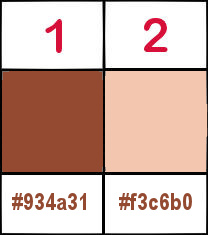
place color #934a31 and #3c6b0 as FG and BG
colors into the materials palette

open a new transparent image 900 * 500
px
prepare a radial gradient into the materials palette

fill the layer with the gradient
copy / paste the misted 1 as new layer
place as shown on final result (always refer to the
model to place the different elements)
blend mode of the layer : Hard Light
copy / paste the misted 2 as new layer
place as shown on final result
blend mode of the layer : Hard Light
copy / paste the misted 3 as new layer
place as shown on final result
blend mode of the layer : Hard Light
copy / paste the different elements (wolf, red riding hood,
text and book) as new layers
place as shown on final result
a book without any text is provided if you want to create
your own version
copy / paste the decoration as new layer (Alyciane used
it twice)
make sure every element is in the right place
layers => merge => merge visible
apply your watermark or signature
write your licence number if you used licenced tubes
layers => merge => merge all
the frame border
you may use the script provided
view => toolbar => script and find the script « chaperon
rouge » => click on the blue arrow to run
the script

but if you want to create this frame step by step
image => add borders => tick « symmetric » => ...
8 px gold pattern provided
10 px color 2 => select this border with the magic want
tool
effects => texture effects => fine leather (default
settings)
selections => select none
image => add borders => tick « symmetric » => ...
8 px gold pattern provided
layers => merge => merge all (flatten)
image => resize => tick « resize all layers » => 900
px width
save your work as... type .jpeg

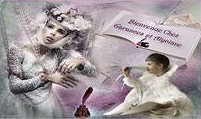
My tag with
my misted images


Don't hesitate to write to me if you have
any trouble with this translation
If you create a tag (using other tubes than those provided)
with this tutorial
and wish it to be shown, send it to Alyciane !
It will be a real pleasure for her to add it to the gallery
at the end of the tutorial


back to the boards of Alyciane’s tutorials
board 1


|