

You will find the original tutorial here :
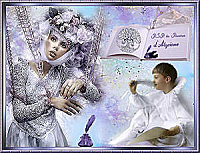
This tutorial is a personal creation.
Any resemblance with another one would be only pure
coincidence.
It is stricly forbidden to modify tubes, to change
their name or take off the matermarks,
To present them on your sites or blog,
To share them in groups,
to make a bank of images, or to use them on lucrative purposes.

Thank you to respect Alyciane’s work and the tubers
work.
Don’t hesitate to warn me if you have any trouble
with this translation,
and I’ll try to fix the problem as quickly as I can

Alyciane works with PSP 2020 and I work with PSP
2020 Ultimate
but you can follow this tutorial with another version
of PSP, however the result might be slightly different

Thank you Garances for testing Alyciane’s tutorials

Supplies
tubes – mask – alpha layer

open the tubes, duplicate, close the originals, and
work with the copies
open the mask(s) and minimize to tray
TIP 1 -> if you don’t want to install
a font -->
open it in a software as « Nexus Font » (or
other font viewer software of you choice)
as long as both windows are opened (software and font),
your font will be available in your PSP
TIP 2 -> from PSPX4, in the later versions of PSP the functions « Mirror » and « Flip » have
been replaced by -->
« Mirror »has become --> image => mirror => mirror
horizontal
« Flip » has become --> image => mirror => mirror
vertical

Plugins needed
Scribe
Graphics Plus

Use the pencil to mark your place
along the way
hold down left click to grab and move it
 |

Realization
open « 1er mai 2023 » alpha layer
selections => select all
copy / paste the image into selection
selections => select none
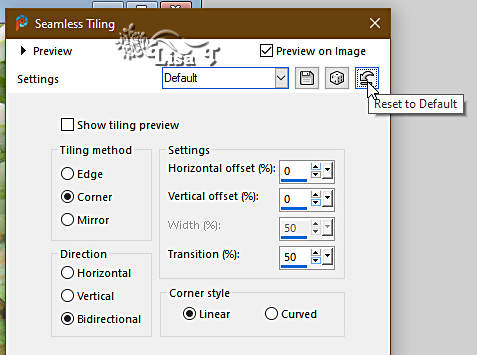
effects => image effects => seamless tiling => default
settings
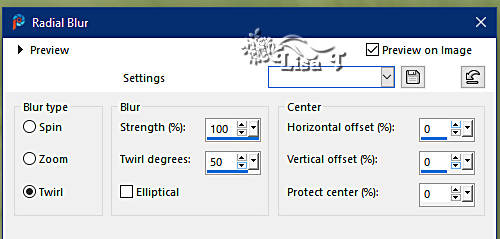
adjust => blur => radial blur
effects => edge effects => enhance more
layers => duplicate
opacity of the layer : 50%
blend mode of the layer : Overlay
layers => merge => merge visible
effects => plugins => Scribe => 4 Way Mirror /
default settings

layers => duplicate
blend mode of the layer : Overlay
layers => merge => merge down
layers => new raster layer
flood fill white
layers => new mask layer => from image
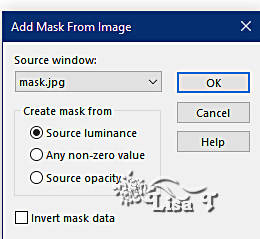
layers => merge => merge group
image => resize => UNtick « resize all layers » => 110%
effects => 3D effects => drop shadow => -2 / -2
/ 40 / 5 / black
effects => 3D effects => drop shadow => 2 / 2
/ 40 / 5 / black
layers => new raster layer
selections => load-save selection => from alpha channel
=> selection # 1
copy / paste the image into selection
effects => plugins => Unlimited 2 => Scribe => ColorSpin

selections => select none
layers => new raster layer
selections => load-save selection => from alpha channel
=> selection # 2
copy / paste the image into selection
effects => plugins => Scribe => ColorSplit

selections => select none
layers => new raster layer
selections => load-save selection => from alpha channel
=> selection # 3
copy / paste the image into selection
effects => plugins => Scribe => Doughnutz
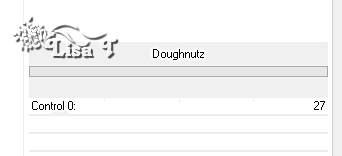
selections => select none
layers => new raster layer
selections => load-save selection => from alpha channel
=> selection # 4
copy / paste the image into selection
effects => plugins => Scribe => H Metal

selections => select none
layers => new raster layer
selections => load-save selection => from alpha channel
=> selection # 5
copy / paste the image into selection
effects => plugins => Scribe => Noisey

selections => select none
layers => new raster layer
selections => load-save selection => from alpha channel
=> selection # 6
copy / paste the image into selection
effects => plugins => Scribe => Partical

selections => select none
layers => new raster layer
selections => load-save selection => from alpha channel
=> selection # 7
copy / paste the image into selection
effects => plugins => Scribe => Switch / default
settings
selections => select none
arrange this layer above the merged layer
highlight top layer
layers => new raster layer
selections => load-save selection => from alpha channel
=> selection # 8
layers => new raster layer
copy / paste the image into selection
effects => 3D effects => drop shadow => -2 / -2
/ 40 / 5 / black
effects => 3D effects => drop shadow => 2 / 2
/ 40 / 5 / black
selections => select none
arrange the layer above the image
close the eyes of the layers with the small frames
and highlight laver just above
layers => merge => merge visible
open the eyes of all the layers
your layers palette looks like this
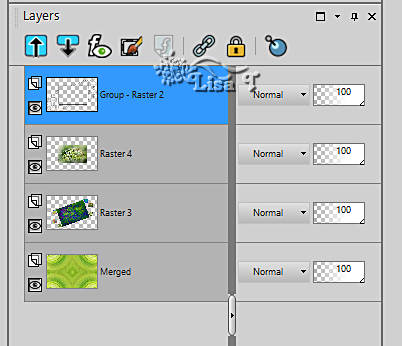
copy / paste the different elements and drop a shadow
to each one
layers => merge => merge visible
edit => COPY
image => add borders => tick « symmetric » => ...
1 px / dark color picked up in your image
3 px light color
1 px dark color
50 px white
select the 50 px border with the Magic Wand tool
edit => paste into selection
adjust => blur => gaussian blur => 50
effects => plugins => Graphics Plus => Quick
Tile 1 / default settings

selections => select none
image => resize => tick « resize all layers » => 950
px width
apply your watermark or signature
write your licence number if you used a licenced tube
layers => merge => merge all (flatten)
save your work as... type .jpeg

Don't hesitate to write to me if you have any trouble
with this tutorial
If you create a tag (using other tubes than those provided)
with this tutorial
and wish it to be shown, send it to Alyciane !
It will be a real pleasure for her to add it to the gallery
at the end of the tutorial


back to the boards of Alyciane’s tutorials
20 tutorials on each board
board 3 => 
at the bottom of each tutorial you will find the
arrows allowing you to navigate from one board to
another


|