Alisson
I'm Member of Tutorial Writers Inc.

original can be found Here

Material
one Alpha layer – tubes – masks – presets Eye Candy 5 Impact
the masks must be recorded in the corresponding files of "My Psp Files"
Double click on the plugins presets and they will be recorded in the good file
open le tubes and the Alpha layer in PSP

Thank you to the tubers : Karine Dreams - Calgui
Filters used
Simple
AAA Frames
Toadies
Tramages
Tormentia
Vanderlee : Unplugged X
Graphic Plus
Colors palette
you can use the paintbrush
use the paintbrush to follow the steps l
left click to grab it
 |
Realization
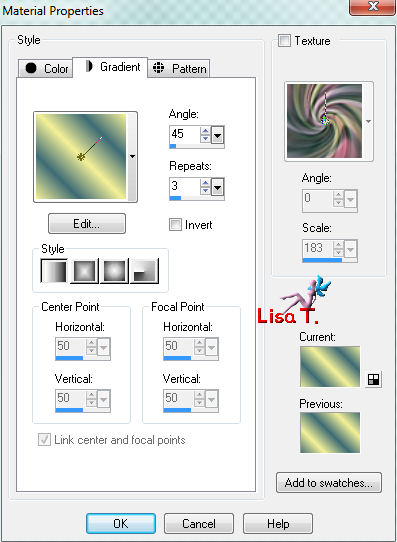
prepare a linear gradient with color 1 an 2 chosen in your tube
(light color as foreground and dark color as background)
open the alpha layer alpha_alisson
duplicate (shift + D)
always work with the copy, close the original
paint with the linear gradient
adjust/blur/gaussian blur : 35
effects/plugins/Simple/Blintz
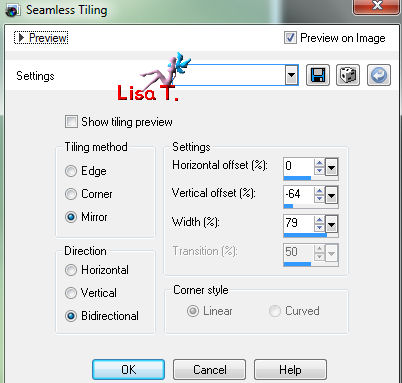
evffects/image effects/seamless tiling
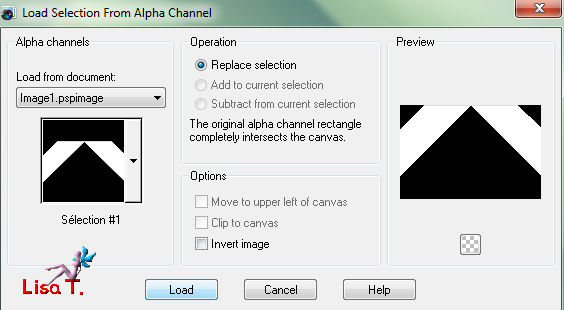
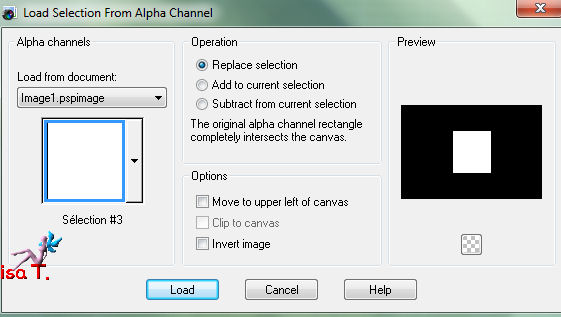
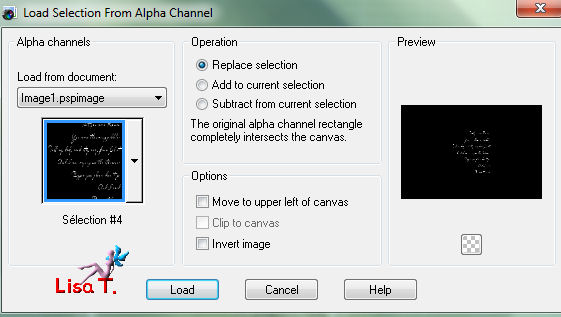
selections/load-save selection/from alpha channel/selections #1
selections/promote selection to layer
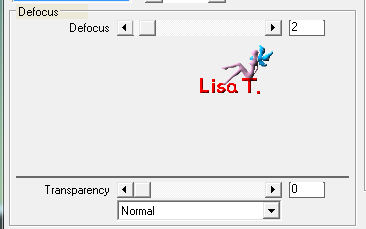
effects/plugins/Vanderlee/Unplugged X/Defocus
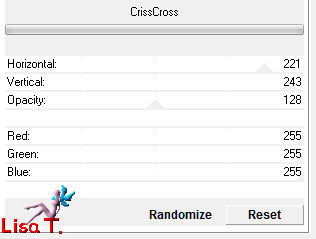
effects/plugins/Tormentia/CrissCross
selections/select none
layers/duplicate
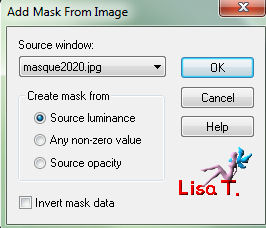
layers/new mask layer/from image/choose mask 20/20
layers/merge/merge group
adjust/sharpness/sharpen more
layers/duplicate
image/flip and merge down
layers/arrange/move down
in the layers palette, set the blend mode on "lighten" (or other according to your colors)
and the opacity on 100%
activate the upper layer (promoted selection)
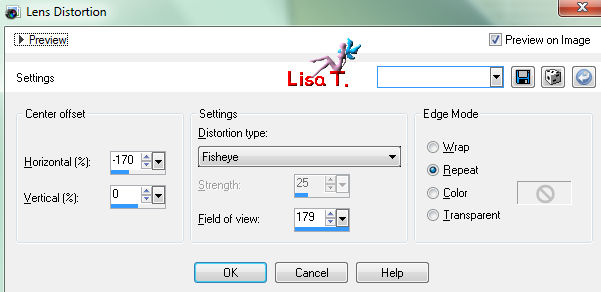
effects/distortion effects/lens distortion/fisheye
in the layers palette, set the blend mode on "screen" and the opacity on 40%
layers/duplicate - image/mirror
in the layers palette, set the blend mode on "lighten" and the opacity on 40%
layers/merge/merge down, and keep that layer activated
in the layers palette set the blend mode on "screen" and the opacity between 40% and 45%
(according to your colors)
selections/load-save selection/from alpha channel/selection #2
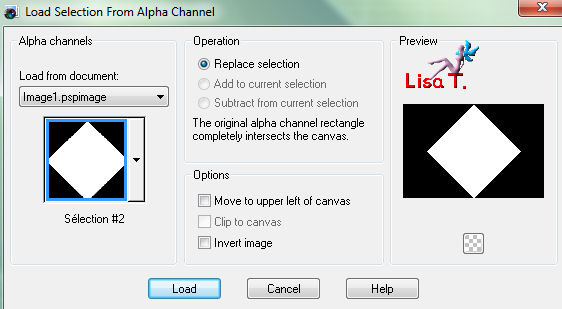
selections/promote selection to layer
selections/select none
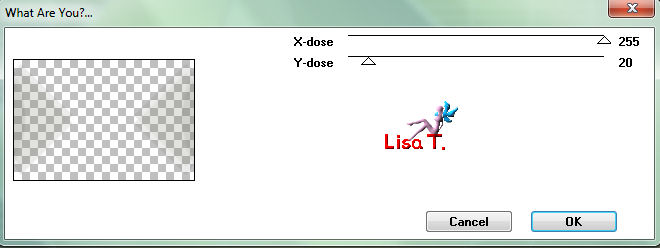
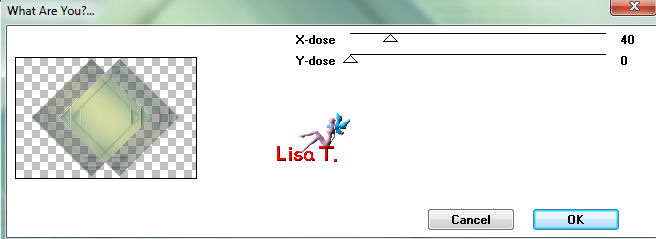
effects/plugins/Toadies/What Are You?
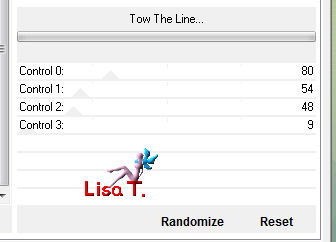
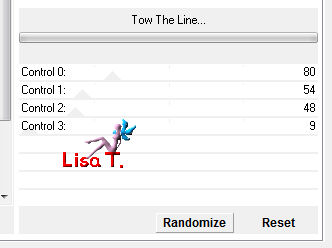
effects/plugins/Tramages/Tow the Line
selections/load-save selections/*from alpha channe/selection #2 again
press the "delete "key of your keyboard
layers/merge/merge visible (keep the selection active)
layers/promote selections to layer
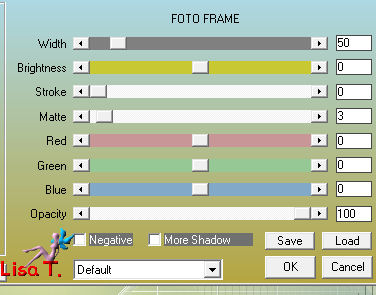
effects/plugins/AAA Frames/Foto Frame
selections/select none
layers/duplicate
image/resize/disable "resize all layers"/80%
effects/3D effects/0 / 0 / 65 / 30 / black
layers/merge/merge down
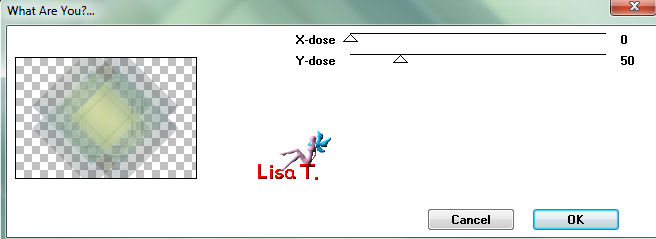
effects/plugins/Toadies/What are You?
effectsplugins/Toadies/What Are You? with new settings
in the layers palette, set the blend mode on "multiply" or "luminance (legacy)"
(or other according to your colors) and the opacity on 75%
selections/load-save selection/from alpha channel/selection #3
effects/3D effects/drop shadow : 0 / 0 / 60 / 20 / black and select none
activate the tube "deco_vivi", edit/copy and paste it in the tag as a new layer
don't move it, it's in the right place
layers/new raster layer
lections/load-save selection/from alpha channel/selection #4
in the materials palette, put the color 3 as foreground
paint the selection and select none
effects/3D effects/drop shadow : 1 / 1 / 80 / 2 / black
effects/plugins/Graphic Plus/Emboss (default settings)
in the layers palette, set the blend mode on "screen" and the opacity on 80%
layers/new raster layer, and paint it in white
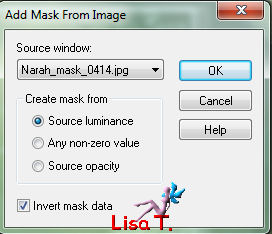
layers/new mask layer/from image/Narah_mask_0414
duplicate the mask twice (you will obtain 3 masks)
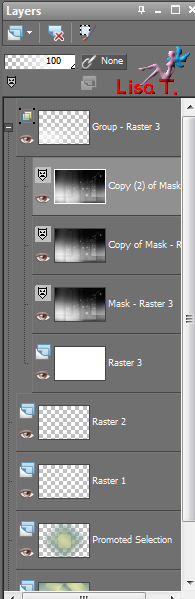
activate the copy of the third mask : layers/merge/merge group
in the layers palette, set the opacity on 80%
layers/duplicate – image/mirror - image/flip
in the layers palette, set the opacity on 45% and merge down
layers/arrange/move down (twice)
activate the upper layer
layers/new raster layer
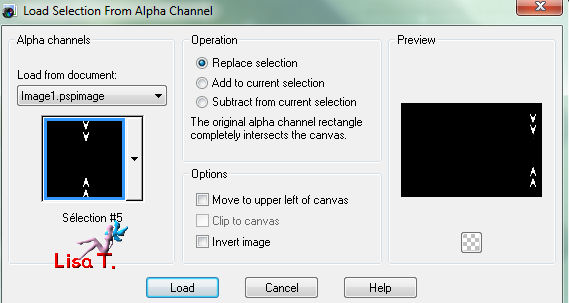
selections/load-save selection/from alpha channel/selection #5
in the materials palette, put the gradient you prepared initially as foreground
paint the selection with the gradient
effects/plugins/Eye Candy 5Impact/Gradient Glow/preset "Vivi 0513"
effects/plugins/Eye Candy 5 Impact/Glass/preset "Vivi glass 0513" and select none
layers/duplicate – image/mirror and merge down
layers/duplicate – image/resize (disable "resize all layers")/55%
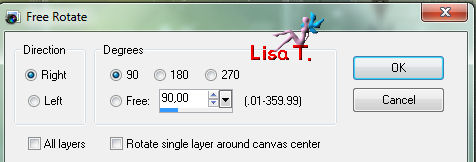
image/free rotate
layers/merge/merge all (flatten)
image/add borders/enable symmetric
2 pixels dark color
2 pixels light color
selections/select all - edit/copy
image/add borders/45 pixels/contrasting color
selections/invert - edit/paste into selection
adjust/blur/gaussian blur/35
effects/plugins/Tramages/Tow the Line
selections/invert
effects/3D effects/drop shadow : 0 / 0 / 85 / 30 / black, and select none
image/add borders/2 pixels/dark color
image/add borders/30 pixels/White
activate the tube "karine dreams 2527 mai 2013", resize : 85%
edit/copy, and paste as a new layer on the tag
place on the right as shown

adjust/sharpness/sharpen
effects/3D effects/drop shadow : 10 / 10 / 41 / 33 / black
activate the tube "Calguis coccinelle" and resize : 70%
image/mirror, copy and paste as a new layer
move it to the left (as shown) and drop shadow as before
new raster for your watermark and merge all
image/add borders/2 pixels/dark color
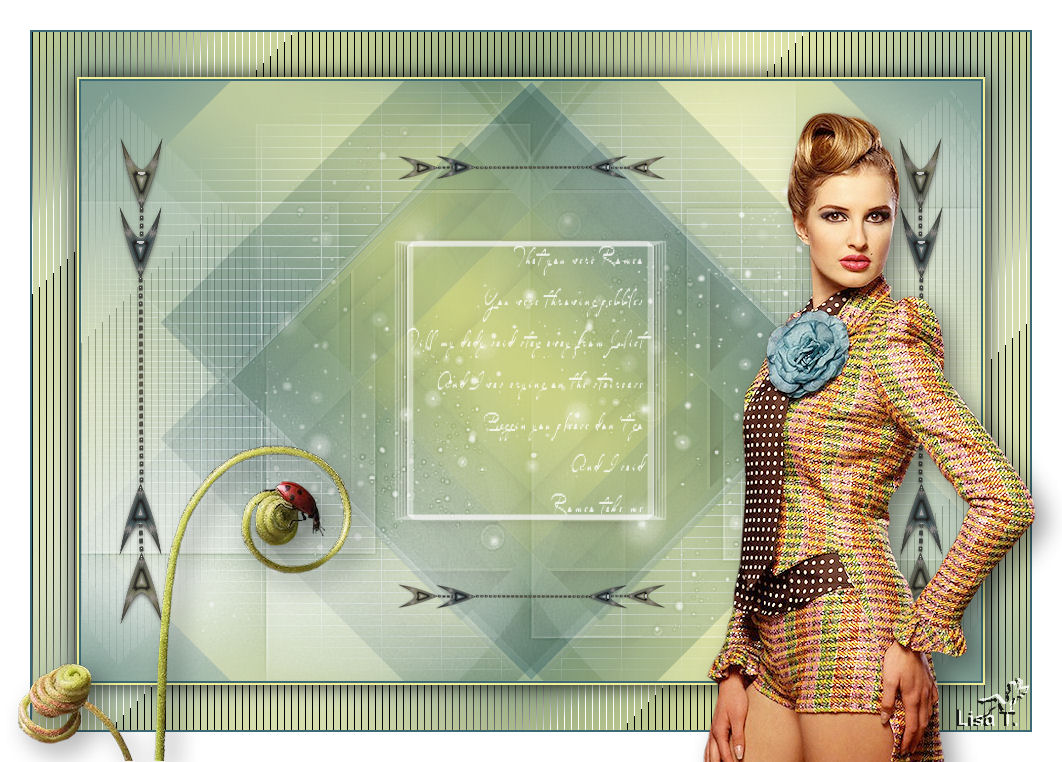
your tag is now finished
resize if necessary, save as... type JPEG
thank you to have realized it
if you want, you can send your creation to Vivi

it will be her pleasure to present it in the gallery of the tutorial
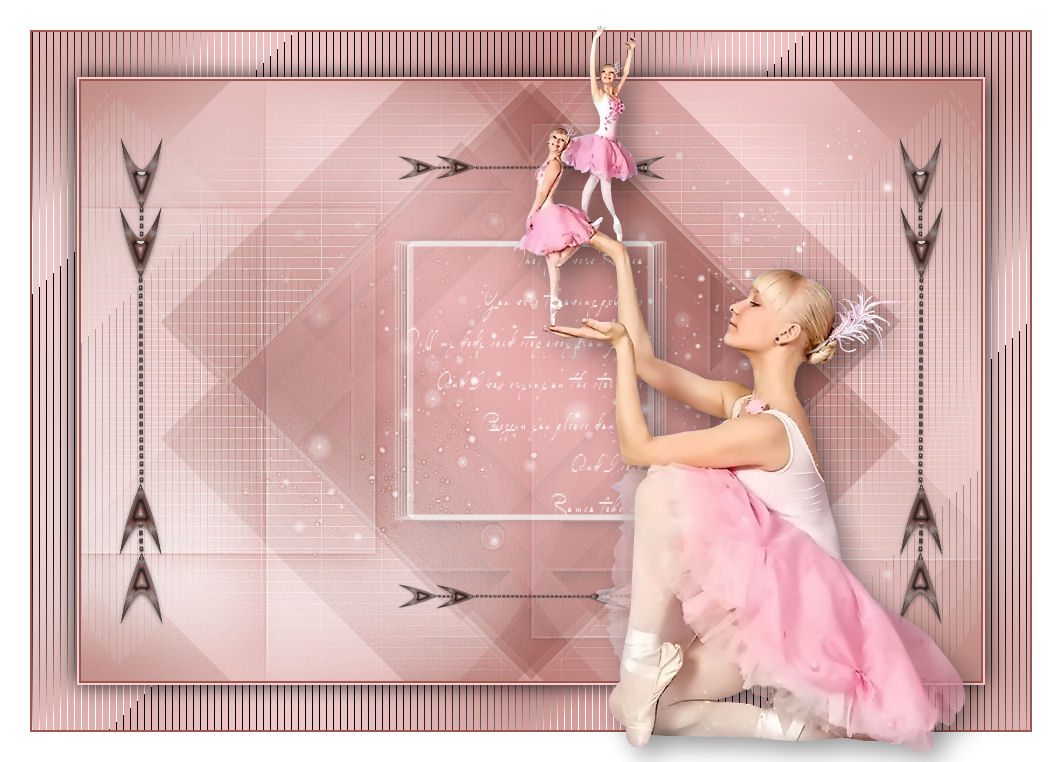
Here is my try with my tubes
Back to the boards of Vivi's tutorials
board 1  board 2 board 2

|